Restoring old furniture wood is a rewarding DIY project that allows you to breathe new life into cherished pieces. Whether you have antique wood furniture or just want to rejuvenate old pieces, this easy guide will walk you through the step-by-step process of furniture restoration. From selecting the right finish to applying the final wood finish coat, you’ll learn the techniques and tips to bring out the beauty of your vintage furniture.
Key Takeaways:
- Learn the step-by-step process of restoring wood furniture
- Choose the right finish based on usage and preference
- Clean the furniture surface to remove dirt and sticky substances
- Assess the condition of the furniture and make any necessary repairs
- Remove the old finish using sanding or chemical stripping methods
Selecting the Right Finish for Your Furniture
When it comes to restoring old furniture wood, selecting the right finish is a crucial step in bringing out its natural beauty and ensuring its durability. Consider the following factors to choose the perfect wood finish for your furniture:
Frequency of Use and Durability
Think about how often your furniture will be used. If it’s a high-traffic piece that will see daily use, opt for a durable finish that can withstand wear and tear. Look for wood finishes specifically designed for daily use, as they provide enhanced protection against scratches and stains. These finishes often have added durability features, making them ideal for furniture that needs to withstand frequent use.
Exposure to Heat, Liquids, Humidity, and Weather
Consider where your furniture will be placed and the potential exposure to heat, liquids, humidity, and weather. If your furniture will be placed near a fireplace or in an area with high humidity, choose a wood finish that offers moisture resistance. Similarly, if your furniture will be used outdoors or in a space with direct sunlight, opt for a UV-resistant finish to prevent fading and damage.
Preference for Dark or Light Finish
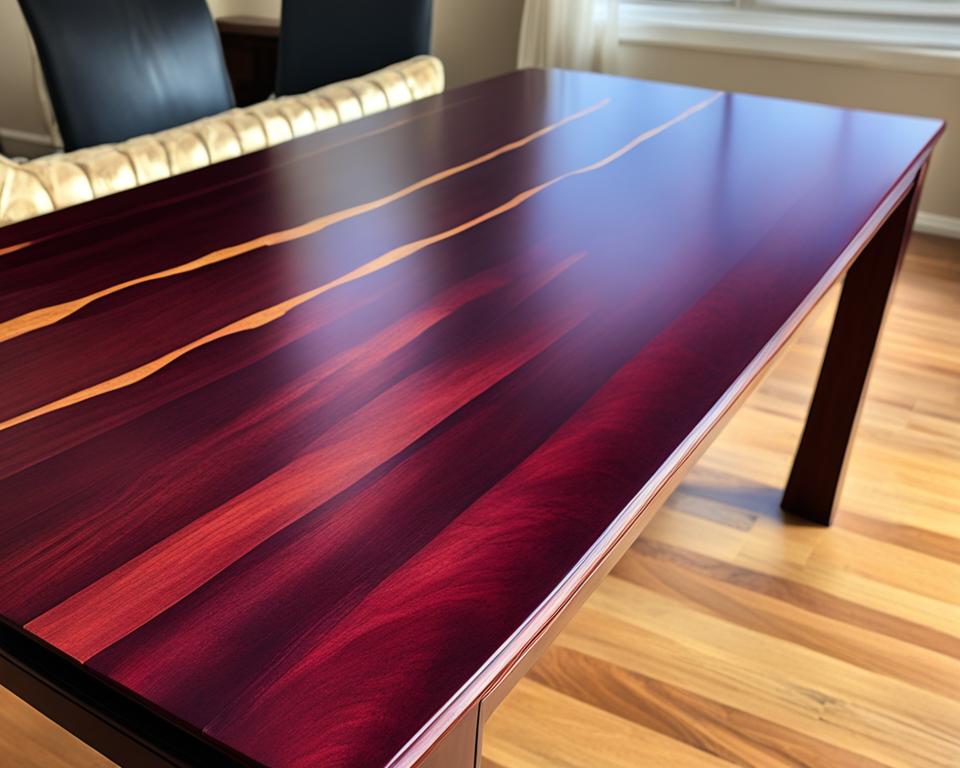
Decide whether you prefer a dark or light finish to complement your overall decor style. Dark wood finishes can add richness and depth to a space, while light finishes can create an airy and modern look. Consider the existing color palette and the overall aesthetic you’re aiming to achieve when making your selection.
Glossy or Matte Finish
Think about whether you prefer a glossy or matte finish for your furniture. A glossy finish can add a luxurious shine and highlight the natural grain of the wood, while a matte finish offers a more subtle and understated look. Consider the desired level of sheen and how it will fit into your overall design vision.
By carefully considering these factors, you can select the perfect wood finish to enhance the beauty of your restored furniture and ensure its longevity.
Comparison of Wood Finish Options
| Finish Type | Durability | Moisture Resistance | Gloss Level |
|---|---|---|---|
| Lacquer | High | Medium | High |
| Shellac | Medium | Low | Medium |
| Polyurethane | High | High | Varies (can be glossy or matte) |
| Tung Oil | Medium | Medium | Medium |
| Wax | Low | Low | Matte |
Note: The table above provides a general comparison of common wood finish options. Always refer to the manufacturer’s guidelines and follow the specific instructions for the product you choose.
Cleaning the Furniture Surface
Before embarking on the restoration process, it is crucial to start with a clean furniture surface. This ensures that you remove dirt and sticky substances that may have accumulated over the years. Cleaning the furniture properly sets the foundation for a successful restoration project.
To clean old furniture effectively, gather the following materials:
- Dish soap
- Warm water
- Tack cloth
- Microfiber towel
Here’s a step-by-step guide to cleaning your old furniture:
- Prepare a solution of dish soap and warm water. The dish soap helps to remove grease and grime from the furniture surface.
- Dip a tack cloth into the soapy solution and gently wring out any excess liquid.
- Use the damp tack cloth to wipe the entire surface of the furniture, making sure to target areas where dirt and sticky substances are visible.
- For stubborn stains, gently rub the affected area using a circular motion.
- Rinse off the furniture with a damp sponge to remove any soap residue.
- Dry the furniture thoroughly using a microfiber towel. This helps prevent any moisture from seeping into the wood.
Now that your furniture is clean and free from dirt and sticky substances, it is ready for the next steps in the restoration process.
Assessing the Condition of the Furniture
When restoring old furniture wood, it’s crucial to carefully assess the condition of the piece before proceeding with the restoration process. Taking the time to check the furniture’s condition allows you to identify any flaws or repairs that may be necessary, ensuring you achieve the best possible results.
Gathering Supplies for Repairs
Once you have thoroughly examined the furniture, make a note of any areas that require repairs or additional supplies. Common issues that may need fixing include scratches, dents, cracks, or holes in the wood.
To fix these flaws, you will need certain supplies to ensure the repairs are effective. Two common solutions for fixing wood furniture flaws are epoxy putty and wax filler.
- Epoxy putty: Epoxy putty is a versatile and durable material used to fill larger holes or gaps in the wood. It can be shaped and molded to match the surrounding wood, creating a seamless repair.
- Wax filler: Wax filler is ideal for smaller cracks and scratches. Its malleable consistency allows you to easily apply and blend it into the damaged areas, creating a smooth surface ready for the next steps of the restoration process.
Gathering these supplies will ensure that you have everything you need to fix any flaws and restore the integrity of the wood.
| Supplies Needed for Assessing Furniture Condition: |
|---|
| Epoxy putty |
| Wax filler |
Assessing the condition of the furniture and gathering the necessary repair supplies sets the stage for a successful restoration. By addressing any flaws or holes in the wood, you can ensure that your finished piece will be both visually appealing and structurally sound.
Removing the Old Finish
When it comes to restoring wood furniture, removing the old finish is a crucial step that sets the stage for a successful restoration. There are two primary methods you can choose from: sanding and chemical stripping. In many cases, a combination of both techniques may be necessary to achieve the best results.
If you opt for sanding, you’ll need a few tools to get started. A varnish stripper and a putty knife will come in handy for removing the old finish. Begin by applying the varnish stripper according to the manufacturer’s instructions. Allow it to sit for the recommended amount of time, typically around 15-30 minutes, to soften the finish. Then, use a putty knife to carefully scrape away the old finish layer by layer. For stubborn spots, you can use steel wool to gently sand away any remaining residue.
If you prefer a chemical stripping method, there are various varnish strippers available in the market that can effectively remove the old finish. Follow the instructions on the product label and apply the stripper evenly to the furniture surface. Let it sit for the recommended time, and then use a putty knife to scrape away the loosened finish.
After removing the old finish, it’s essential to clean the wood surface thoroughly. Wipe it down with a clean cloth or use a mild wood cleaner to remove any remaining residue. Once clean, allow the wood to dry completely before moving on to the next step of the restoration process.
Comparison of Sanding and Chemical Stripping Methods
| Sanding Method | Chemical Stripping Method |
|---|---|
| Requires tools such as a varnish stripper, putty knife, and steel wool | Requires the use of a chemical varnish stripper |
| Allows for more control and precision when removing the finish | May require multiple applications for heavily layered finishes |
| Ideal for smaller furniture pieces or intricate details | Effective for larger furniture pieces or surfaces with many layers of finish |
| Can create more dust and debris during the sanding process | Some chemical strippers have strong odors and may require proper ventilation |
Both methods have their advantages and considerations, so choose the one that aligns best with your specific project and personal preferences.
Remember to take your time and work carefully when removing the old finish. Properly preparing the wood surface will ensure a smooth and flawless restoration.
Sanding the Wood Surface
When it comes to restoring old furniture wood, sanding is a crucial step in the process. Sanding the wood surface helps to remove any residual finish and smooth out rough patches, creating a clean and even foundation for the next stages of restoration.
Start by using coarse sandpaper to strip off the remaining finish. Coarse sandpaper has a rough grit that effectively removes the built-up layers of old finish, exposing the raw wood underneath. This initial sanding helps to eliminate any stubborn residue and prepares the surface for further refinement.
After using coarse sandpaper, switch to medium-grit sandpaper to remove any patches that may still be sticking to the wood. Medium-grit sandpaper smooths out imperfections and evens out the surface, ensuring a more uniform appearance. Take your time and sand in the direction of the wood grain for the best results.
Finally, finish the sanding process with fine-grit sandpaper. Fine-grit sandpaper provides a smoother and more polished finish, eliminating any remaining roughness and creating a surface that’s ready for the next restoration steps. Use gentle, circular motions to achieve the desired level of smoothness.
Remember to wear protective eyewear and a mask while sanding to avoid inhaling dust particles. It’s also a good idea to periodically check the sandpaper for wear and replace it as needed to maintain optimal results.
Sanding the wood surface helps to remove any residual finish and smooth out rough patches, creating a clean and even foundation for the next stages of restoration.
By following these sanding techniques and selecting the appropriate sandpaper grades (coarse, medium-grit, and fine-grit), you can achieve a beautifully sanded wood surface. This step sets the stage for the subsequent stages of the restoration process, including sealing, staining, and applying the finishing coat.
Sealing the Wood
When restoring old furniture wood, one crucial step is sealing the wood to protect it and create a smooth base for staining or painting. Sealing not only adds a layer of protection but also enhances the overall appearance of the furniture.
If your wood furniture has cracks or holes, it’s important to address them before sealing. Use a wood filler specifically designed for cracks and holes, ensuring it matches the color and grain of the wood. Apply the filler generously and smooth it out to create a seamless surface.
Once the cracks and holes are filled, it’s time to apply the sealant. Choose a high-quality sealant that is compatible with your chosen finish. Apply an even coat of sealant to the entire surface of the furniture, ensuring all areas are covered. Use a brush or a rag to apply the sealant, following the manufacturer’s instructions.
After applying the sealant, wipe away any excess with a clean cloth. This step ensures a smooth and even finish once the sealant dries. Allow the sealant to dry completely before proceeding to the next steps of the restoration process.
Once the sealant is dry, use fine-grit sandpaper to sand the entire surface of the furniture. This will help smooth out any rough areas and remove any wood dust or imperfections.
Staining or Painting the Furniture
Now that the wood is sealed, it’s time to add some color and personality to your restored furniture. You have the option to either stain or paint the wood, depending on the look you want to achieve. Here’s a step-by-step guide to staining or painting your furniture:
- Choose the appropriate wood dye or paint for your furniture. Consider the desired color and finish.
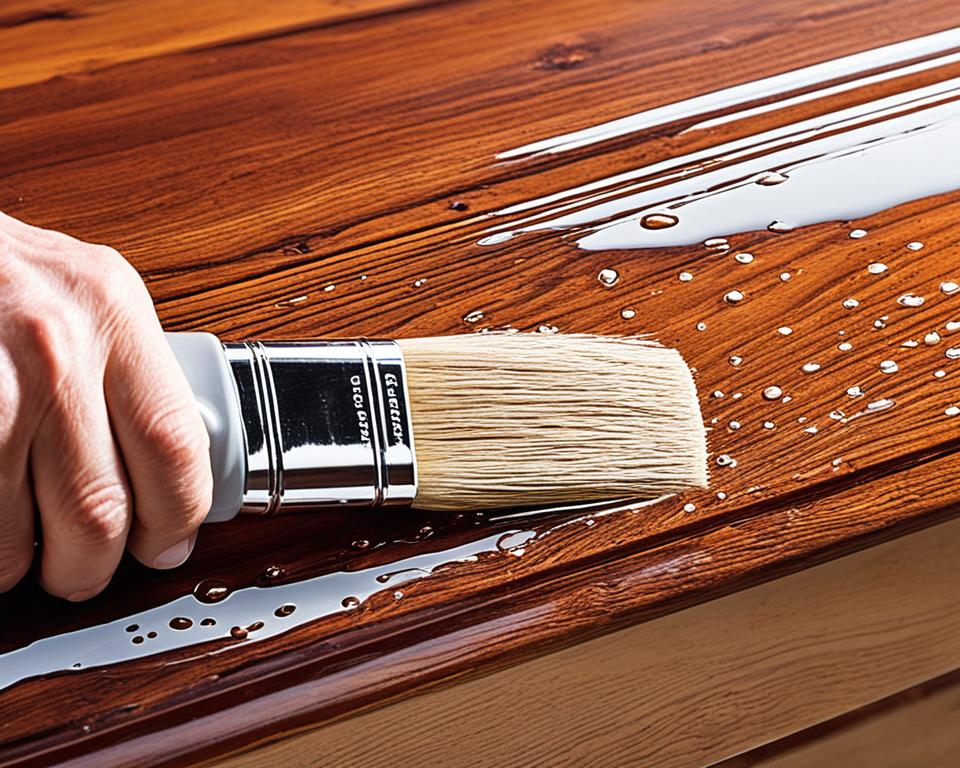
- Using a paintbrush, apply the wood dye or paint evenly to the furniture surface. Follow the manufacturer’s instructions for application.
- Allow each coat to dry completely before deciding if another layer is necessary. This will ensure a smooth and professional-looking finish.
- If you want a deeper color or more coverage, apply multiple coats as needed. This will help you achieve the desired color intensity.
The staining or painting process will transform your restored wood furniture, giving it a fresh and vibrant appearance. Remember to be patient and let each coat dry thoroughly before proceeding. This will help you achieve the best results and a beautiful outcome.
Adding color to your furniture is a wonderful way to showcase your personal style and enhance the overall aesthetics of your space.
Applying the Wood Finish
After all the hard work of restoring your wood furniture, it’s time to apply the finishing touch – the wood finish itself. This final coat will not only protect the furniture but also enhance its natural beauty, giving it a durable and long-lasting finish.
To apply the wood finish, you have two options: using a paintbrush or a cotton rag. Both methods can achieve excellent results, so choose the one that feels most comfortable to you.
Using a paintbrush:
- Carefully dip the paintbrush into the wood finish, ensuring it is evenly coated.
- Apply the finish using long, smooth strokes, following the grain of the wood.
- Make sure to cover the entire furniture surface, paying attention to any intricate details.
- Allow the first coat to dry completely according to the manufacturer’s instructions. This drying time will vary depending on the type of finish used.
- After the first coat has dried, assess if a second coat is necessary. Apply a second coat using the same technique as the first, if needed.
Using a cotton rag:
- Pour a small amount of wood finish onto a clean cotton rag.
- Working in small sections, rub the finish onto the furniture surface using circular motions.
- Continue applying the finish, ensuring an even and thorough coverage.
- Allow the first coat to dry completely according to the manufacturer’s instructions.
- If a second coat is desired, repeat the process with a fresh cotton rag.
Remember to always follow the drying time instructions provided by the manufacturer to ensure the best results. Rushing the drying process may result in a less durable finish.
Once the wood finish has dried, you’ll notice a significant transformation in the appearance of your furniture. The finish adds a protective layer that safeguards the wood against everyday wear and tear, making it more resistant to scratches, moisture, and other potential damage.
Now, take a moment to admire your beautifully restored wood furniture. The combination of the careful restoration process and the application of the wood finish has breathed new life into these cherished pieces, allowing you to enjoy their beauty and functionality for years to come.
| Type of Wood Finish | Drying Time | Number of Coats | Finish |
|---|---|---|---|
| Lacquer | 1-2 hours | 2-3 coats | Durable and glossy finish |
| Polyurethane | 4-6 hours | 2-3 coats | Durable and protective finish |
| Varnish | 8-10 hours | 2-3 coats | Durable and slightly glossy finish |
| Oil-based finish | 24-48 hours | 2-3 coats (or more) | Deep and rich finish |
Enjoying Your Restored Furniture
Now that your furniture is beautifully restored, it’s essential to take proper care to preserve its beauty and ensure its longevity. By following these simple tips, you can enjoy your restored wood furniture for many years to come.
Preserving Restored Furniture
- Avoid placing your furniture near heat sources such as radiators or fireplaces. Heat can cause the wood to warp or crack over time.
- Similarly, keep your furniture away from direct sunlight, as prolonged exposure can fade and damage the wood.
- Use coasters and placemats to protect the surface from spills, stains, and scratches. This will help maintain the pristine condition of your restored furniture.
Tips for Maintaining Wood Furniture
- Regularly clean your furniture with a gentle cleaner and a soft cloth. This will help remove dust, dirt, and grime, keeping the wood looking fresh and vibrant.
- When cleaning, avoid using harsh chemicals or abrasive materials that can strip away the finish or damage the wood surface.
- If you notice any stains or spills, clean them immediately to prevent them from seeping into the wood and causing permanent damage.
“Proper maintenance is key to preserving the beauty and longevity of your restored wood furniture.”
By following these simple tips and incorporating them into your regular cleaning and maintenance routine, you can ensure that your restored furniture continues to impress and bring joy to your space. Taking care of your wood furniture will not only maintain its aesthetic appeal but also preserve its value and craftsmanship over time.
Pro Tips for Furniture Refinishing
To further enhance your furniture restoration skills, here are some pro tips to keep in mind. By incorporating these tips into your restoration process, you can achieve professional-quality results.
Recognizing When to Refinish
It’s important to recognize when a piece of furniture needs refinishing. Look for signs of wear, such as peeling or chipping finishes, scratches, or discoloration. If the piece has lost its original luster and beauty, it may be time to refinish.
Considering Painting Over Finishes
In some cases, painting over finishes can be a great way to breathe new life into old furniture. This is particularly useful if the original finish is too damaged to restore or if you want to change the look of the piece entirely. However, keep in mind that painting over finishes may not be suitable for all types of furniture, especially antiques or pieces with intricate detailing.
Repairing and Reinforcing Furniture
Before refinishing, it’s essential to repair and reinforce any damaged or weak areas of the furniture. This may involve replacing broken or missing parts, reinforcing joints, or fixing structural issues. Taking the time to address these repairs will ensure that your restored furniture is sturdy and durable.
Remember, the key to successful furniture refinishing is patience, attention to detail, and using the right techniques. By following these pro tips, you’ll be on your way to transforming old, tired furniture into stunning pieces that will be enjoyed for years to come.
| # | Tip |
|—|————————————————–|
| 1 | Recognize signs of wear and when to refinish |
| 2 | Consider painting over finishes for a new look |
| 3 | Repair and reinforce weak or damaged areas |
| 4 | Take your time and pay attention to detail |
| 5 | Use the appropriate techniques for each project |
Taking these tips into account will help you achieve outstanding results in your furniture refinishing endeavors.
Conclusion
Restoring old furniture wood can be a fulfilling and creative DIY project that allows you to breathe new life into cherished pieces. By following the steps outlined in this furniture restoration guide and incorporating the pro tips provided, you’ll be equipped with the knowledge and techniques to restore wood furniture to its former glory.
Throughout the process of DIY furniture refinishing, you’ll discover the joy of transforming worn-out pieces into beautiful heirlooms. From selecting the right finish to applying a wood finish coat, every step is crucial in achieving professional-quality results. Take pride in the beautiful, restored furniture you can showcase in your home.
I hope this furniture restoration guide has provided you with the confidence and inspiration to embark on your own furniture refinishing journey. Whether you want to revive antique wood furniture or simply bring a fresh look to your household pieces, restoring old furniture wood is a rewarding endeavor that allows you to express your creativity and preserve the past.
FAQ
How do I select the right finish for my furniture?
Consider factors such as frequency of use, exposure to heat and liquids, and your preference for a dark or light finish with a glossy or matte sheen.
How do I clean the surface of the furniture?
Use a mixture of dish soap and warm water with a tack cloth to wipe away dirt and sticky substances. Rinse with a damp sponge and dry with a microfiber towel.
How do I assess the condition of the furniture?
Take a close look at the furniture and determine if any repairs are needed. Gather supplies like epoxy putty and wax filler to fix flaws or holes in the wood.
How do I remove the old finish?
You can remove the old finish through sanding or using a chemical stripper. A combination of both methods may be required for the best results.
How do I sand the wood surface?
Start with coarse sandpaper to strip off the remaining finish, then switch to medium-grit sandpaper to remove patches. Finish with fine-grit sandpaper for a smooth surface.
How do I seal the wood?
Use a wood filler that matches the color and grain to fill cracks or holes. Apply a generous coat of sealant to the entire surface, then sand it down when dry.
Should I stain or paint the furniture?
It depends on your preference. Use wood dye or paint and apply multiple coats as needed for the desired color and coverage.
How do I apply the wood finish?
Use a paintbrush or cotton rag to apply an even coat of wood finish. Let it dry and decide if a second coat is necessary for added protection and beauty.
How do I preserve my restored furniture?
Avoid placing the furniture near heat sources or in direct sunlight. Use coasters and placemats to protect the surface and clean it regularly with a gentle cleaner.
What are some pro tips for furniture refinishing?
Some pro tips include knowing when to refinish, considering painting over finishes, and learning how to repair and reinforce furniture for professional-quality results.


