Posted on

Reviving Charm: “Restoration stories” of Antique Finds

Antique furniture restoration is a labor of love that involves meticulously bringing classic pieces back to their former glory. Restorers aim to preserve authenticity and enhance functionality, celebrating the artistry of a bygone era. Each restoration project is a journey through time, where skilled artisans and craftsmen collaborate to revive cherished treasures and uncover the stories they tell.

Restoration stories are not just about fixing old furniture; they are about breathing new life into forgotten relics of the past. Whether it’s a weathered Victorian armchair or a distressed mahogany table, the restoration process is a testament to the resilience and enduring beauty of these pieces.

"Restoration stories" of antique furniture

Key Takeaways:

  • Antique furniture restoration is a meticulous process that aims to preserve authenticity.
  • Skilled artisans and craftsmen collaborate to bring cherished treasures back to life.
  • Restoration stories uncover the history and beauty of antique finds.
  • Each restoration is a journey through time, celebrating the artistry of a bygone era.
  • Restored antique furniture holds both historical and emotional value.

Why Restore Antique Furniture?

The motivations behind restoring antique furniture are diverse. Enthusiasts are driven by a passion to preserve heritage and to experience the visceral joy of using these beautifully crafted pieces. Restorers take on the challenge of breathing new life into forgotten treasures and delight in the transformation from worn and tired to renewed and cherished.

Restoring antique furniture allows for the preservation of historical and cultural significance. By carefully refurbishing these pieces, enthusiasts can ensure that the craftsmanship and design aesthetics of past eras are enjoyed and admired by future generations.

Furthermore, the process of restoring antique furniture provides a unique sense of fulfillment and satisfaction. Restorers witness firsthand the remarkable before and after transformations, witnessing the intricate details and craftsmanship coming back to life. Each project is a labor of love and a statement of dedication to preserving the past.

“Restoring antique furniture allows us to bridge the gap between the past and the present. It’s a way of honoring the craftsmanship and artistry of earlier generations while also bringing these beautiful pieces back into daily use.”

Restored antique furniture also holds intrinsic value as a sustainable and eco-friendly choice. By giving new life to existing pieces, the need for new furniture production is reduced, lessening the impact on the environment.

Whether it’s personal sentiment, historical significance, or a passion for craftsmanship, the restoration of antique furniture offers a rewarding and meaningful way to celebrate the past and preserve the beauty of bygone eras.

Benefits of Restoring Antique Furniture
Preserves historical and cultural significance
Revives intricate craftsmanship
Offers a sense of fulfillment and satisfaction
Provides sustainable and eco-friendly choices

The Restoration Process Unveiled

The vintage furniture restoration process is a meticulous and multifaceted journey that breathes new life into cherished pieces of the past. Let’s explore the step-by-step process that professional restorers undertake to revive these timeless treasures.

Researching the Essence of Design

Every restoration project begins with in-depth research into historical archives and technical specifications. Restorers delve into the past, unearthing the essence of the original design. By studying the craftsmanship, materials, and techniques of the era, they gain a profound understanding of the piece’s unique characteristics.

Dismantling, Repairing, and Rebuilding

Skilled artisans and craftsmen carefully dismantle the furniture, component by component. They meticulously examine each element, identifying areas that need repair or replacement. From fixing loose joints to replacing missing parts, every detail is attended to with care and precision.

A Harmonious Blend of Tradition and Innovation

Authenticity is at the heart of vintage furniture restoration. Skilled restorers source authentic materials, ensuring that the furniture maintains its historical integrity. While staying true to tradition, they also integrate modern techniques to enhance the longevity and usability of the piece.

“Vintage furniture restoration is a delicate dance between preserving the past and embracing the present. It requires expertise, artistry, and a deep appreciation for craftsmanship.” – Sarah Thompson, Professional Restorer

Showcasing the Restoration Process

Let’s take a closer look at the restoration process through this detailed table:

Step Description
1 Research historical archives and technical specifications to understand the essence of the original design.
2 Dismantle the furniture, carefully assessing each component for repair or replacement.
3 Repair, reinforce, and rebuild the furniture, preserving its authenticity while integrating modern techniques as necessary.
4 Source and utilize authentic materials to maintain historical accuracy.
5 Refinish the piece with precision, enhancing its aesthetic appeal without compromising its original charm.
6 Reassemble the furniture, ensuring structural stability and functionality.
7 Complete final touches and inspections, readying the restored piece for its new life.

Each step in this meticulous process is executed with the utmost care, resulting in the revival of vintage furniture that will tell its stories for generations to come.

The People Behind the Restoration

Antique furniture restoration is a collaborative effort that brings together skilled artisans, engineers, enthusiasts, and collectors. Each individual plays a significant role in the meticulous process of revitalizing cherished pieces of the past. Let’s delve into the contributions of these dedicated individuals and understand how they bring antique furniture back to life.

Skilled Artisans: Crafting Authenticity

Skilled artisans are at the heart and soul of antique furniture restoration. With their expert craftsmanship and meticulous attention to detail, they breathe new life into each component of the furniture. From delicate woodwork to intricate upholstery, these artisans possess the knowledge and skillset necessary to replicate the original design and restore the antique piece to its former glory. Through their expertise, they preserve the authenticity and charm that makes each piece unique.

Engineers: Ensuring Optimal Functionality

Engineers play a crucial role in antique furniture restoration by applying their technical expertise. They collaborate with artisans to ensure that the restored furniture not only looks authentic but also functions optimally. Engineers analyze the structural integrity of the piece, identify areas that need reinforcement, and incorporate appropriate solutions. Their expertise guarantees that the restored furniture is not only aesthetically pleasing but also durable and functional in a modern environment.

Enthusiasts and Collectors: The Driving Force

Enthusiasts and collectors are the driving force behind antique furniture restoration projects. They bring a deep appreciation for the historical significance and artistry of these pieces. Their passion and dedication fuel the restoration process, as they eagerly seek out rare and unique antique furniture to be preserved and cherished. Enthusiasts and collectors provide the necessary resources, support, and vision required to bring these restoration projects to fruition. Their love for antique furniture ensures that these treasures continue to be valued and celebrated for generations to come.

The collaboration between skilled artisans, engineers, enthusiasts, and collectors in antique furniture restoration highlights the importance of preserving our rich heritage. Together, they revive the charm of bygone eras and create opportunities for us to immerse ourselves in the craftsmanship and beauty of the past.

Preserving Authenticity in Restoration

Restoration is an art that involves delicately preserving the original design of antique furniture while seamlessly integrating modern features to enhance its functionality. Skilled restorers understand the importance of maintaining the authenticity and charm of each piece, ensuring that its historical significance remains intact. By striking a perfect balance between tradition and innovation, they breathe new life into these timeless treasures, making them relevant in today’s modern settings.

In their pursuit to preserve authenticity, restorers employ various techniques and approaches. They meticulously research historical archives and technical specifications to gain a deep understanding of the original design. This knowledge serves as a foundation for their restoration process, allowing them to choose the most appropriate methods and materials that closely match the original craftsmanship.

While the primary goal is to retain as much of the original character as possible, restorers also recognize the value in integrating modern features. This integration ensures that the furniture remains functional and adaptable to the needs of contemporary users. Whether it’s reinforcing weak joints, replacing worn-out upholstery with durable fabrics, or incorporating hidden compartments for storage, restorers carefully implement these enhancements without compromising the piece’s authenticity.

Preserving Authenticity: A Balancing Act

Preserving authenticity in restoration requires a delicate balancing act between respecting the furniture’s historical value and adapting it to suit modern lifestyles. It involves mindful decision-making and meticulous craftsmanship to seamlessly blend tradition with innovation. The end result is a harmonious fusion of old and new, where the original allure of antique furniture is complemented by the convenience and comfort of modern features.

Authenticity Integration of Modern Features
Retains the original design, craftsmanship, and aesthetic appeal Enhances functionality, usability, and adaptability
Preserves historical significance and cultural heritage Addresses the practical needs of modern users
Reflects the craftsmanship and artistry of a bygone era Embraces the advancements in materials and techniques

By embracing the integration of modern features, restorers ensure that authentic antique furniture can seamlessly fit into contemporary living spaces. They enable these exquisite pieces to withstand the test of time while serving as functional and cherished elements of home decor.

The image above exemplifies the successful integration of modern features into an authentic antique furniture piece. The combination of traditional craftsmanship and thoughtful enhancements showcases how restoration can breathe new life into treasured relics, making them relevant for generations to come.

The Value and Significance of Antique Furniture

The value of antique furniture extends beyond its monetary worth. These pieces carry historical significance and embody the craftsmanship and design aesthetics of the eras they represent. Their rarity, unique designs, and quality craftsmanship contribute to their allure. However, their true value lies in the emotional connection they evoke, bridging the gap between past and present and preserving cultural heritage.

Antique furniture holds a tangible link to our history. Each piece tells a story, representing the social, cultural, and artistic influences of its time. Whether it’s the intricate carvings of a Victorian armchair or the sleek lines of a mid-century modern desk, these relics of the past offer a glimpse into the lives of those who came before us.

Aside from their historical significance, vintage furniture also carries immense artistic value. Skilled artisans poured their expertise into crafting these timeless pieces, ensuring that they not only serve a functional purpose but also serve as works of art. From the choice of materials to the attention to detail in the construction, antique furniture showcases the mastery of craftsmen who dedicated themselves to their trade.

Emotional Connection and Cultural Heritage

“Antique furniture allows us to connect with the past in a tangible way. Sitting in a vintage chair or running your fingers over an aged wooden tabletop transports you to a different time, where you can imagine the conversations and experiences that took place around these pieces.” – Emma Thompson, Antique Enthusiast

The emotional connection that antique furniture fosters is powerful. It evokes nostalgia and sentimentality while reminding us of our roots and heritage. Owning and cherishing antique furniture allows us to celebrate the past and create a bridge between generations, passing down stories and traditions to future heirs.

Moreover, antique furniture contributes to the preservation of cultural heritage. The design elements, craftsmanship techniques, and materials used in these pieces are a testament to the cultural and historical context of their creation. By appreciating and maintaining antique furniture, we ensure that this cultural heritage survives and continues to inspire future generations.

In conclusion, antique furniture holds immense value and significance, transcending mere monetary considerations. From historical importance to artistic excellence, these pieces capture the essence of past eras and allow us to forge a deep emotional connection. By preserving and cherishing antique furniture, we not only honor our cultural heritage but also enrich our lives with timeless beauty and craftsmanship.

The Impact of Restoration on the Market

The resurgence of interest in antique furniture restoration has had a profound impact on the vintage furniture market. Auction houses now witness fierce bidding wars for iconic pieces, reflecting the growing appreciation for restored antique furniture among collectors and enthusiasts alike. These individuals no longer view these items solely as collectibles; they recognize them as valuable investments that continue to appreciate in worth over time.

Vintage furniture market

Collector preferences have also undergone a significant shift due to the demand for restored antique furniture. With the rise in restoration projects, collectors now prioritize finding pieces that have undergone professional restoration, ensuring they meet the highest standards of quality and authenticity. This preference for restored pieces has sparked a new wave of creativity and innovation in the restoration industry as experts strive to meet the evolving needs and desires of collectors.

Influencing Market Trends

The demand for restored antique furniture has become a driving force in shaping market trends. As more collectors and enthusiasts seek out these pieces, the market has responded with an increased supply and variety of restored furniture. Styles and designs that were once overlooked or undervalued are now experiencing a resurgence, creating new opportunities for both collectors and sellers.

“The demand for restored antique furniture has created a ripple effect throughout the market. We are seeing a surge in interest and an increased appreciation for vintage pieces that have been carefully restored to their former glory.” – Jane Miller, vintage furniture expert

Driving Innovation in the Restoration Industry

The growing demand for restored antique furniture has fueled innovation within the restoration industry. Restorers and craftsmen are continually pushing the boundaries, combining traditional techniques with modern advancements to achieve stunning results. From the integration of 3D printing for precise part replication to the use of advanced materials for enhanced durability, these innovations ensure that the restored pieces not only maintain their historical authenticity but also meet the demands of contemporary living.

The Vintage Furniture Market: A Table of Transformation

Market Trends Impact
Increase in Auction Prices Strong bidding wars driving up the value of restored antique furniture
Shift in Collector Preferences Restored pieces prioritized, increasing the demand for professional restoration
Expanded Variety Greater supply and diversity of restored antique furniture
Merging of Styles Previously overlooked designs gaining popularity
Technological Advancements Integration of modern techniques and materials in restoration

As the vintage furniture market continues to evolve, the impact of restoration on its trajectory cannot be overstated. From influencing market trends to driving innovation, the demand for restored antique furniture has breathed new life into the industry. Collectors, enthusiasts, and restorers alike are all actively shaping the market landscape, ensuring the preservation of our rich cultural heritage for future generations.

Innovation in Antique Furniture Restoration

Innovation plays a crucial role in antique furniture restoration. While traditional craftsmanship remains at the core, modern technologies and techniques have found their way into the restoration process. From 3D printing authentic parts to incorporating advanced materials, innovation enhances the restoration process while maintaining the authenticity and charm of the original designs.

The integration of advanced restoration techniques allows for more efficient and precise restoration work. For example, 3D printing technology can be used to recreate missing or damaged components of antique furniture, ensuring a seamless restoration that is indistinguishable from the original. This not only reduces the reliance on hard-to-find replacement parts but also allows for greater customization and flexibility in the restoration process.

Another area where innovation has made significant strides is in the use of advanced materials. While traditional restoration techniques often rely on natural materials like wood and fabric, modern restorers have access to a wide range of synthetic materials that can enhance the durability and longevity of antique furniture. These materials can be seamlessly integrated into the restoration process, providing strength and stability without compromising the aesthetic value of the piece.

Additionally, innovative techniques such as laser scanning and digital imaging have revolutionized the documentation and preservation of antique furniture. These technologies allow for precise measurements and detailed records of the original design, ensuring that every restoration project stays true to the piece’s historical integrity.

The combination of traditional craftsmanship and innovative restoration techniques has elevated the art of antique furniture restoration to new heights. With each restoration project, skilled craftsmen and artisans take on the challenge of breathing new life into cherished pieces, preserving their historical significance, and honoring the artistry of the past.

Benefits of Innovation in Antique Furniture Restoration

By embracing innovation in the restoration process, the field of antique furniture restoration has experienced several key benefits:

  1. Enhanced Efficiency: Advanced technologies and techniques enable restorers to complete projects more efficiently, reducing turnaround time and increasing the accessibility of restoration services.
  2. Improved Accuracy: Digital imaging and laser scanning ensure precise measurements and accurate replication of original details, resulting in restoration work that faithfully reflects the craftsmanship of the past.
  3. Expanded Possibilities: Innovation opens up new possibilities for customization and adaptation, allowing restorers to address unique challenges and meet the specific needs of each antique furniture piece.
  4. Prolonged Preservation: The use of advanced materials and restoration techniques promotes the longevity and durability of restored antique furniture, ensuring that these pieces can be enjoyed by future generations.

The marriage of innovation and tradition in antique furniture restoration ensures that these timeless pieces continue to be admired and cherished, bridging the gap between the past and the present.

Case Studies: Restoration Success Stories

Delve into the remarkable restoration stories that showcase the painstaking revival of antique furniture. Witness the collaborative efforts of skilled artisans and restorers as they breathe new life into these cherished pieces of the past. Each success story highlights the craftsmanship, dedication, and love that goes into the restoration process, resulting in stunning before and after transformations that inspire and awe.

Restored Victorian Armchair: A Timeless Masterpiece

One of the most captivating restoration success stories is the revival of a Victorian armchair dating back to the 19th century. The chair, worn and neglected, underwent a remarkable transformation under the expert hands of master restorer Henry Thompson. He meticulously repaired its delicate carved details, reupholstered it with sumptuous brocade fabric, and restored its original mahogany finish. The armchair now adorns the elegant sitting room of a renowned historic mansion, capturing the essence of a bygone era.

“Restoring this beautiful Victorian armchair was a labor of love. It required hours upon hours of intricate woodwork, careful upholstery, and a deep understanding of the craftsmanship from that time. Witnessing the transformation of this neglected chair into a captivating masterpiece was incredibly fulfilling.”

– Henry Thompson, Master Restorer

Revived French Rococo Dresser: A Statement of Opulence

A French Rococo dresser, once concealed under layers of grime and damage, emerged as an emblem of opulence after a meticulous restoration. Restorer Marie Leblanc skillfully repaired its intricately carved details, rejuvenated the gilded finish, and replaced the tarnished brass handles with exact replicas. The dresser now stands as a testament to the rich history and exquisite craftsmanship of the Rococo era, a centerpiece in a luxurious private collection.

“Restoring this French Rococo dresser was like unraveling a hidden treasure. The delicate carvings were a challenge, but the end result was worth every moment of effort. It now exudes the grandeur and elegance that it once possessed, captivating all who lay eyes on it.”

– Marie Leblanc, Restorer

Transformed Mid-Century Modern Sideboard: A Contemporary Rebirth

A mid-century modern sideboard, battered by time and neglect, underwent a remarkable transformation into a contemporary masterpiece. Restoration specialist David Chen modernized its functionality by incorporating sleek push-to-open drawers and concealed storage compartments. He preserved the essence of its original design, skillfully refinishing the teak veneer to highlight its natural beauty. The sideboard now graces the living room of a design-savvy homeowner, seamlessly blending vintage charm with modern practicality.

“Bringing this mid-century modern sideboard back to life was an exciting endeavor. Balancing restoration with modernization was a delicate process, but the end result exceeded all expectations. It now serves as a stunning testament to the timelessness of quality design.”

– David Chen, Restoration Specialist

These restoration success stories are just a glimpse into the world of antique furniture revival. Each project showcases the transformative power of skilled craftsmanship, dedication, and a deep appreciation for the beauty and history of antique furniture. Whether it’s a Victorian armchair, a French Rococo dresser, or a mid-century modern sideboard, antique furniture restoration brings timeless pieces back to their former glory, preserving their enduring charm for generations to come.

Antique Furniture Restoration Success Stories

Conclusion

Restoring antique furniture goes beyond mere preservation, serving as a testament to human ingenuity, artistry, and dedication. As the demand for restored antique furniture continues to grow, enthusiasts, artisans, and collectors find themselves immersed in a narrative that transcends restoration itself. The future of antique furniture restoration lies in the blend of tradition and adaptation, driven by evolving technologies, shifting market trends, and changing societal values.

For those interested in getting involved, whether as an enthusiast, collector, or aspiring professional, the world of antique furniture restoration offers fulfillment, creativity, and a profound connection to our rich heritage. To ensure success in your restoration endeavors, here are some valuable tips:

1. Research: Take the time to learn about the historical context and specific characteristics of the piece you’re restoring. Understanding its origins and craftsmanship will guide your restoration process.

2. Seek Professional Guidance: If you’re new to restoration or dealing with valuable pieces, it’s wise to consult with experienced professionals who can provide expert advice and guidance throughout the restoration journey.

3. Use Appropriate Materials: Opt for high-quality materials that closely match the original ones. This ensures authenticity and longevity in the restored furniture.

4. Preserve Patina: Patina refers to the natural aging and wear that occurs on the surface of antique furniture. Preserve and enhance it whenever possible, as it adds character and value to the piece.

5. Follow Proper Techniques: Employ appropriate restoration techniques, such as gentle cleaning, careful repairs, and precise finishing, to maintain the integrity and value of the furniture.

By following these tips and embracing the art of antique furniture restoration, you can contribute to the preservation of our cultural heritage while experiencing the unmatched joy of breathing new life into timeless pieces.

FAQ

What is antique furniture restoration?

Antique furniture restoration is the process of meticulously bringing classic pieces back to their former glory. Skilled artisans and craftsmen dismantle, repair, and rebuild every component with painstaking attention to detail in order to preserve authenticity and enhance functionality.

Why do people restore antique furniture?

People restore antique furniture for various reasons. Some are driven by a passion to preserve heritage and experience the joy of using beautifully crafted pieces. Others take on the challenge of breathing new life into forgotten treasures and delight in the transformation from worn and tired to renewed and cherished.

What is involved in the restoration process?

The restoration process involves research, dismantling, repairing, and rebuilding every component of the furniture. Skilled artisans and craftsmen use authentic materials and traditional techniques, while also integrating modern advancements to ensure the furniture looks authentic and functions optimally.

Who is involved in antique furniture restoration?

Antique furniture restoration is a collaborative effort. Skilled artisans bring their craftsmanship to the forefront, engineers lend their technical expertise, and enthusiasts and collectors provide the driving force behind restoration projects.

How can antique furniture retain its authenticity during restoration?

Skilled restorers strive to retain as much of the original character as possible while carefully integrating modern features that enhance functionality. The goal is to preserve the authenticity and charm of the piece while ensuring its continued relevance in a modern setting.

What is the value and significance of antique furniture?

Antique furniture carries historical significance and embodies the craftsmanship and design aesthetics of the eras they represent. Their rarity, unique designs, and quality craftsmanship contribute to their allure. However, their true value lies in the emotional connection they evoke and the preservation of cultural heritage.

How does restoration impact the vintage furniture market?

The resurgence of interest in restored antique furniture has transformed the market. Iconic pieces witness fierce bidding wars at auction houses, collectors see them as valuable investment opportunities, and the demand influences market trends and shapes collector preferences.

How does innovation play a role in antique furniture restoration?

Innovation plays a crucial role in antique furniture restoration. While traditional craftsmanship remains at the core, modern technologies and techniques have found their way into the restoration process. From 3D printing authentic parts to incorporating advanced materials, innovation enhances the restoration process while maintaining the authenticity and charm of the original designs.

Can you provide some restoration success stories?

Yes, we have remarkable case studies showcasing the revival of antique furniture. These stories highlight the craftsmanship, dedication, and love that go into the restoration process, resulting in stunning before and after transformations. Each case study inspires and awe both enthusiasts and aspiring professionals.

Do you have any tips for restoring antique furniture?

Yes, when restoring antique furniture, it is essential to do thorough research, use appropriate tools and materials, and consult with experienced restorers if needed. Taking your time, focusing on preserving authenticity, and seeking professional advice can help ensure a successful restoration project.

Posted on

Beginner’s Guide to Restoring Antique Furniture

Restoring antique furniture for beginners

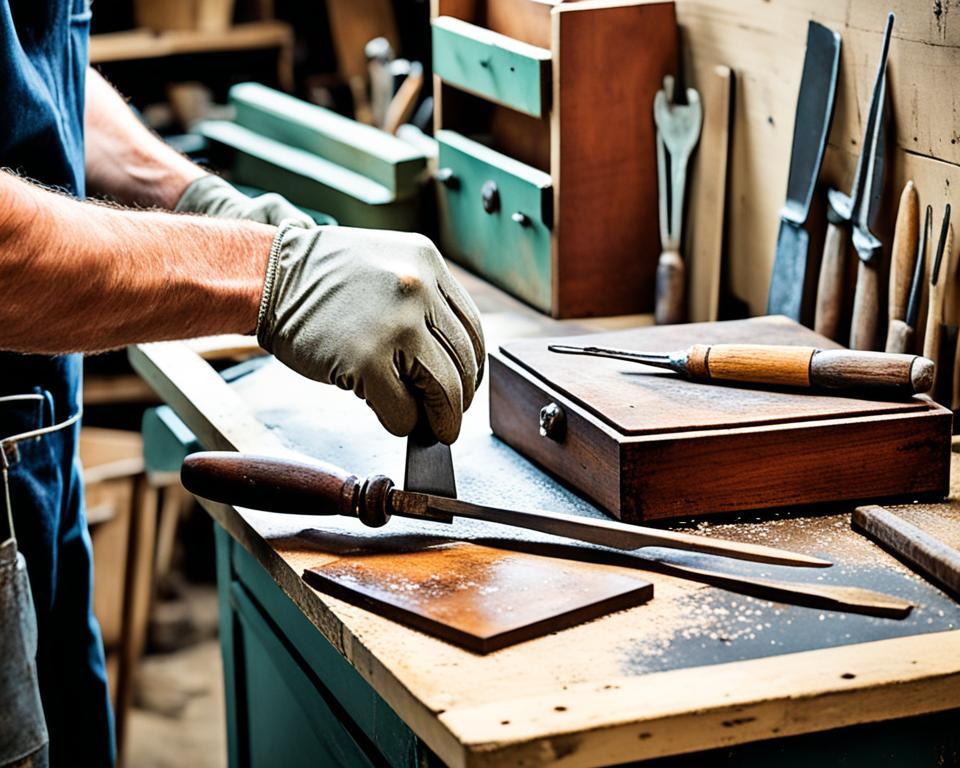
Welcome to the Beginner’s Guide to Restoring Antique Furniture! If you have a passion for vintage pieces and want to learn how to bring them back to life, you’ve come to the right place. This comprehensive guide is designed specifically for beginners like you, providing step-by-step instructions and expert tips for a successful antique furniture restoration project.

Whether you have inherited a family heirloom or stumbled upon a hidden gem at a thrift store, restoring antique furniture can be a rewarding and fulfilling experience. Not only will you breathe new life into these cherished pieces, but you will also gain a deeper appreciation for their craftsmanship and history.

In this guide, we will walk you through the entire restoration process, from gathering the necessary supplies to adding the final touches. You will discover how to test for lead in antique furniture paint, apply paint stripper, remove residue, sand the surfaces, and choose between natural wood or stained finish. We will also discuss the benefits of antique furniture restoration and provide valuable resources for further learning.

By following this beginner’s guide and acquiring the knowledge and skills needed, you will be well-equipped to tackle your first antique furniture restoration project. Get ready to embark on a journey of discovering the beauty and value hidden in these timeless pieces!

Key Takeaways:

  • Restoring antique furniture allows you to bring new life to cherished pieces with historical significance.
  • This guide provides step-by-step instructions and expert tips for beginners to successfully restore antique furniture.
  • You will learn how to gather necessary supplies, test for lead in paint, apply paint stripper, remove residue, sand surfaces, and choose the perfect finish.
  • Antique furniture restoration offers various benefits, including preservation of history, customization, and potential cost savings.
  • Further learning resources, such as books and websites, are recommended for those interested in delving deeper into furniture restoration.

Gathering Supplies for Antique Furniture Restoration

Before diving into a restoration project, it’s important to gather all necessary supplies. Having the right tools and materials on hand will ensure a successful and smooth restoration process. Here is a list of essential items to consider:

1. Paint Stripper

Removing old paint and finishes is a crucial step in antique furniture restoration. Look for a high-quality paint stripper that is effective yet safe for the furniture’s surface. One recommended brand is Citristrip, known for its effectiveness and low toxicity.

2. Sanding Tools

Sanding is essential for achieving a smooth and even surface before applying new finishes. Invest in various grits of sandpaper or sanding blocks to efficiently remove imperfections. For larger surfaces, consider using a power sander for quicker and more consistent results.

3. Sealant

Applying a sealant after sanding will help protect the wood and enhance its appearance. Choose a sealant suitable for antique furniture, such as polyurethane or shellac. Apply it in thin, even coats for optimal results.

4. Paint or Stain

Determine whether you want to preserve the natural wood or give the furniture a fresh look with paint or stain. Opt for high-quality paint or wood stain that matches your desired finish. Apply multiple thin coats for a professional-looking result.

5. Protective Gear

Ensuring your safety during the restoration process is crucial. Wear chemical-resistant gloves to protect your hands from paint stripper and other chemicals. Eye protection such as safety goggles or glasses is also necessary to shield your eyes from any potential splashes or debris.

Taking the time to gather these necessary supplies before beginning your antique furniture restoration project will set you up for success. Having everything you need on hand will make the process more efficient and enjoyable. Now that you have your supplies ready, it’s time to move on to the next step.

Continue reading to learn how to test antique furniture paint for lead and ensure a safe restoration process.

Testing for Lead in Antique Furniture Paint

To ensure the safety of antique furniture restoration projects, it is crucial to test for lead-based paint, especially in pieces manufactured prior to 1978. Lead-based paint can pose serious health risks if ingested or inhaled, making it essential to take proper precautions. Lead test kits, such as the one from 3M™, provide a simple and effective way to determine if a piece of furniture contains lead paint.

Using a lead test kit is a straightforward process. Start by selecting an inconspicuous area on the furniture that you suspect may contain lead-based paint. Open the lead test kit and remove the swab. Rub the swab firmly on the test area, ensuring it comes into contact with the surface. Observe the swab’s color change to determine the presence of lead. If the swab turns red or pink, this indicates the presence of lead-based paint.

Testing for lead in antique furniture paint is an important step in ensuring the safety of both the restorer and future users of the furniture. By identifying and addressing lead-based paint, you can take appropriate measures to mitigate health risks and handle the restoration process accordingly.

“Testing for lead-based paint is crucial to ensure the safety of antique furniture restoration projects. By using a reliable lead test kit, like the one from 3M™, restorers can confidently determine the presence of lead in furniture paint.”

Advantages of Lead Testing Kits for Antique Furniture Disadvantages of Lead Testing Kits for Antique Furniture
1. Easy to use 1. Limited testing areas due to swab size
2. Provides quick results 2. May not detect low levels of lead
3. Affordable and readily available 3. Can only determine the presence of lead, not the exact level
4. Suitable for on-site testing 4. Requires proper disposal of used swabs

While lead test kits offer a convenient solution for testing antique furniture paint, there are some limitations to consider. The size of the swab limits the testing area, and low levels of lead may not be detectable. Additionally, lead test kits can only determine the presence of lead, not the exact level. However, their affordability, accessibility, and ease of use make them a valuable tool for restorers.

Applying Paint Stripper for Antique Furniture Restoration

When it comes to restoring antique furniture, using the right paint stripper is essential for achieving the desired results. In this section, we’ll explore the use of Citristrip, a highly recommended brand known for its effectiveness in stripping furniture. By following the proper application techniques, you can ensure a successful restoration process.

Before diving into the paint stripping process, make sure to protect your hands with chemical-resistant gloves. This will safeguard your skin from any potential irritation or damage caused by the paint stripper.

Next, it’s time to apply the Citristrip. Grab a chip brush and generously coat the surface of the furniture with the paint stripper. Ensure that you cover all areas that need stripping, as Citristrip works best when thoroughly applied. Take your time and be meticulous in this step.

To prevent the paint stripper from drying out, cover the freshly applied Citristrip with plastic wrap. This helps create a barrier that preserves the moisture and enhances the effectiveness of the product. Leave the plastic wrap in place for up to 24 hours. This allows the Citristrip to penetrate the layers of paint and break its bond with the wood, making it easier to scrape off.

Once the waiting period is over, it’s time to start removing the paint. Use a scraping tool, such as a putty knife or paint scraper, to gently lift the softened paint off the furniture. Take care to scrape in the direction of the wood grain to avoid damaging the surface.

If there are multiple layers of paint, you may need to repeat the process and apply a second coat of Citristrip. This ensures that even the stubborn layers are effectively stripped away. Remember to follow the manufacturer’s instructions and safety guidelines.

Now that you’ve successfully removed the old paint, you can proceed to the next steps in the antique furniture restoration process. Clean off any residue left by the paint stripper using mineral spirits and scrubbing pads or toothpicks for hard-to-reach areas. This prepares the furniture for the next phase of restoration.

Below is a quote from an experienced restorer, emphasizing the effectiveness of Citristrip:

“I’ve been using Citristrip for years, and it has never failed me. Its gentle formula makes it safe to use on various wood surfaces, yet it still packs a powerful punch when it comes to stripping away layers of paint. I highly recommend it for any furniture restoration project.” – Jane Thompson, Antique Furniture Restorer

Next, we’ll move on to the crucial step of removing residue from antique furniture. Be sure to check out the following section to learn how to achieve a clean surface for a pristine restoration finish.

Removing Residue from Antique Furniture

After using paint stripper for antique furniture restoration, it’s essential to address the residue that may be left behind. Cleaning off the residue not only improves the aesthetic appeal but also prepares the furniture for the next restoration steps.

To effectively remove residue from antique furniture, one of the most commonly used products is mineral spirits. Mineral spirits, also known as paint thinner, are effective in dissolving and removing stubborn residue without damaging the wood.

  • Step 1: Start by applying a small amount of mineral spirits to a scrubbing pad or a toothpick for hard-to-reach areas.
  • Step 2: Gently scrub the surface of the furniture using circular motions, focusing on the areas with visible residue.
  • Step 3: As you clean, periodically wipe away the residue with a clean cloth or paper towel.
  • Step 4: Continue this process until all residue has been removed and the surface is clean.

It’s important to exercise caution when working with mineral spirits. Make sure to work in a well-ventilated area and wear gloves to protect your skin. Additionally, follow the manufacturer’s instructions and dispose of used mineral spirits properly.

Once the residue has been successfully cleaned off, wipe down the furniture with a clean, dry cloth and allow it to dry completely before proceeding with the next steps of the restoration process.

Pros of Using Mineral Spirits for Cleaning Residue Cons of Using Mineral Spirits for Cleaning Residue
  • Effectively dissolves and removes residue
  • Gentle on the wood surface
  • Easy to apply and work with
  • Helps prepare the furniture for the next restoration steps
  • Strong odor, requires proper ventilation
  • Can be hazardous to health if not used properly
  • Requires careful handling and disposal

Safety Tip

Always read and follow the safety instructions provided by the manufacturer of the mineral spirits or paint thinner. Proper ventilation and protective gear, such as gloves, are crucial when working with these chemicals.

Cleaning residue from antique furniture

Sanding Antique Furniture for a Smooth Finish

Once the paint stripper has been successfully removed from the antique furniture, the next step in the restoration process is to sand the surfaces to achieve a smooth finish. Sanding is crucial for removing any remaining paint or residue and preparing the furniture for the final touches.

Sanding antique furniture can be done using either sandpaper or a power sander, depending on the size and complexity of the piece. For larger, flat surfaces such as table tops or cabinet doors, a power sander is recommended as it can save time and effort. However, for intricate areas or curved surfaces, it’s best to use sandpaper or sanding blocks to ensure precision and control.

When sanding, it’s important to always follow the grain of the wood. Sanding against the grain can result in scratches and uneven surfaces. Start with a coarse-grit sandpaper or sanding disc to remove any roughness or imperfections. Then, gradually move to finer-grit sandpaper to achieve a smoother finish.

Note: Remember to wear protective gear such as goggles and a mask to prevent inhalation of dust particles.

Removing Dust

After sanding, it’s crucial to remove any dust or debris from the furniture before proceeding with the next steps. This can be done using tack cloths or a vacuum cleaner with a brush attachment. Ensuring a clean surface will help the final finish to adhere properly.

Sanding Grit Guide

Grit Description Best Used for
Coarse (40-60) Removes roughness, paint, and stubborn stains Initial sanding, removing imperfections
Medium (80-120) Smooths surfaces, evens out rough areas Preparing the surface for finer sanding
Fine (150-180) Refines surfaces, removes scratches left by coarser grits Final sanding before application of finish
Super Fine (220-240) Produces an ultra-smooth surface Final touch-up, readying surface for staining or sealing

Sanding antique furniture is a critical step in achieving a professional-looking final result. It helps to create a smooth and polished surface that enhances the overall aesthetics of the piece. Once the sanding process is complete, the furniture is ready for the next steps in the restoration process, whether that involves staining, sealing, or applying a protective finish.

Choosing Between Natural Wood or Stained Finish

When it comes to restoring antique furniture, one important decision to make is whether to preserve the natural beauty of the wood or enhance it with a stained finish. Each option offers its own unique charm and benefits, catering to different preferences and styles.

Natural Wood Finish

A natural wood finish showcases the inherent character and grain patterns of the antique furniture. This option is ideal for those who appreciate the warmth and authenticity of the wood’s natural color. With a natural finish, the furniture exudes a timeless elegance, allowing the craftsmanship to take center stage.

“Preserving the natural wood finish is a great way to honor the history and craftsmanship of antique furniture.” – [Insert Expert Name]

To achieve a natural wood finish, you can follow these steps:

  1. Clean the surface of the furniture using a mild wood cleaner.
  2. Apply a clear wood conditioner to enhance the wood’s natural color.
  3. Seal the wood with a clear, water-based polyurethane to protect it from moisture and wear.

Stained Finish

On the other hand, staining antique furniture allows you to customize the color and create a uniform appearance. A stain can help even out inconsistencies in the wood’s color, making the furniture appear more cohesive. This option is particularly beneficial for pieces with noticeable color variations or to match the furniture with other décor elements in the room.

“Adding a stained finish to antique furniture adds depth and character, while still honoring its vintage appeal.” – [Insert Expert Name]

Here’s a simple process for staining antique furniture:

  1. Choose a stain color that complements the furniture and fits your aesthetic.
  2. Using a rag or brush, apply a light coat of stain, ensuring even coverage.
  3. Allow the stain to penetrate the wood for the desired amount of time.
  4. Wipe off any excess stain and let the furniture dry completely.
  5. Apply water-based polyurethane to protect the stained surface and enhance its durability.

“Staining antique furniture provides an opportunity to breathe new life into cherished pieces, while still honoring their history.” – [Insert Expert Name]

Ultimately, the decision between a natural wood finish and a stained finish comes down to personal preference and the desired aesthetic for the antique furniture. Whether you choose to showcase the natural beauty of the wood or add a touch of color, restoring antique furniture allows you to preserve its history and enjoy its timeless appeal.

Option Pros Cons
Natural Wood Finish
  • Showcases the authentic beauty of the wood
  • Preserves the historical value and craftsmanship
  • Timeless and elegant
  • May accentuate imperfections in the wood
  • Requires regular maintenance to protect the wood
Stained Finish
  • Allows customization of color
  • Creates a cohesive look with other décor
  • Can even out color inconsistencies
  • May hide some of the natural wood’s characteristics
  • Requires careful application for an even finish

Adding the Final Touches to Antique Furniture

After completing the restoration process, it’s time to add the finishing touches that will truly elevate the look of your antique furniture. By carefully selecting and incorporating antique furniture pulls and other decorative elements, you can enhance the overall aesthetic and create a cohesive vintage style. These final details will contribute to the polished and finished appearance of the piece.

Antique furniture pulls are an essential component when it comes to adding character and charm to your restored piece. They not only serve a functional purpose but also act as ornamental accents. Consider using antique brass pulls to complement the traditional style of your furniture. These pulls often feature intricate designs and intricate detailing, showcasing the craftsmanship of a bygone era.

When choosing antique furniture pulls, pay attention to the size and design. Opt for pulls that are proportionate to the piece and aligned with its overall style. This will ensure a harmonious and visually pleasing result. Antique shops, online marketplaces, and specialty hardware stores are great sources for finding a wide selection of antique pulls to suit your needs.

In addition to pulls, consider incorporating other decorative elements such as escutcheons and keyhole covers. These small details can make a significant difference in the overall presentation of your antique furniture. Choose pieces that match the style and era of your furniture to maintain authenticity.

To inspire you, here’s an image of a beautifully restored antique cabinet with carefully selected antique furniture pulls:

Remember, the goal is to create a cohesive vintage look that highlights the beauty and history of your restored piece. By adding the perfect antique furniture pulls and other decorative elements, you can achieve a stunning finished result that showcases your craftsmanship and attention to detail.

Benefits and Advantages of Restoring Antique Furniture

Restoring antique furniture provides a multitude of benefits and advantages that make it a worthwhile endeavor for enthusiasts and beginners alike. Whether you’re preserving history, customizing a cherished piece, or looking to save money, the rewards of DIY furniture restoration are truly exceptional.

Preservation of History

When you embark on the journey of restoring antique furniture, you are not only enhancing the beauty of a particular piece but also preserving its historical significance. Each restored furniture item represents a unique story and serves as a tangible link to the past. By carefully revitalizing these treasures, you contribute to the preservation of our collective heritage.

Customization and Personalization

One of the key advantages of antique furniture restoration is the opportunity to customize and personalize the piece according to your taste and style. Whether it’s refinishing the wood in a different shade, adding decorative elements, or reupholstering with a fabric of your choice, you have the freedom to create a one-of-a-kind masterpiece that reflects your individuality.

Potential Cost Savings

Restoring antique furniture can be a cost-effective alternative to purchasing new pieces. Rather than investing in brand-new furniture with often hefty price tags, you can acquire antique pieces at a lower cost and transform them into stunning works of art through restoration. With careful planning and a DIY approach, you can achieve remarkable results without breaking the bank.

Satisfaction and Sense of Achievement

“Restoring antique furniture allows individuals to unleash their creativity, learn new skills, and experience the satisfaction of transforming a neglected piece into a cherished treasure.”

The process of restoring antique furniture is not only a rewarding creative endeavor but also an opportunity to acquire new skills and knowledge. As beginners undertake restoration projects, they learn techniques such as stripping, sanding, staining, and finishing, which can be applied to future projects. The sense of achievement that comes with successfully completing a restoration project is truly fulfilling and can inspire a lifelong passion for furniture restoration.

Benefits of Antique Furniture Restoration

Advantages of Restoring Antique Furniture Benefits of DIY Furniture Restoration
Preservation of history Customization and personalization
Potential cost savings Satisfaction and sense of achievement

Tips for Successful Antique Furniture Restoration

If you’re a beginner embarking on an antique furniture restoration project, here are some essential tips and techniques to ensure a successful outcome. These beginner-friendly furniture restoration techniques will help you navigate the process with confidence and achieve satisfying results.

1. Patience is Key

Antique furniture restoration requires patience and a methodical approach. Take your time to carefully assess the condition of the piece, plan your restoration process, and execute each step with precision. Rushing through the restoration can lead to mistakes and unsatisfactory results.

2. Research and Learn

Before diving into your restoration project, take the time to research and learn about the specific type of antique furniture you are working on. Familiarize yourself with the techniques, materials, and finishes commonly used in that era. This knowledge will help you make informed decisions throughout the restoration process.

3. Clean and Prep the Surface

Ensure that the surface of the furniture is clean and free from dirt, grime, and old finishes before starting any restoration work. Use gentle cleaning methods and avoid harsh chemicals that may damage the wood. A clean surface will provide a solid foundation for the restoration process.

4. Practice on Small Sections

If you’re new to furniture restoration, it’s a good idea to practice your techniques on small, inconspicuous sections of the furniture before tackling the entire piece. This allows you to refine your skills and gain confidence in your abilities before moving on to more visible areas.

5. Take Before and After Photos

Documenting your restoration journey with before and after photos is not only satisfying but also serves as a valuable reference for future projects. It allows you to track your progress, compare different techniques, and showcase your accomplishments.

6. Protect the Original Hardware

If the antique furniture has original hardware, such as handles or knobs, take extra care to protect and preserve them during the restoration process. Remove the hardware before stripping or refinishing and clean them separately. This ensures that the hardware retains its original charm and adds to the authenticity of the piece.

7. Seek Professional Advice When Needed

Don’t hesitate to seek professional advice or assistance if you encounter any challenges during the restoration process. There are experts in the field who can provide valuable guidance and help you overcome obstacles that may arise.

Tips for Successful Antique Furniture Restoration
1. Patience is Key
2. Research and Learn
3. Clean and Prep the Surface
4. Practice on Small Sections
5. Take Before and After Photos
6. Protect the Original Hardware
7. Seek Professional Advice When Needed

By following these tips and incorporating beginner-friendly furniture restoration techniques, you’ll be well-equipped to restore antique furniture with confidence and achieve beautiful results that will be enjoyed for years to come.

Resources for Further Learning on Furniture Restoration

For those looking to delve deeper into the world of furniture restoration, there are several recommended resources available. Whether you prefer learning from books or exploring online platforms, these resources offer comprehensive guides and inspiration to enhance your restoration skills. Here are some valuable sources to consider:

Books on Furniture Restoration

“Furniture Restoration Workshop” by Kevin Jan Bonner

“Furniture Restoration and Repair for Beginners” by Kevin Jan Bonner

These books provide detailed instructions, tips, and techniques for restoring antique furniture. From understanding different woodworking tools to mastering restoration processes, you’ll find comprehensive guidance to tackle your next project successfully.

Websites for Furniture Restoration

  • CentsationalGirl: This popular website offers a wealth of information and inspiration for furniture restoration enthusiasts. Browse through their articles and tutorials to find expert advice, step-by-step guides, and creative ideas.
  • Design*Sponge: Known for its design-focused content, Design*Sponge also provides valuable resources on furniture restoration. Explore their articles and DIY projects to learn more about techniques, materials, and design elements that can elevate your restoration projects.

By referring to these books and websites, you can enhance your knowledge, gain new ideas, and improve your skills in the art of furniture restoration. Remember, practice and continuous learning are key to becoming a proficient restorer.

Resource Description
“Furniture Restoration Workshop” by Kevin Jan Bonner A comprehensive guidebook that covers various restoration techniques, tools, and materials.
“Furniture Restoration and Repair for Beginners” by Kevin Jan Bonner An excellent resource for beginners, providing step-by-step instructions and tips for restoring and repairing furniture.
CentsationalGirl An online platform offering articles and tutorials on furniture restoration, showcasing inspiring project ideas and providing insights on techniques and materials.
Design*Sponge A design-focused website that features articles, DIY projects, and resources on furniture restoration, offering ideas, tips, and design inspirations.

Conclusion

In conclusion, this beginner’s guide to restoring antique furniture provides a comprehensive step-by-step process for beginners to successfully restore cherished pieces. By following the outlined techniques and utilizing the available resources, individuals can bring new life to old furniture and preserve its historical value.

Throughout this guide, we have discussed the importance of gathering the necessary supplies, testing for lead in paint, applying paint stripper, removing residue, sanding for a smooth finish, and choosing between a natural wood or stained finish. We have also explored adding the final touches and discussed the benefits of restoring antique furniture.

Restoring antique furniture not only allows beginners to unleash their creativity and customize their pieces but also offers potential cost savings compared to purchasing new furniture. By taking the time to restore these historical treasures, beginners can create unique and personal pieces that will be cherished for years to come.

FAQ

What are the essential supplies needed for antique furniture restoration?

The necessary supplies include paint stripper, sanding tools, sealant, and paint or stain. It’s also important to have protective gear such as gloves and eyewear.

How can I test antique furniture for lead-based paint?

Use lead test kits, like the one from 3M™, to determine if the furniture contains lead paint. Rub the swab on the test area and observe the color change to detect the presence of lead.

Which brand of paint stripper is recommended for antique furniture restoration?

Citristrip is a recommended brand of paint stripper for antique furniture restoration.

How should I apply paint stripper to antique furniture?

Apply the Citristrip generously using a chip brush, cover with plastic wrap, and leave it on for up to 24 hours before scraping off.

How do I remove residue from antique furniture after using paint stripper?

Use mineral spirits and scrubbing pads or toothpicks for hard-to-reach areas. Wipe down the furniture and allow it to dry before proceeding.

What is the recommended method of sanding antique furniture?

Use power sanders for larger, flat surfaces and sandpaper or sanding blocks for smaller areas. Sand with the grain of the wood and remove dust using tack cloths or a shop vac.

Should I leave the antique furniture in its natural state or apply a stain?

It depends on your preference. If you want to even out the wood’s color, you can apply a light coat of stain using a rag. Follow it up with water-based polyurethane for protection.

How can I enhance the look of my restored antique furniture?

Consider adding antique brass pulls or other decorative elements to enhance the overall appearance of the furniture.

What are the benefits of restoring antique furniture?

Restoring antique furniture helps preserve history, allows for customization, and can result in cost savings compared to purchasing new furniture.

Do you have any tips for successful antique furniture restoration?

Yes! Remember to be patient, plan carefully, and pay attention to detail throughout the restoration process.

Where can I find additional resources for learning about furniture restoration?

Books such as “Furniture Restoration Workshop” and “Furniture Restoration and Repair for Beginners” are recommended. Online platforms like CentsationalGirl and Design*Sponge offer inspiration and tutorials.

Posted on

DIY Antique Decor Projects: Vintage Charm Ideas

DIY antique decor projects

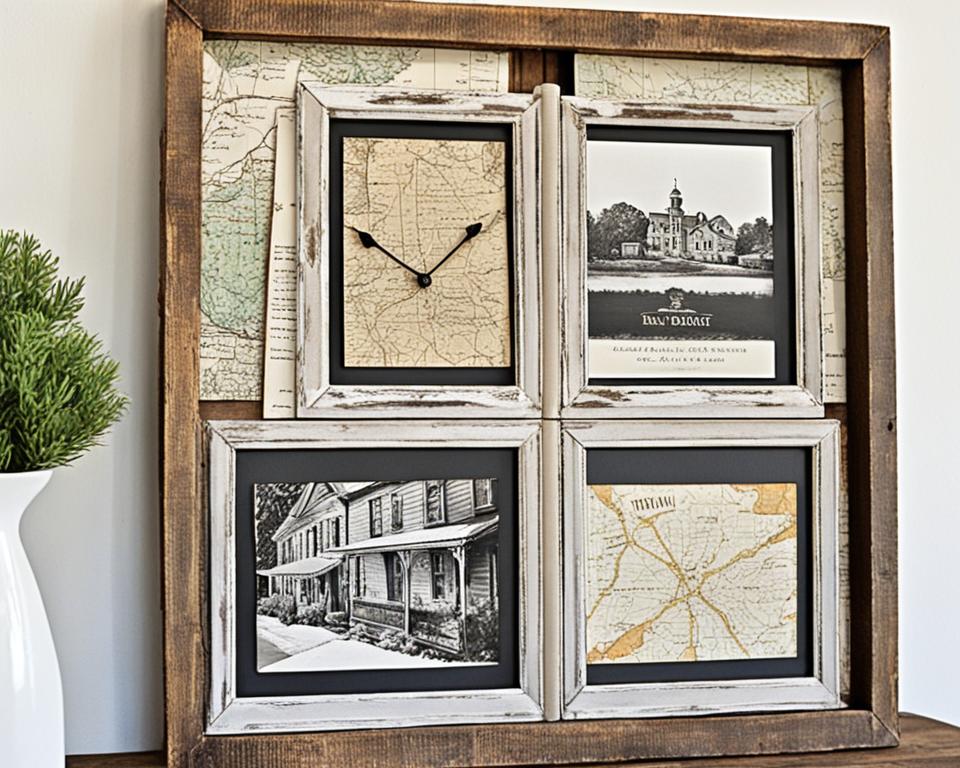
Incorporating vintage charm into your home can create a lived-in and welcoming look. Vintage charm is not limited to old or antique items, but can also be achieved through wallpaper, unique collections, and subtle choices like wooden tools and copper cookware. Adding vintage artwork, starting a collection, and using vintage-inspired kitchen essentials can also bring a touch of vintage elegance to your space. You can also explore vintage charm through built-ins and molding, as well as using wallpaper with the right pattern. By incorporating these DIY antique decor projects, you can transform your home with vintage charm and timeless elegance.

Key Takeaways:

  • DIY antique decor projects offer a budget-friendly way to bring vintage charm to your home.
  • Incorporate vintage artworks and start collections to personalize your space with vintage elegance.
  • Add vintage-inspired kitchen essentials and explore built-ins and molding for a true vintage charm.
  • Utilize vintage-inspired wallpapers to transform any room into a vintage haven.
  • Engage in DIY projects and decorative ideas to infuse your home with a cohesive vintage-inspired decor.

Whether you’re a fan of shabby chic crafts, antique furniture restoration, or easy DIY projects, there are plenty of ideas to help you achieve your desired vintage look. From repurposing antiques to creating farmhouse-style decor, the world of DIY antique decor projects is filled with endless possibilities. So roll up your sleeves, grab your tools, and let your creativity flow as you embark on a journey to transform your home into a charming vintage haven.

How to Add Vintage Charm to Your Home

To add vintage charm to your home, you can incorporate various elements that evoke a comforting and nostalgic feeling, reminiscent of simpler times. Vintage charm is not limited to old or antique items; it can also be achieved through unique collections, wood-handled kitchen tools, vintage-inspired wallpaper, and built-ins with decorative molding. By adding vintage charm to your home, you can create a cozy and inviting atmosphere that reflects your personal style.

Artwork

One way to bring vintage charm into your home is through incorporating vintage artwork. By exploring local antique and thrift stores, you can discover hidden artistic gems that will add elegance and charm to your space. Consider framing old photographs, love letters, recipe cards, or sentimental fabrics to create your own vintage-inspired art collection.

Collections

Starting a collection is another great way to infuse your home with vintage charm. Look for unique items such as vintage straw hats, white vases, or any other objects that bring joy and style to your space. Displaying these collections can create a charming and personalized vintage aesthetic that reflects your taste and adds a touch of elegance.

Kitchen Essentials

When it comes to adding vintage charm to your kitchen, pay attention to the small details. Opt for vintage-inspired kitchen essentials such as wooden utensils, copper or cast iron cookware, and glass jars for pantry storage. Consider framing a vintage recipe card, displaying an apron, or using a vintage wood table to complete the vintage look. These small touches will transform your kitchen into a nostalgic haven.

Built-ins and Molding

Built-ins and molding with decorative details can add character and vintage elegance to your home. Consider incorporating board and batten, beadboard, or a peg rail for a cozy cottage vibe. Explore built-ins with corbels, beadboard, and built-in lights to enhance the vintage charm of your space. Custom cabinetry or DIY versions can achieve the desired effect and elevate the overall aesthetic of your home.

Wallpaper

Choosing the right vintage-inspired wallpaper can instantly transform any room in your home. Deep navy wallpaper with whimsical patterns like foxes, bunnies, bees, or foliage can add a whole lot of charm to your space. Brands specializing in vintage-inspired wallpapers, like Lake August, offer a variety of options that capture the classic look and feel you desire.

Adding vintage charm to your home creates a warm and inviting space that reflects your personal style and brings a sense of nostalgia. By incorporating elements such as artwork, collections, vintage-inspired kitchen essentials, built-ins and molding, and wallpaper, you can easily achieve that timeless and elegant vintage aesthetic. Let the vintage charm embrace you and transform your home into a welcoming haven filled with nostalgia and character.

Vintage Charm: Artwork

Vintage artwork can add a touch of elegance and charm to your home. Whether you’re an art enthusiast or simply looking for a unique way to personalize your space, incorporating vintage art into your decor is a great choice. By exploring local antique and thrift stores, as well as discovering contemporary painters who capture the nostalgic feelings of the past, you can create a captivating art collection that reflects your style and adds a timeless touch of vintage charm.

“Vintage artwork can transport you to another time and place, evoking emotions and memories. It’s like having a window to the past in your own home.”

When building your vintage art collection, consider the following ideas:

  • Look for unique vintage art pieces that resonate with you.
  • Explore various art mediums, such as paintings, sketches, or prints.
  • Consider the theme or style of the artwork that aligns with your overall decor.
  • Frame old photographs, love letters, recipe cards, or sentimental fabrics to create your own vintage-inspired art.
  • Display your vintage art collection in a gallery wall or create a dedicated corner to showcase your favorite pieces.

By incorporating vintage artwork into your decor, you not only add visual interest but also infuse your space with a sense of history and charm. It’s an opportunity to tell stories and spark conversations while creating a personalized and inviting atmosphere.

Benefits of Vintage Artwork Ways to Incorporate Vintage Artwork
  • Timeless elegance
  • Unique and one-of-a-kind
  • Enhances the vintage charm of your space
  • Elevates the overall aesthetic of your home
  • Creates a conversation starter
  • Gallery wall of vintage art
  • Curate a vintage art collection
  • Combine vintage and contemporary pieces
  • Create DIY vintage-inspired art
  • Use vintage art as a focal point in a room

With an array of vintage artwork options available, from classic paintings to nostalgic prints, you can find pieces that resonate with your personal style and add a touch of sophistication to your home. Explore the world of vintage art and let your imagination guide you in creating a curated collection that truly reflects your unique taste and love for all things vintage.

Vintage Charm: Start a Collection

Starting a collection is a great way to infuse your home with vintage charm. By curating a collection of unique vintage treasures, you can add a touch of elegance and personality to your space. Whether it’s vintage straw hats, delicate white vases, or any other items that bring you joy, these collections can become stylish focal points in your home decor.

When starting your vintage collection, consider items that resonate with your personal style and home aesthetic. Look for pieces that speak to you and evoke a sense of nostalgia. Flea markets, antique stores, and thrift shops are treasure troves where you can find affordable vintage items for your collection.

Creating a charming display of your vintage collection can transform any room. Place your treasures on shelves, in glass cabinets, or on wall-mounted displays. Let your collection shine and become a conversation starter for guests entering your home.

Item Description Image
Vintage Straw Hats A collection of straw hats with different ribbon colors and decorative details.
White Vases A collection of white ceramic vases in various shapes and sizes.
Porcelain Figurines An assortment of delicate porcelain figurines depicting animals and characters. porcelain figurines

“Starting a vintage collection is like embarking on a treasure hunt; you never know what unique and beautiful items you’ll find along the way.”

As you expand your vintage collection, remember to be selective and only acquire pieces that truly resonate with you. Each addition should enhance the charm and character of your space.

Display Tips:

  • Group items together by theme, color, or era.
  • Use different heights and sizes to create visual interest.
  • Combine vintage treasures with other decor elements for a curated look.
  • Regularly dust and clean your collection to keep it looking its best.

By starting a vintage collection, you can bring a unique and personalized touch to your home decor. Each item tells a story and adds a layer of history and nostalgia to your space. So go out and explore the world of vintage treasures, and let your collection be a reflection of your style and appreciation for the beauty of the past.

Vintage Charm: Kitchen Essentials

Adding vintage charm to your kitchen can be achieved through simple and subtle choices. Opting for wooden tools instead of steel or plastic, choosing copper or cast iron cookware, and displaying frequently used pantry items in glass jars can instantly evoke a vintage look and feel.

Framing a vintage recipe card, displaying an apron, using a vintage wood table, and considering antique knobs and drawer pulls for your cabinets are other ways to incorporate vintage charm into your kitchen. By selecting vintage-inspired kitchen essentials, you can create a charming and nostalgic atmosphere in your culinary space.

Vintage Kitchen Essentials

Essential Description
Wooden Tools Swap out modern steel or plastic utensils for vintage-inspired wooden spoons, spatulas, and cutting boards.
Copper or Cast Iron Cookware Add a touch of vintage elegance with copper pots and pans or cast iron skillets.
Glass Jar Pantry Storage Show off dry goods like pasta, grains, and spices in glass jars for a vintage-inspired display.
Vintage Recipe Card Frame a cherished family recipe card and hang it in your kitchen for a sentimental touch.
Vintage Wood Table Introduce a vintage element with a beautiful wooden table as the centerpiece of your kitchen.
Antique Knobs and Drawer Pulls Upgrade your cabinet hardware with vintage-inspired knobs and pulls for a charming look.

By incorporating these vintage kitchen essentials, you can create a welcoming and nostalgic ambiance in your kitchen, transforming it into a space with timeless charm.

Vintage Charm: Built-ins and Molding

Built-ins and molding can add character and charm to your home, creating a vintage-inspired atmosphere. By incorporating these architectural elements, you can bring a touch of vintage elegance to your space, enhancing its overall aesthetic.

One way to achieve a cozy, cottage vibe is by adding board and batten, beadboard, or a peg rail to your walls. These decorative accents instantly transform a room and give it a nostalgic feel.

Built-ins with intricate details like corbels, beadboard, and built-in lights can further enhance the vintage charm of your space. Whether it’s a bookshelf, a built-in desk, or a window seat, these custom additions can be both functional and visually appealing.

If custom cabinetry is not an option, don’t worry! There are plenty of DIY versions available that can achieve the same effect. You can repurpose vintage cabinets or even build your own from scratch with easy-to-follow tutorials and guides.

By incorporating built-ins and molding into your home decor, you not only bring a touch of vintage elegance but also add architectural interest to your space. These elements create depth and visual appeal, making your home stand out with its unique charm.

Example of Vintage Built-ins and Molding

Before After
Vintage built-ins after

Adding built-ins and molding can completely transform a space. In the “before” photo, the room appears plain and lacking character. However, the “after” photo showcases how the addition of built-ins and molding brings depth and vintage charm to the room.

With carefully chosen details like decorative trim and vintage-inspired hardware, built-ins can seamlessly blend with your existing decor and create a cohesive vintage aesthetic.

Whether you choose to incorporate built-ins and molding through DIY projects or seek professional help, these vintage-inspired elements can truly elevate your home decor, infusing it with a nostalgic charm that will never go out of style.

Vintage Charm: Wallpaper

Wallpaper can be a powerful tool for creating a vintage charm look. By selecting the right pattern, you can emulate a sweet cottage vintage charm aesthetic in your home. Consider deep navy wallpaper with whimsical patterns like foxes, bunnies, bees, or foliage to add a whole lot of charm to your space.

Lake August is a renowned brand that specializes in creating wallpapers that capture the vintage charm look. Their collections feature stunning vintage-inspired patterns that can transform any room into a nostalgic haven. With an array of designs to choose from, you can find the perfect vintage wallpaper to suit your taste and enhance the timeless elegance of your space.

To give you an idea of the charming impact vintage-inspired wallpaper can have, take a look at this lovely example:

“Vintage-inspired wallpaper can completely change the atmosphere of a room. It adds depth and character while evoking a sense of nostalgia. It’s like bringing a piece of the past into your present.” – Jane Thompson, interior designer

Where to Use Vintage-Inspired Wallpaper

Vintage-inspired wallpaper can be used in various rooms of your home to infuse them with vintage charm. Here are some ideas to get you started:

  • Living Room: Create a focal point by wallpapering an accent wall with a vintage-inspired pattern. This can instantly transform your living room into a warm and inviting space.
  • Bedroom: Bring a touch of romance to your bedroom by adorning the walls with soft floral vintage wallpaper. This can create a cozy and dreamy ambiance.
  • Dining Room: Make a statement in your dining room by lining the walls with vintage damask wallpaper. This can add sophistication and elegance to your space, creating a perfect backdrop for memorable dinner parties.
  • Bathroom: Add a hint of retro charm to your bathroom with vintage-inspired wallpaper featuring classic motifs like polka dots or geometric patterns. This can enhance the vintage aesthetic and bring a nostalgic feel to your daily routines.

Remember that vintage patterns don’t have to be limited to just the walls. You can also use vintage-inspired wallpaper to line the back of bookshelves, create unique drawer liners, or even frame and hang as artwork.

Embrace the beauty and versatility of vintage-inspired wallpaper to bring a touch of timeless elegance and vintage charm to your home.

Benefits of Vintage-Inspired Wallpaper Points to Consider
  • Adds character and depth to a space
  • Evoke a sense of nostalgia and warmth
  • Transforms ordinary rooms into vintage havens
  • Complements various interior design styles
  • Available in a wide range of patterns and colors
  • Consider the scale of the pattern, ensuring it works well with the size of the room
  • Take into account the existing furniture and decor in the space to ensure cohesive design
  • Consider hiring a professional for installation if you’re not confident in your DIY skills

DIY Vintage Decor Projects

If you want to bring vintage charm to your home without spending a lot of money, DIY projects are a great option. There are numerous easy and affordable DIY projects that can give your home a vintage look, such as creating vintage plates wall decor, repurposing wooden crates into a vintage boot rack, turning old drawers into storage containers, making photo pendants, and distressing furniture to achieve a vintage feel. Additionally, you can dye jars to resemble vintage glass and create charming lace balls, wooden spools, and teacup lights to add a whimsical touch to your home. By embracing DIY projects, you can transform your home into a vintage lover’s dream without breaking the bank.

DIY Vintage Plates Wall Decor

Turn your collection of vintage plates into stunning wall decor. Select a mix of plates with different patterns and sizes, then arrange them on the wall to create a visually appealing display. You can use adhesive plate hangers to easily hang the plates and create a beautiful focal point in any room.

Repurposed Wooden Crates

Give old wooden crates a new lease on life by repurposing them into a vintage boot rack. Attach the crates together vertically, leaving enough space between them to accommodate boots. Paint the crates in a vintage-inspired color, such as distressed white or pale blue, and add a coat of clear varnish for a polished look. Place the boot rack near the entryway for a charming vintage touch.

Upcycled Drawer Storage Containers

Transform old drawers into stylish storage containers for your home. Remove the drawer fronts and paint the remaining wooden frames in vintage colors like soft pink or mint green. Line the insides of the drawers with patterned paper or fabric to add an extra touch of vintage charm. Use these upcycled storage containers to organize small items, such as craft supplies, jewelry, or office supplies.

Photo Pendants

Create personalized vintage-inspired jewelry with photo pendants. Print out small vintage photos or cut out images from old magazines or books. Using clear glass cabochon pendants, adhere the images to the back of the cabochons using strong adhesive. Attach a jump ring to the top of each pendant and string them on a chain or ribbon for a unique accessory with a nostalgic touch.

Distressed Furniture

Add a vintage feel to your furniture by distressing it. Use sandpaper or a paint scraper to gently remove layers of paint and expose the wooden surface underneath. Focus on areas that would naturally wear over time, such as edges, corners, and raised details. You can also use a tinted glaze or wax to give the furniture an aged patina. This DIY technique can breathe new life into old furniture and create a charming vintage look.

DIY Vintage Decor Project Description
Vintage Plates Wall Decor Create a stunning display using vintage plates arranged on the wall.
Repurposed Wooden Crates Transform old wooden crates into a vintage-inspired boot rack.
Upcycled Drawer Storage Containers Turn old drawers into stylish storage containers for organizing.
Photo Pendants Create personalized vintage jewelry using photo pendants.
Distressed Furniture Add a vintage touch to your furniture by distressing and aging it.

Decorative Vintage Ideas

Create a charming and nostalgic atmosphere in your home with these decorative vintage ideas. Incorporating vintage decor pieces and DIY crafts can add a touch of old-world elegance to any room.

1. Vintage Items

Add a touch of vintage charm by surrounding yourself with curated vintage items. Display vintage plates on a wall, hang antique keys as decorative accents, and arrange vintage books on a shelf. These small details can lend a sense of history and sophistication to your home.

2. Vintage Jewelry Boxes

Utilize vintage jewelry boxes as decorative pieces to add a touch of elegance to your space. These boxes not only provide storage for your precious jewelry but also serve as beautiful decor items. Place them on dressers, nightstands, or mantels for a vintage-inspired touch.

3. Antique Mirrors

Add a statement piece to your decor with an antique mirror. The intricate designs and aged patina of vintage mirrors can create a focal point in any room. Hang them on walls or lean them against a mantel for a touch of vintage elegance.

4. Vintage Dishes

Transform your dining area with vintage dishes as decor pieces. Display vintage tea sets or delicate china plates on open shelves or in glass-front cabinets. These vintage dishes will not only add character to your space but also create a timeless and elegant atmosphere.

5. Wooden Spools

Repurpose wooden spools as unique and rustic decorative accents. Use them as candle holders, display them as small sculptures, or thread twine through them for a DIY vintage-inspired garland. The possibilities are endless, and they can add a touch of whimsy and nostalgia to your home.

6. Teacups

Bring a touch of vintage charm to your home by incorporating teacups into your decor. Use them as planters for small succulents or display them on a tiered stand as a decorative centerpiece. Teacups add a delicate and feminine touch to any room.

7. Vintage Suitcases

Repurpose vintage suitcases as stylish storage solutions and decorative accents. Stack them to create a unique side table, use them as decorative storage bins for blankets or pillows, or display them open as decorative props. Vintage suitcases not only add a touch of nostalgia but also provide functionality and storage.

Decorative Vintage Ideas Description
Vintage Items Display vintage plates, antique keys, and vintage books as decorative accents to add a touch of history and sophistication to your home.
Vintage Jewelry Boxes Utilize vintage jewelry boxes as both storage and decorative pieces for an elegant touch in your space.
Antique Mirrors Add a statement piece to your decor with antique mirrors that create a focal point in any room.
Vintage Dishes Display vintage tea sets and delicate china plates to add character and create a timeless atmosphere in your dining area.
Wooden Spools Repurpose wooden spools as rustic decorative accents, such as candle holders or DIY garlands, to add a touch of whimsy to your home.
Teacups Incorporate teacups into your decor as planters or display them on a tiered stand for a delicate and feminine touch.
Vintage Suitcases Repurpose vintage suitcases as stylish storage solutions or display them open as decorative props for a touch of nostalgia.

By incorporating these decorative vintage ideas, you can create a cohesive and charming vintage-inspired home decor that reflects your personal style and adds a timeless touch of elegance.

Vintage-Inspired Lighting

Vintage-inspired lighting is a captivating way to add a warm and nostalgic atmosphere to your home. By incorporating vintage lamps, pendant lights, and vintage-inspired light fixtures, you can enhance the overall vintage charm of your space. These lighting elements not only serve a functional purpose but also contribute to the aesthetics of your decor.

One way to brighten a room and create a focal point is by incorporating vintage lamps with mirrors. The combination of vintage lighting and antique mirrors can create a visually stunning display. The mirrors reflect the light and create the illusion of a larger and brighter space, adding depth and dimension to your home.

Hanging pendant lights are another popular choice for infusing vintage charm into your space. Whether you choose simple and elegant pendant lights with a vintage-inspired design or opt for more ornate fixtures, they can instantly transform the ambiance of any room. Pendant lights provide both functional and decorative lighting, making them a versatile choice for vintage-inspired decor.

Using vintage-inspired light fixtures throughout your home can further enhance the vintage charm. Chandeliers, sconces, and ceiling light fixtures with unique and intricate designs can serve as focal points and add a touch of elegance to your space. Vintage-inspired light fixtures come in a variety of styles, from industrial to art deco, allowing you to find the perfect match for your home’s aesthetic.

To help you envision how vintage-inspired lighting can enhance your home, here’s a table showcasing some popular vintage lighting options:

Lighting Type Description Image
Vintage Table Lamp A small table lamp with intricate detailing and a vintage-inspired shade.
Vintage Pendant Light A hanging pendant light fixture with a vintage design and an adjustable chain.
Vintage Chandelier A grand and ornate chandelier with multiple arms and vintage-style bulbs.

By carefully selecting and placing vintage lighting elements, you can create a captivating ambiance that complements the beauty of your decor. Whether you prefer a cozy and nostalgic atmosphere or a more elegant and sophisticated vintage look, vintage-inspired lighting can help you achieve your desired aesthetic.

Conclusion

DIY antique decor projects offer a budget-friendly way to bring vintage charm to your home. By incorporating vintage-inspired artwork, starting collections, and using vintage kitchen essentials, you can infuse your space with a cozy and nostalgic atmosphere. Built-ins, wallpaper, and DIY projects allow you to customize your home and create a unique vintage look. Decorative vintage ideas can add a touch of elegance and whimsy, while vintage-inspired lighting can enhance the overall ambiance. By embracing these DIY antique decor projects and incorporating vintage-inspired elements, you can transform your home into a charming vintage haven.

FAQ

What are some DIY antique decor projects I can try?

There are numerous easy and affordable DIY projects you can try to give your home a vintage look. Some ideas include creating vintage plates wall decor, repurposing wooden crates into a vintage boot rack, turning old drawers into storage containers, making photo pendants, and distressing furniture to achieve a vintage feel. Additionally, you can dye jars to resemble vintage glass and create charming lace balls, wooden spools, and teacup lights to add a whimsical touch to your home.

How can I add vintage charm to my home?

To add vintage charm to your home, you can incorporate various elements such as artwork, collections, and vintage-inspired kitchen essentials. Vintage charm evokes a comforting and nostalgic feeling, reminiscent of simpler times. It can be created not only with old or antique items but also through unique collections, wood-handled kitchen tools, vintage-inspired wallpaper, and built-ins with decorative molding. By adding vintage charm to your home, you can create a cozy and inviting atmosphere that reflects your personal style.

How can I incorporate vintage artwork into my decor?

Vintage artwork can add a touch of elegance and charm to your home. You can create a unique art collection by exploring local antique and thrift stores, as well as discovering contemporary painters who evoke the nostalgic feelings of the past. You can also frame old photographs, love letters, recipe cards, or sentimental fabrics to create your own vintage-inspired art. By incorporating vintage artwork into your decor, you can personalize your space and add a timeless touch of vintage charm.

What are some tips for starting a vintage collection?

Starting a collection is a great way to infuse your home with vintage charm. You can create a charming display with vintage straw hats, white vases, or any other items that bring you joy and add a stylish touch to your home. Collecting vintage items allows you to curate a unique space that reflects your personal style and adds a touch of vintage elegance. By exploring flea markets and thrift stores, you can find affordable treasures that will enhance the vintage charm of your home.

How can I incorporate vintage charm into my kitchen?

Adding vintage charm to your kitchen can be achieved through simple and subtle choices. Opting for wooden tools instead of steel or plastic, choosing copper or cast iron cookware, and displaying frequently used pantry items in glass jars can instantly evoke a vintage look and feel. Framing a vintage recipe card, displaying an apron, using a vintage wood table, and considering antique knobs and drawer pulls for your cabinets are other ways to incorporate vintage charm into your kitchen. By selecting vintage-inspired kitchen essentials, you can create a charming and nostalgic atmosphere in your culinary space.

How can built-ins and molding add vintage charm to my home?

Built-ins and molding can add character and charm to your home, creating a vintage-inspired atmosphere. Adding board and batten, beadboard, or a peg rail can instantly transform a room and give it a cozy, cottage vibe. Built-ins with decorative details like corbels, beadboard, and built-in lights can enhance the vintage charm of your space. Custom cabinetry is an option, but you can also find DIY versions that achieve the same effect. Incorporating built-ins and molding into your home decor can bring a touch of vintage elegance and add architectural interest to your space.

How can I use wallpaper to create a vintage charm look?

Wallpaper can be a powerful tool for creating a vintage charm look. Selecting the right pattern can emulate a sweet cottage vintage charm aesthetic. Deep navy wallpaper with whimsical patterns like foxes, bunnies, bees, or foliage can add a whole lot of charm to your space. Brands like Lake August specialize in creating wallpapers that capture the vintage charm look. By incorporating vintage-inspired wallpaper, you can transform any room in your home and infuse it with the timeless elegance of the past.

What are some easy DIY vintage decor projects?

If you want to bring vintage charm to your home without spending a lot of money, DIY projects are a great option. There are numerous easy and affordable DIY projects that can give your home a vintage look, such as creating vintage plates wall decor, repurposing wooden crates into a vintage boot rack, turning old drawers into storage containers, making photo pendants, and distressing furniture to achieve a vintage feel. Additionally, you can dye jars to resemble vintage glass and create charming lace balls, wooden spools, and teacup lights to add a whimsical touch to your home. By embracing DIY projects, you can transform your home into a vintage lover’s dream without breaking the bank.

What are some decorative vintage ideas for my home?

Vintage decor can be achieved through various DIY projects and decorative ideas. Surrounding yourself with vintage items like plates, keys, and books can lend a touch of old-world charm to your home. Incorporating vintage jewelry boxes, antique mirrors, and vintage dishes as decor pieces can bring style and elegance to your space. Additionally, using wooden spools, teacups, and suitcases for storage and display purposes can add a vintage flair to any room. By incorporating these decorative vintage ideas, you can create a cohesive and charming vintage-inspired home decor.

How can vintage-inspired lighting enhance the vintage charm of my home?

Vintage-inspired lighting can add a warm and nostalgic atmosphere to your home. Incorporating vintage lamps with mirrors can brighten a room and create a focal point. Hanging pendant lights and using vintage-inspired light fixtures can enhance the overall vintage charm of your space. By carefully selecting and placing vintage lighting elements, you can create a captivating ambiance and highlight the beauty of your decor. Vintage mirrors can also be used strategically to reflect light and create the illusion of a larger space. By embracing vintage-inspired lighting, you can add a touch of elegance and sophistication to your home.

Posted on

Antique Wood Furniture Care Tips & Tricks

Antique wood furniture care

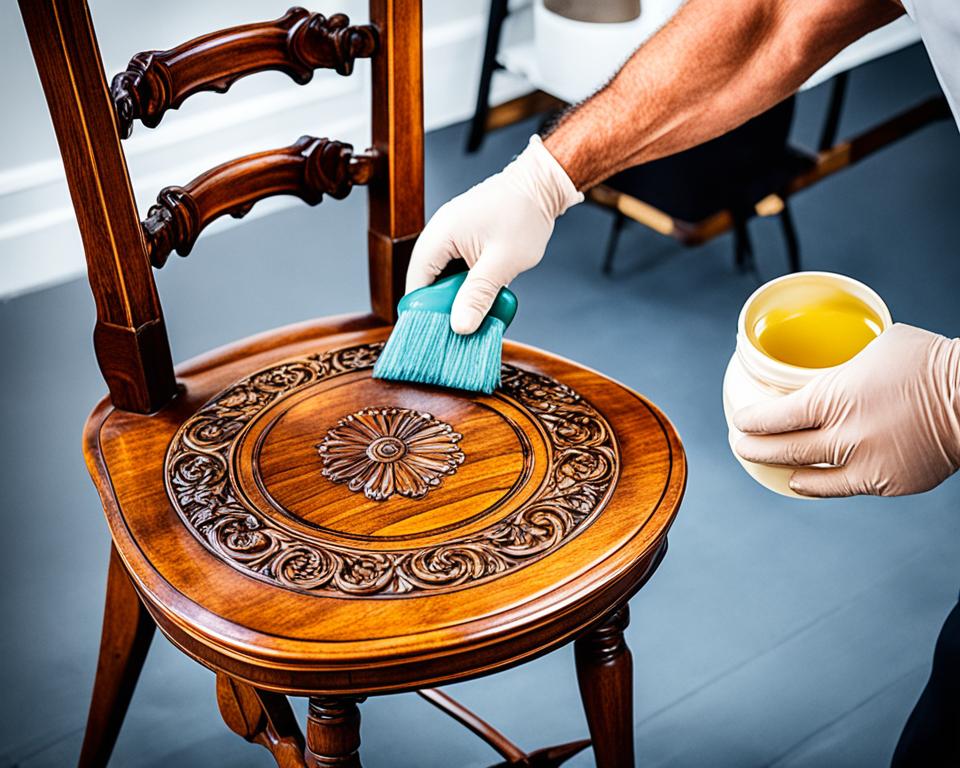
Cleaning antique wood furniture is crucial for preserving its value and appearance. By properly caring for your antique pieces, you can bring out their natural beauty and protect them from damage. In this guide, we will provide you with expert tips and tricks on how to clean and maintain your antique wood furniture.

Whether you have inherited a family heirloom or found a hidden gem at a vintage store, antique wood furniture requires special attention to keep it looking its best. Regular maintenance and cleaning can help extend the lifespan of these timeless pieces and enhance their charm.

Key Takeaways:

  • Properly cleaning antique wood furniture is essential for preserving its value and appearance.
  • Determine the type of wood finish before cleaning to ensure the right approach.
  • Use appropriate cleaning solutions and techniques to protect the wood and prevent damage.
  • Waxing can provide additional protection and enhance the beauty of antique wood furniture.
  • Avoid common mistakes and damaging practices when caring for antique wood furniture.

Determining the Wood Finish

Before you start cleaning your antique wood furniture, it is important to determine the type of wood finish it has. This will help you choose the right cleaning method and avoid damaging the furniture.

To determine the wood finish, you can perform a simple test using denatured alcohol. Here’s how:

  1. Select an inconspicuous area of the furniture where the test won’t be noticeable.
  2. Apply a small amount of denatured alcohol to a clean cloth or cotton ball.
  3. Gently rub the alcohol onto the chosen area of the wood.
  4. Observe how the wood reacts to the alcohol.

If the finish dissolves or becomes sticky, it is likely shellac. Shellac finishes typically require refinishing and may be more delicate and sensitive to certain cleaning methods. It’s best to consult a professional for shellac finishes.

If the finish remains unchanged, it is likely lacquer, polyurethane, varnish, or oil. These finishes are more durable and can be cleaned using the methods we will discuss later in this guide.

Note: It’s important to perform this test in an inconspicuous area to avoid damaging the furniture. If in doubt, always consult a professional before attempting any cleaning or restoration techniques.

Example:

“I was unsure about the type of finish on my antique table, so I decided to perform the denatured alcohol test. I applied a small amount of alcohol to a cloth and gently rubbed it on an inconspicuous area. To my relief, the finish remained unchanged, indicating a durable lacquer. This allowed me to proceed confidently with the cleaning process. It’s always better to be safe than sorry when it comes to cleaning delicate antiques!” – Amanda, Antique Furniture Enthusiast

Wood Finish Description
Shellac A traditional finish with a lustrous appearance, but it can be more susceptible to damage and may require refinishing.
Lacquer A durable and glossy finish commonly used on antique furniture.
Polyurethane A tough and resistant finish that provides excellent protection.
Varnish A transparent, hard finish that enhances the natural beauty of the wood.
Oil A popular finish that penetrates the wood for a natural look and feel.

Table: Types of Wood Finishes

Cleaning Antique Wood Furniture: Step by Step

Once you have determined the wood finish of your antique furniture, it’s time to start the cleaning process. By following a step-by-step approach, you can ensure that your wood furniture is properly cared for and maintains its timeless beauty. Here’s a guide to help you clean your antique wood furniture:

Gather Supplies

Before you begin cleaning, gather the necessary supplies to make the process seamless. You will need:

  • Oil soap
  • Cotton cloths
  • A small mixing bowl
  • Measuring cup
  • Fork or whisk
  • Rubber gloves

Create a Cleaning Solution

Mix oil soap with water in the small mixing bowl. Follow the ratio recommended on the oil soap packaging to ensure proper dilution. Stir the mixture with a fork or whisk until well combined.

Clean the Furniture

With your cleaning solution and cotton cloth ready, you can now start cleaning your antique wood furniture:

  1. Dampen a clean cotton cloth with the cleaning solution.
  2. Begin cleaning the furniture, ensuring to follow the direction of the wood grain.
  3. Use circular motions to gently clean away any dirt or grime.

Dry Thoroughly

After cleaning the furniture, it is crucial to dry it thoroughly to prevent any moisture damage. Use a dry cotton cloth to wipe away any residual moisture and ensure the wood is completely dry.

By following this step-by-step cleaning process, you can effectively remove dirt, restore the natural beauty of your antique wood furniture, and preserve it for future generations to enjoy.

Cleaning Antique Wood Furniture with Mildew

If your antique wood furniture has been affected by mildew, it requires special attention to ensure its restoration. To effectively remove mildew and restore the original beauty, gather the following supplies:

  • Distilled white vinegar
  • An air mask
  • Goggles
  • Rubber gloves
  • Cotton cloths
  • Linseed oil, olive oil, or vegetable oil

To begin the cleaning process, follow these steps:

  1. Clean the furniture surface using a soft cloth, removing any loose dirt or debris.
  2. Prepare a cleaning solution by mixing equal parts oil and distilled white vinegar in a bowl.
  3. Apply the cleaning solution onto a clean cotton cloth.
  4. Gently scrub the affected areas of the wood furniture with the cloth, ensuring to target the mildew growth.
  5. Continue wiping away the loosened mildew until the surface is clean.
  6. If necessary, repeat the process to completely remove the mildew.

Remember to always wear protective gear like an air mask, goggles, and rubber gloves when dealing with mildew. Proper ventilation is essential to avoid inhaling any harmful particles during the cleaning process.

Once you have successfully removed the mildew, consider applying a thin layer of linseed oil, olive oil, or vegetable oil to the antique wood furniture to restore its natural luster and provide protection against future damage. Use a clean cotton cloth to gently apply the oil in the direction of the wood grain.

By following these steps, you can effectively clean your antique wood furniture from mildew and restore its beauty to its former glory.

<!–

Quote: “Cleaning antique wood furniture with mildew requires patience and attention to detail. The vinegar cleaning solution is an effective and affordable method that restores the wood’s natural beauty while eliminating mildew. Remember to test the solution on a small, inconspicuous area of the furniture before proceeding with the cleaning process.” – Jane Smith, Antique Furniture Expert

–>

Waxing Antique Wood Furniture

Waxing your antique wood furniture is a crucial step in maintaining its beauty and protecting it from damage. By applying furniture wax to your cherished pieces, you can add an additional layer of protection that helps seal the wood and keep it looking its best for years to come.

After thoroughly cleaning your antique wood furniture using the appropriate methods, such as the ones discussed in the previous sections, it’s time to apply the wax. Choose a high-quality furniture wax specifically designed for use on wood surfaces. This ensures that the wax will not contain any abrasive or harmful ingredients that could potentially damage the antique wood.

Before applying the wax, ensure that the furniture is completely dry. This prevents any moisture from being trapped beneath the wax and causing damage to the wood. Once dry, take a soft, dry rag and apply a thin, even layer of wax to the surface of the furniture. Work in small sections, applying the wax in circular motions, following the direction of the wood grain.

After applying the wax, allow it to dry according to the manufacturer’s instructions. This typically takes a few minutes to an hour, depending on the type of wax used. Once dry, take a clean, soft rag and begin buffing the waxed surface. Use firm but gentle circular motions to create a lustrous sheen and remove any excess wax.

Waxing is an optional step in the cleaning and maintenance process of antique wood furniture, but it is highly recommended for long-term preservation. The wax creates a protective barrier that helps guard against stains, moisture, and everyday wear and tear. Additionally, waxing enhances the natural beauty of the wood, bringing out its rich tones and textures.

Remember, it’s always important to test any new wax or waxing product on an inconspicuous area of the furniture first. This ensures that there are no adverse reactions or discoloration before applying the wax to the entire piece.

By incorporating waxing into your regular cleaning routine, you can maintain the beauty and longevity of your antique wood furniture. The added protection and stunning finish provided by waxing will keep your cherished pieces looking their best for generations to come.

waxing antique wood furniture

Benefits of Waxing Antique Wood Furniture:

Cleaning Method Effectiveness Ease of Use Cost
Vinegar Cleaning Solution Excellent Easy Affordable
Hydrogen Peroxide Good Moderate Moderate
Bleach Effective, but may damage wood Requires caution Low cost
Benefits Description
Enhances beauty Waxing brings out the natural colors and textures of the wood, adding a lustrous sheen.
Protects from stains The wax creates a barrier that shields the wood from spills, preventing permanent stains.
Guards against moisture The wax helps seal the wood, reducing the risk of moisture damage and warping.
Prevents wear and tear Waxing provides a protective layer that helps minimize scratches and abrasions.

Deodorizing Antique Wood Furniture

If your antique wood furniture has a musty odor, there are natural deodorizers you can use to eliminate the smell. By addressing the underlying causes and using the right techniques, you can remove odors and restore the freshness of your cherished pieces.

Identifying and Addressing Underlying Causes

Before deodorizing, it’s important to identify and address any underlying causes of the odor. Musty smells can be a result of moisture or mold, which can lead to further damage if left untreated. Inspect the furniture thoroughly and take necessary steps to eliminate excess moisture and prevent mold growth. This may include fixing leaks, improving ventilation, or using dehumidifiers in the room.

Natural Deodorizers for Wood Furniture

“Using natural deodorizers is a safe and effective way to remove unpleasant odors from antique wood furniture.”

When it comes to deodorizing antique wood furniture, natural options are the preferred choice. These methods effectively absorb and neutralize odors without causing any harm to the wood or finishes. Two popular natural deodorizers for wood furniture are odor-eliminating volcanic rocks and baking soda.

  1. Odor-Eliminating Volcanic Rocks: These rocks are made from natural minerals, such as activated charcoal and zeolite, which have the ability to absorb and trap odors. Place a few rocks inside the furniture and let them sit for a couple of days to allow the absorption process to take place. Afterward, remove the rocks and discard them. The musty smell should be significantly reduced or eliminated.
  2. Baking Soda: Baking soda is a versatile natural deodorizer that can be used in many applications, including deodorizing wood furniture. Sprinkle a generous amount of baking soda on and inside the furniture, making sure to reach all affected areas. Let it sit for 24-48 hours to absorb the unpleasant odors, then vacuum or wipe away the baking soda. Repeat the process if necessary.

Remember to test these deodorizing methods on a small, inconspicuous area of the furniture before applying them extensively. This will help ensure that they do not cause any discoloration or damage to the wood.

Image: Antique wood furniture can benefit from natural deodorizers to remove musty odors.

By using natural deodorizers, you can effectively remove unpleasant odors from your antique wood furniture without resorting to harsh chemicals that may harm the wood or finishes. Remember to address any underlying causes of the odor and take preventive measures to maintain the freshness of your beloved antique pieces.

White Spirit Cleaning

In the process of deep cleaning antique wood furniture, white spirit can be a useful solvent. However, it should be handled with caution due to its harsh nature. To ensure the safety of your furniture, it is essential to perform a spot test on a small, inconspicuous area before using white spirit on the entire piece.

If the spot test proves safe and the finish remains intact, you can proceed with the white spirit cleaning method. Begin by applying a small amount of white spirit to a soft cloth. Gently rub the cloth along the wood grain, taking care to cover the entire surface.

After applying the white spirit, be sure to thoroughly wipe away any residue to prevent damage. Remember, white spirit should only be used as a deep cleaning method on antique wood furniture when safer alternatives have not yielded satisfactory results.

Pros Cons
Effective for removing tough dirt and grime Harsh solvent that requires caution
Can penetrate deep into the wood for a thorough clean May cause damage to certain wood finishes
Can restore the natural beauty of the wood Not recommended for regular or routine cleaning

General Cleaning Tips for Antique Wood Furniture

In addition to the specific cleaning methods mentioned above, there are some general tips to keep in mind when caring for antique wood furniture. By following these tips, you can maintain the beauty and longevity of your cherished pieces.

Avoid Washing with Water

One important tip is to avoid washing antique wood furniture with water. Excessive moisture can cause warping and damage the wood over time. Instead, use alternative cleaning methods that do not involve water.

Use Coasters or Placemats

To protect the surface of your antique wood furniture from heat, moisture, and stains, always use coasters or placemats. These simple accessories can prevent damage and maintain the pristine condition of the wood.

Regular Dusting and Polishing

To keep your antique wood furniture looking its best, make sure to regularly dust and polish it. Use a soft cloth to gently remove dust particles and apply a furniture polish specifically formulated for wood. This will help maintain the beauty and shine of the furniture’s surface.

By following these general cleaning tips, you can ensure that your antique wood furniture remains in excellent condition for generations to come.

What to Avoid When Cleaning Antique Wood Furniture

When it comes to cleaning antique wood furniture, it’s important to handle it with care and avoid practices that could potentially damage the wood. By steering clear of these common mistakes, you can preserve the beauty and integrity of your cherished pieces.

1. Avoid Using Normal Soap and Water

One common mistake is using regular soap and water to clean antique wood furniture. This can cause warping and damage to the wood. Instead, opt for specialized wood cleaners or natural solutions specifically designed for antique furniture.

2. Be Cautious with Cleaning Products that Require Heavy Dilution

Some cleaning products may contain chemicals that can react negatively with the wood. When using products that require heavy dilution, be cautious and test them on a small, inconspicuous area of the furniture first. If you notice any adverse effects, discontinue use immediately.

3. Avoid Abrasive Tools and Harsh Scrubbing

Using abrasive tools or scrubbing too hard can damage the delicate surface of antique wood furniture. Instead, use soft cloths or brushes with gentle bristles to remove dust and dirt. Gentle cleaning is key to preserving the original finish and minimizing the risk of scratches.

4. Steer Clear of Excessive Moisture

Excessive moisture can be detrimental to antique wood furniture, causing warping, discoloration, and even mold growth. Avoid using excessively wet cloths or soaking the furniture in water. Instead, use a damp cloth or sponge for cleaning, and then thoroughly dry the furniture to prevent moisture damage.

“When cleaning antique wood furniture, gentle approaches are often the best. Less is more when it comes to preserving these timeless pieces.”

5. Don’t Neglect Regular Dusting and Maintenance

Regular dusting is crucial to maintain the cleanliness and appearance of antique wood furniture. Dust buildup can attract moisture and accelerate the deterioration of the wood. Use a soft cloth or feather duster on a weekly basis to remove dust, and follow up with appropriate cleaning methods when necessary.

6. Avoid Exposing Antique Furniture to Direct Sunlight

Direct sunlight can cause the wood to fade and deteriorate over time. Avoid placing antique wood furniture in areas where it will be exposed to direct sunlight for extended periods. If sunlight is unavoidable, consider using UV-blocking window films or curtains to minimize damage.

By avoiding these common mistakes and adopting proper cleaning techniques, you can maintain the beauty and longevity of your antique wood furniture for generations to come.

preventing damage to wood furniture

Mistake Effect
Using regular soap and water Can cause warping and damage
Using cleaning products that require heavy dilution Chemical reactions with wood
Using abrasive tools and harsh scrubbing Causes scratches and damage to the surface
Excessive moisture Warping, discoloration, and potential mold growth
Neglecting regular dusting and maintenance Buildup of dust and accelerated deterioration
Exposing furniture to direct sunlight Fading and deterioration of the wood

Conclusion

Caring for antique wood furniture requires proper cleaning and maintenance techniques to preserve its beauty and value. By following the tips and tricks provided in this guide, you can ensure that your antique pieces remain in excellent condition for years to come.

Remember to always test any cleaning products on inconspicuous areas first and consult an expert if you are unsure about the best approach for your specific furniture. With the right care, your antique wood furniture will continue to be a cherished and beautiful part of your home.

In conclusion, maintaining antique wood furniture is a rewarding and worthwhile endeavor. Regular cleaning, using appropriate products, and protecting the furniture from harmful elements are essential steps in preserving its integrity. By investing time and effort into caring for your antique pieces, you can enjoy their timeless beauty and proudly pass them down through generations.

FAQ

Why is cleaning antique wood furniture important?

Cleaning antique wood furniture is crucial for preserving its value and appearance. Proper care helps bring out its natural beauty and protects it from damage.

How do I determine the wood finish of my antique furniture?

You can determine the wood finish by conducting a simple test using denatured alcohol. Apply a small amount of denatured alcohol to an inconspicuous area and observe how the wood reacts.

What supplies do I need to clean antique wood furniture?

You will need oil soap, cotton cloths, a small mixing bowl, measuring cup, fork or whisk, and rubber gloves to create a cleaning solution.

How do I clean antique wood furniture?

Wet a cloth with the cleaning solution and clean the furniture following the wood grain using circular motions. Afterward, make sure to dry the furniture thoroughly to prevent moisture damage.

How do I clean antique wood furniture with mildew?

Clean the furniture with a soft cloth, then mix equal parts oil and vinegar to create a cleaning solution. Apply the solution to the wood and wipe away the loosened mildew.

Should I wax my antique wood furniture?

Waxing your antique wood furniture can provide an additional layer of protection and enhance its beauty. After cleaning, apply furniture wax and buff it with a soft, dry rag.

How can I deodorize my antique wood furniture?

You can use natural deodorizers such as volcanic rocks or baking soda placed inside the furniture to absorb odors. Address any underlying causes of the odor to prevent future issues.

Can I use white spirit for deep cleaning antique wood furniture?

White spirit can be used for deep cleaning, but caution should be exercised as it is a harsh solvent. Perform a spot test first to ensure it doesn’t damage the finish.

Are there general tips for cleaning antique wood furniture?

Avoid washing with water, use coasters or placemats, and regularly dust and polish the furniture to keep it looking its best.

What should I avoid when cleaning antique wood furniture?

Avoid using normal soap and water, as well as cleaning products that require heavy dilution. Consult a furniture expert if unsure about the best cleaning methods.

Posted on

Antique Furniture Restoration Experts | Revive Charm

Antique furniture restoration

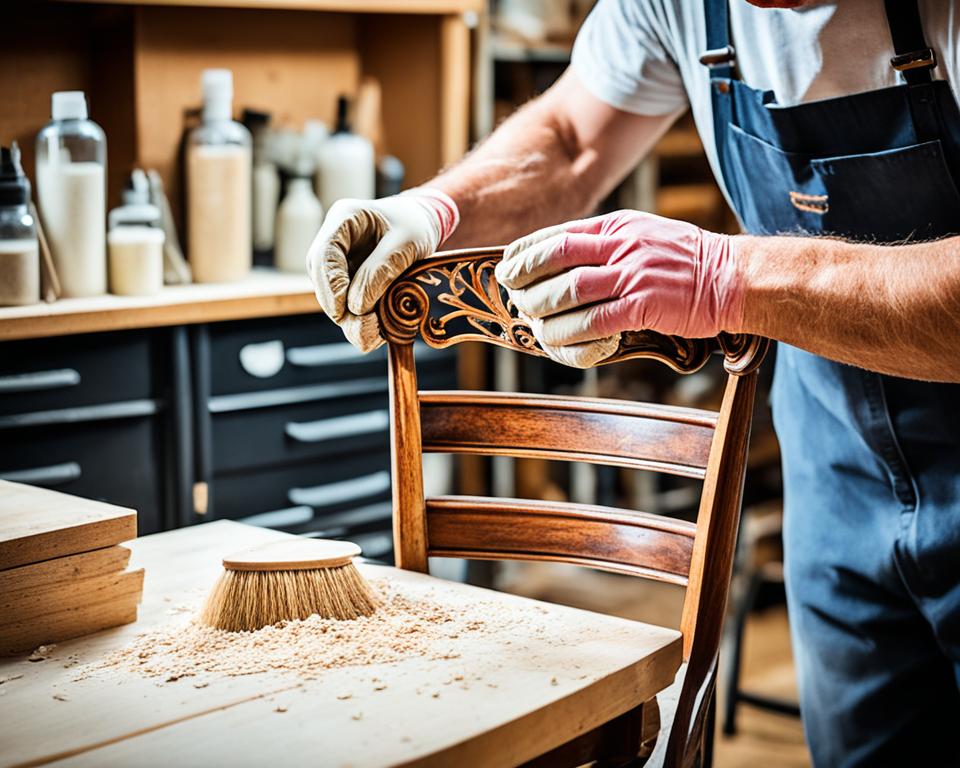
Antique furniture holds a unique charm and historical significance that deserves to be preserved and admired. However, the passage of time can take a toll on these cherished pieces, leaving them in need of expert care and restoration. That’s where antique furniture restoration experts come in.

At Revive Charm, our team of skilled and knowledgeable professionals specializes in the art of antique furniture restoration. With years of experience and a deep understanding of the intricacies involved, we strive to bring back the original beauty and functionality of every piece we work on.

Antique furniture restoration is not a task to be taken lightly. It requires a meticulous approach, a keen eye for detail, and a thorough understanding of historical techniques and materials. Our experts will carefully assess the condition of your antique furniture, provide personalized recommendations, and employ the appropriate restoration techniques to ensure the best possible results.

While it may be tempting to attempt a DIY restoration, it’s important to understand that antique furniture is delicate and requires professional expertise. DIY methods can often result in irreversible damage, compromising the value and integrity of the piece. Trusting your antique furniture to our restoration experts will ensure that it receives the care and attention it deserves.

Key Takeaways:

  • Antique furniture restoration is a specialized process that requires professional expertise.
  • Skilled craftsmen use techniques and materials true to the era of the piece to maintain authenticity.
  • Thorough research, assessment, and a personalized approach are essential in successful restoration.
  • Cleaning, repairing, and restoring antique furniture require specific techniques and attention to detail.
  • Professional assistance is recommended for extensive damage, woodworm treatment, and upholstery refinishing.

The Art of Antique Furniture Restoration

Antique furniture restoration is a meticulous and intricate process that requires the expertise of skilled craftsmen. These antique furniture experts possess extensive knowledge and experience in antique furniture restoration and understand the importance of preserving the authenticity and historical significance of each piece. The art of antique furniture restoration goes beyond mere repair; it involves honoring the craftsmanship of the past and bringing back the original beauty and functionality of the furniture.

During the antique furniture restoration process, the experts carefully examine the piece, assessing its condition and identifying any structural issues that may need attention. Whether it’s repairing loose joints, replacing missing parts, or restoring worn-out upholstery, the craftsmen employ the most suitable techniques and materials to seamlessly blend their repairs with the original piece. The goal is to ensure that the restoration is virtually undetectable, allowing the furniture to retain its timeless appeal.

One of the key aspects of antique furniture restoration is the commitment to using techniques and materials true to the era of the piece. By conducting thorough research on the furniture’s style, historical period, and construction methods, the experts can accurately replicate the original craftsmanship. This attention to detail ensures that the restored piece maintains its authenticity and historical value, making it a true masterpiece.

Antique furniture restoration is not merely a trade; it’s an art. It requires a deep understanding of the history, materials, and techniques used in different eras. Skilled craftsmen possess the ability to breathe new life into furniture that has stood the test of time, reviving its charm and allowing it to continue captivating generations to come.

When searching for furniture restoration services, it’s essential to choose reputable experts who specialize in antique furniture restoration. Their expertise and meticulous approach to every detail will ensure that your treasured piece receives the care and attention it deserves. By entrusting your antique furniture to these professionals, you can rest assured that it will be restored to its former glory, enabling you to enjoy its beauty and historical significance for years to come.

Continue reading to discover the intriguing process of antique furniture restoration and gain insights into the steps involved in reviving these timeless treasures.

The Process of Antique Furniture Restoration

Antique furniture restoration is a meticulous and intricate process that requires a comprehensive approach to breathe new life into cherished pieces. This section will guide you through the essential steps involved in restoring antique furniture to its former glory.

Thorough Research and Assessment

Before embarking on any restoration journey, it is crucial to conduct thorough research on the piece’s era and style. Understanding the historical context helps determine the appropriate restoration techniques and materials that align with the original craftsmanship. Once the research is complete, a comprehensive assessment of the furniture’s condition is conducted, identifying areas that require repair or refinishing.

Preservation and Enhancement Decisions

When restoring antique furniture, there are crucial decisions to be made regarding preservation and enhancement. Preservation involves maintaining the original elements of the piece, paying utmost respect to its historical significance and authenticity. On the other hand, enhancements may be made to certain elements to improve functionality or aesthetic appeal while staying true to the piece’s overall character.

Cleaning and Reviving

The next step in the restoration process is the careful cleaning and reviving of the antique furniture. The techniques employed for cleaning and reviving vary depending on the material of the piece. Wood furniture may require gentle cleaning to remove dirt and grime, while metal or upholstery restoration may involve more specialized cleaning methods.

“Antique furniture restoration is a blend of artistry and expertise, aimed at preserving the original beauty while reviving its functionality.”

Attention to Detail and Personalized Approach

Attention to detail is paramount throughout the entire antique furniture restoration process. Every minute element, from intricate carvings to delicate joinery, must be handled with precision and care. A personalized approach ensures that every restoration decision is tailored to bring out the unique charm and character of the furniture.

Collaborating with Furniture Restoration Specialists

While some restoration tasks can be done by enthusiasts, collaborating with experienced furniture restoration specialists is highly recommended for more complex projects. These specialists have the knowledge, skills, and access to specialized tools and materials necessary for achieving exceptional restoration results.

By following the meticulous process of antique furniture restoration, you can revive and preserve the beauty, craftsmanship, and historical significance of these treasured pieces for generations to come.

Cleaning and Reviving Antique Furniture

When it comes to antique furniture, proper cleaning and reviving techniques are essential to maintain its beauty and longevity. By removing dirt, grime, and old finishes without causing damage, you can bring life back to these cherished pieces. Whether you’re a DIY enthusiast or seeking professional assistance from furniture restoration specialists, here are some tips to help you in the process.

Gentle dusting or vacuuming is the first step in cleaning antique furniture. This helps to remove loose dirt and prevent scratches during deeper cleaning. Use a soft, lint-free cloth or a brush with natural bristles to carefully dust the surface.

Dealing with Stubborn Grime and Stains

For deeper cleaning, consider using suitable techniques based on the material of the furniture. Here are some methods to address stubborn grime and stains:

  • Wood: Use a mild soap solution or a wood cleaner specifically designed for antique furniture. Apply the solution with a soft cloth, following the grain of the wood. Avoid excessive moisture, and immediately dry the surface to prevent damage.
  • Metal: Use a metal cleaner or a solution of vinegar and water to remove tarnish or rust. Apply the cleaner with a soft cloth, gently scrubbing the affected areas. Rinse with clean water and dry thoroughly.
  • Upholstery: Consult a professional upholstery cleaner for delicate fabrics, or gently spot clean with a mild detergent solution for more durable materials. Test the cleaning solution on a small, inconspicuous area first to ensure it doesn’t cause discoloration.

Remember to always follow the manufacturer’s instructions and test any cleaning solution on a small, hidden area before applying it to the entire piece.

Reviving Antique Furniture

Reviving antique furniture goes beyond cleaning. It involves repairing minor imperfections, restoring faded colors or finishes, and protecting the wood from further damage. Here are some techniques to bring back the original beauty of your antique furniture:

  • Repairing: Address minor imperfections like scratches, dents, or loose joints using appropriate repair materials, such as wax sticks or touch-up pens. These products help disguise the damage while blending seamlessly with the original finish.
  • Restoring: If the colors or finishes have faded over time, consider using products specifically designed for antique furniture restoration. These products can revive the original luster and protect the wood from further deterioration.

Remember, antique furniture restoration can be a delicate process, and it’s always best to consult with furniture restoration specialists who have the expertise and experience to handle your valuable pieces.

In the next section, we’ll explore the intricacies of repairing and restoring antique furniture, from fixing structural issues to disguising scratches and grease stains.

Repairing and Restoring Antique Furniture

When it comes to antique furniture, proper repair and restoration are essential to maintain its beauty and functionality. Skilled craftsmen, known as furniture restoration specialists, possess the expertise to address structural issues, repair damages, and revive worn-out pieces. Whether it’s fixing loose joints, replacing missing parts, or refurbishing worn upholstery, these professionals have the knowledge and experience to bring antique furniture back to life.

One common issue with antique furniture is the presence of holes and cracks. These defects can be effectively repaired using wax sticks, which are available in various colors to match the furniture’s original finish. By carefully melting the wax and applying it to the damaged areas, specialists can seamlessly fill the imperfections, adding strength and durability to the piece.

Scratches, another common problem, can also be discreetly disguised. Furniture restoration specialists utilize touch-up pens and wax to carefully blend in the color and texture of the surrounding surfaces. This attention to detail ensures a flawless finish and restores the furniture’s aesthetic appeal.

In some cases, antique furniture may suffer from extensive woodworm damage. This is a more complex issue that may require professional assistance. Furniture restoration specialists can evaluate the severity of the damage and apply appropriate treatment methods to eradicate woodworms, repair weakened structures, and prevent further infestation.

Antique furniture restoration requires expertise in addressing a range of issues, from minor scratches to extensive woodworm damage. By relying on the skills of furniture restoration specialists, you can ensure that your cherished pieces receive the care and attention they deserve.

Overall, repairing and restoring antique furniture is a meticulous process that shouldn’t be taken lightly. Entrusting your valuable pieces to furniture restoration specialists ensures that the necessary repairs are carried out professionally, preserving the historical significance and value of your antique furniture for years to come.

furniture restoration

Continue reading to discover how to deal with paint marks and grease stains on antique furniture in the next section.

Dealing with Paint Marks and Grease Stains

When it comes to antique furniture, paint marks and grease stains can be a common issue. Fortunately, there are effective methods to deal with these blemishes and restore the beauty of your cherished pieces. Whether you’re an antique furniture enthusiast or a professional furniture restorer, understanding how to address these challenges is essential for successful restoration.

Removing Paint Marks

If paint marks mar the surface of your antique furniture, there are two popular methods for their removal:

  1. Applying methylated spirit: This alcohol-based solvent can effectively dissolve various types of paint marks. Simply dampen a clean cloth with methylated spirit and gently rub the affected area until the paint is removed. Remember to work in small sections and avoid excessive scrubbing to prevent damage to the underlying finish.
  2. Using polish reviver: A specialized polish reviver can be a gentle yet effective solution for paint removal. Apply a small amount to a soft cloth, and carefully rub the paint marks until they fade away. Be sure to follow the product instructions and test it on a discreet area first to ensure compatibility with the furniture’s finish.

Addressing Grease Stains

Grease stains on antique furniture can be stubborn, but there are techniques to effectively tackle this issue:

  1. Using clear wax: Apply a small amount of clear wax directly onto the affected area and gently rub it in. The wax will help lift the grease stain and protect the underlying wood. After a few minutes, wipe away the excess wax with a clean cloth, and repeat the process if necessary.
  2. Stripping off the old finish: In some cases, a grease stain may deeply penetrate the finish. If this occurs, it may be necessary to strip off the old finish to fully remove the stain. Once stripped, create a paste using talcum powder and water, and apply it directly to the affected area. Allow the paste to dry completely before gently wiping it away. This process helps draw out the oil from the stain.

While these methods can effectively address paint marks and grease stains on antique furniture, it’s important to assess the extent of the damage. If the damage is extensive or if you’re uncertain about the appropriate techniques, it’s recommended to seek professional help from experienced antique furniture repair and refinishing specialists.

Expert Tip:

Always test any cleaning or restoration method on a small, inconspicuous area before applying it to the entire piece. This precaution ensures that no further damage occurs and helps you determine the best approach for your specific furniture.

Upholstery Refinishing for Antique Furniture

When it comes to antique furniture restoration, the attention to detail extends beyond just the wood. Upholstery refinishing plays a crucial role in bringing back the charm of these treasured pieces. With their expertise in selecting appropriate materials and their meticulous approach, furniture restoration specialists ensure that every element of the furniture is restored to its former glory.

During the upholstery refinishing process, specialists carefully evaluate the condition of the antique furniture’s fabric or leather. They consider the historical significance and the overall aesthetic appeal to choose the best materials for the restoration. Whether it’s preserving the original upholstery or replacing it with matching fabric, each decision is made with utmost care and consideration for the piece’s authenticity.

Upholstery Refinishing for Antique Furniture

The restoration process involves careful attention to detail, ensuring that every aspect of the upholstery, such as stitching, tufting, and cushioning, is skillfully repaired or replaced. Professionals use techniques like reupholstering, repairing loose or broken springs, and refinishing the frames to enhance the furniture’s stability and comfort.

One of the key benefits of upholstery refinishing is the opportunity to create a harmonious blend of old-world charm and refreshed elegance. Specialists work closely with clients to understand their vision and preferences, customizing the upholstery to suit their unique style. The result is a restored masterpiece that enhances the original allure of the antique furniture.

Whether it’s an intricately carved Victorian armchair or a plush Chesterfield sofa, upholstery refinishing breathes new life into these timeless treasures. It not only revives the comfort and functionality of the furniture but also preserves its historical significance, making it a valuable investment for both collectors and enthusiasts alike.

Benefits of Upholstery Refinishing for Antique Furniture:

  • Preserves the historical significance and authenticity of the piece
  • Enhances the comfort and functionality
  • Customized solutions tailored to individual style and preferences
  • Revives the beauty and elegance of the furniture
  • Increases the value of antique furniture

By entrusting your antique furniture to the expertise of upholstery refinishing specialists, you can enjoy the beauty and charm of these timeless pieces for years to come. With their meticulous craftsmanship and attention to detail, they ensure that every element of the furniture is restored to perfection.

Antique Furniture Upholstery Refinishing Services Price Range
Armchair $200 – $500
Sofa $500 – $1500
Ottoman $100 – $300
Dining Chair $100 – $300

Treating Antique Furniture with Woodworm

When it comes to antique furniture restoration, one common problem that collectors and enthusiasts encounter is woodworm damage. These tiny pests can wreak havoc on cherished pieces, compromising their structural integrity. Fortunately, there are effective treatments available to combat woodworm and restore the beauty of your antique furniture.

For minor woodworm infestations, you can start by using commercial woodworm killing fluid. This specialized fluid is designed to eradicate woodworm larvae and prevent further damage. Carefully apply the fluid according to the product instructions, making sure to treat all affected areas thoroughly.

However, when the woodworm damage is extensive, seeking the expertise of furniture restoration specialists is highly recommended. They have the knowledge and experience to assess the extent of the damage and determine the best course of action. Professional assistance ensures that the woodworm infestation is completely eradicated and any structural weaknesses caused by the pests are addressed properly.

Repairing Holes and Cracks with Repair Wax Sticks

After treating the woodworm infestation, it’s important to repair any holes and cracks in the antique furniture. One effective method is using repair wax sticks in matching colors. These wax sticks can be melted and carefully applied to the damaged areas. By blending the colors as needed, the repairs become seamless and discreet.

Repair wax sticks are a versatile tool in antique furniture restoration, as they can also be used to fill in small gaps and minor imperfections caused by the woodworm damage. The wax blends effortlessly with the surrounding wood, maintaining the overall aesthetic of the piece.

Remember, if you’re uncertain about the appropriate colors to use or if the damage is extensive, consulting furniture restoration specialists is always a wise decision. They have the expertise to accurately match the colors and ensure that the repairs are carried out flawlessly.

Now that you understand how to treat antique furniture with woodworm, you can confidently address this common issue that arises in the restoration process. By combining effective treatments and the skills of furniture restoration specialists, you can preserve the integrity and beauty of your cherished antique pieces.

With proper treatment and expert care, your antique furniture can continue to dazzle and delight for generations to come.

Applying Wax on Antique Furniture

Applying wax on antique furniture is an essential step in preserving its original finish and protecting it from wear and tear. Proper wax application can enhance the furniture’s appearance and ensure its longevity. Here are some important tips to keep in mind when waxing antique furniture:

  1. Choose the right wax: Select a high-quality furniture wax specifically designed for antique pieces. Be sure to choose a wax that matches the color and type of wood you are treating.
  2. Prepare the surface: Before applying wax, thoroughly clean the furniture to remove any dirt or grime. Use a gentle cleaner that is safe for antique finishes.
  3. Apply thin layers: Apply the wax in thin, even layers using a clean, lint-free cloth or a soft brush. Avoid applying too much wax, as this can result in a sticky residue.
  4. Buff in the direction of the grain: After applying the wax, use a clean cloth or brush to gently buff the surface in the direction of the wood grain. This will help distribute the wax evenly and create a smooth finish.
  5. Repeat every three months: To maintain the furniture’s appearance and protect the wood, it is recommended to wax antique pieces every three months. This will help keep the finish looking fresh and prevent drying or cracking.

By following these tips, you can ensure that your antique furniture remains in excellent condition for years to come.

Benefits of Waxing Antique Furniture

Waxing antique furniture offers several benefits:

  • Protects the wood from moisture, spills, and scratches
  • Enhances the natural beauty and depth of the wood grain
  • Restores luster and shine to the furniture’s finish
  • Creates a protective barrier against UV damage and fading
  • Provides a smooth, silky feel to the touch

Waxing is a simple yet effective way to care for your antique furniture and ensure that it retains its charm and value for generations to come.

Remember, if you’re uncertain about the appropriate wax or technique to use for your specific piece of antique furniture, it’s always best to consult with a professional furniture refinishing specialist.

Disguising Scratches on Furniture

Scratches on furniture can be a frustrating sight, but don’t worry – there are ways to restore the beauty of your beloved pieces. Whether you have an antique heirloom or a modern furniture piece, there are simple techniques that can help disguise those unsightly scratches and rejuvenate the look of your furniture.

When it comes to antiques, using the right methods is crucial to preserve their historical value. Here are some effective techniques that can be used for antique furniture repair and refinishing:

  1. Wax Sticks: Wax sticks are a great option for small scratches on wooden furniture. These sticks come in various colors to match different wood shades. Simply choose a wax stick that closely matches the color of your furniture and gently rub it over the scratch. The wax will fill in the scratch and blend with the surrounding wood, making it less noticeable.
  2. Touch-Up Pens: Touch-up pens are another handy tool for concealing scratches. They work well on furniture with a painted or stained finish. Like wax sticks, touch-up pens come in different shades to match various furniture colors. Fill the scratch with the touch-up pen, let it dry, and then gently buff the area to achieve a smooth finish.
  3. Furniture Polish Reviver: Furniture polish reviver can be used to restore the appearance of minor scratches. Apply a small amount of the reviver to a soft cloth and gently rub it over the scratch in a circular motion. The reviver will help hide the scratch and revive the shine of the surrounding area.

It’s important to note that these techniques are most effective for surface-level scratches. If the scratches are deep or extensive, it’s recommended to seek professional assistance for antique furniture refurbishment or restoration.

Remember, patience and a light touch are key when dealing with scratches on furniture. Take your time and test the methods on a small, inconspicuous area first to ensure the desired results. With the right approach, you can bring new life to your furniture and enjoy its beauty for years to come.

Method Best for Pros Cons
Wax Sticks Small scratches on wooden furniture Easy to use May not be suitable for deep scratches
Touch-Up Pens Painted or stained furniture Precise application May require multiple layers for deeper scratches
Furniture Polish Reviver Minor scratches on various furniture types Restores shine Not suitable for deep scratches

Disguising scratches on furniture can be a simple yet effective way to maintain the beauty of your cherished pieces. By using the right methods and taking care in the application, you can restore the appearance of your furniture and enjoy its timeless charm.

Conclusion

Antique furniture restoration requires a combination of skill, knowledge, and attention to detail. By entrusting your cherished pieces to professional antique furniture experts, you can ensure that they are assessed, repaired, and restored with the utmost care and expertise. Whether it’s assessing the condition of the piece, identifying necessary repairs, or selecting the right tools, these specialists have the experience and knowledge to handle antique furniture restoration projects.

When it comes to antique furniture restoration, preventive measures are key in maintaining the longevity of your prized possessions. Regularly inspecting and maintaining your antique furniture, along with taking timely action to address any issues, can help prevent extensive damage and preserve its historical significance.

For extensive damage or complex restoration needs, seeking the assistance of furniture restoration specialists is highly recommended. These professionals have the expertise and access to specialized techniques and materials required to restore antique furniture to its original beauty and functionality. Their meticulous attention to detail ensures that every repair and restoration is seamless and blends harmoniously with the piece’s overall aesthetics.

Preserving History Through Restoration

Antique furniture restoration allows us to preserve and honor the history behind each piece. By breathing new life into these treasured items, we not only extend their lifespan but also continue to appreciate their craftsmanship and unique charm. Through the hands of skilled antique furniture experts, these pieces can once again take center stage, enriching our homes and reminding us of the enduring beauty of the past.

“Antique furniture restoration is a delicate art form that requires a deep understanding of the materials, techniques, and historical context. It’s about capturing the essence of the original piece while ensuring its longevity for future generations to enjoy.” – Rebecca Thompson, Antique Restoration Specialist

Investing in Expertise

When it comes to antique furniture restoration, it’s not just about repairing and restoring old furniture; it’s about preserving a piece of history. By investing in the expertise of antique furniture restoration professionals, you can be confident that your treasured pieces will be handled with care and restored to their former glory. These specialists have a deep understanding of the intricate details and techniques required to give each piece the attention it deserves.

Benefits of Professional Antique Furniture Restoration
Preserves the historical significance of antique furniture
Extends the lifespan of cherished pieces
Ensures meticulous repairs and restorations
Maintains the authenticity and aesthetic appeal of the furniture
Provides access to specialized techniques and materials

By entrusting your antique furniture restoration to the hands of experts, you can revitalize your cherished pieces and continue to appreciate their timeless beauty for years to come.

Conclusion

Antique furniture restoration is a fascinating art that allows us to revive the charm of cherished pieces while honoring their historical significance. Through a deep understanding of the restoration process and careful execution, preserving and reviving antique furniture treasures becomes an accessible and rewarding journey.

By entrusting your antique furniture to the expertise of professional restoration specialists, you can ensure that each step, from meticulous cleaning and repairing to refinishing and upholstery, is executed with the utmost care and precision. These experts possess the skills and knowledge needed to seamlessly blend repairs and maintain the authenticity of each piece, ultimately bringing back its original beauty and functionality.

Whether it’s removing paint marks, disguising scratches, or treating woodworm damage, the meticulous attention to detail provided by antique furniture experts is essential to achieving exquisite results. Their personalized approach and commitment to using the appropriate materials and techniques are instrumental in preserving the integrity and allure of these timeless treasures.

So, if you have a beloved antique piece that is in need of revitalization, consider consulting with antique furniture restoration experts. Their expertise and passion for preserving and reviving vintage furniture will not only breathe new life into your cherished pieces but also ensure they can be enjoyed and admired for many years to come.

FAQ

What is antique furniture restoration?

Antique furniture restoration is a complex process that involves repairing and revitalizing old and valuable furniture pieces to their original beauty and functionality.

Why should I consult with professional furniture restorers?

It’s best to consult with professional furniture restorers because they have the specialized skills, knowledge, and materials needed to assess and restore antique furniture properly. DIY methods can often cause irreversible damage.

What does antique furniture restoration involve?

Antique furniture restoration involves maintaining authenticity, using techniques true to the era of the piece, conducting thorough research on the piece’s era and style, assessing its condition, and making decisions on how to preserve or enhance certain elements.

How do I clean and revive antique furniture?

Cleaning and reviving antique furniture involves removing dirt, grime, and old finishes without causing damage. It includes gentle dusting or vacuuming, thorough cleaning techniques for stubborn grime or stains, repairing minor imperfections, restoring faded colors or finishes, and protecting the wood with suitable products.

How do I repair and restore antique furniture?

Repairing and restoring antique furniture includes fixing structural issues like loose joints, missing parts, and worn-out upholstery. It involves using repair wax sticks, touch-up pens, or furniture polish reviver to repair holes, cracks, and scratches. For extensive damage, professional assistance may be needed.

How do I deal with paint marks and grease stains on antique furniture?

Paint marks on antique furniture can be removed using methylated spirit or polish reviver. Grease stains can be addressed by using clear wax or by stripping off the old finish and applying talcum powder paste. Professional help is recommended for extensive damage.

How does upholstery refinishing work for antique furniture?

Upholstery refinishing for antique furniture involves selecting appropriate materials and paying attention to detail during restoration. It offers personalized solutions tailored to each piece, combining old-world charm with refreshed elegance.

How do I treat antique furniture with woodworm?

Minor woodworm damage can be treated using commercial woodworm killing fluid. Extensive damage may require professional assistance. Holes and cracks caused by woodworm can be repaired using repair wax sticks, blending the colors as needed.

How do I apply wax on antique furniture?

Applying wax on antique furniture preserves the original finish and protects the wood. The wax should be applied in thin layers and buffed up in the direction of the grain. Waxing should be done every three months to maintain the furniture’s appearance and protect the wood.

How can I disguise scratches on furniture?

Scratches on furniture can be disguised using wax sticks, touch-up pens, or furniture polish reviver. The right method depends on the depth of the scratch. Care must be taken when applying the products to achieve a seamless blend and restore the furniture’s appearance.

What is the importance of professional help and preventive measures in antique furniture restoration?

Professional help is essential for extensive damage and complex restoration needs. Taking preventive measures and seeking professional assistance can help ensure the longevity of antique furniture.

Posted on

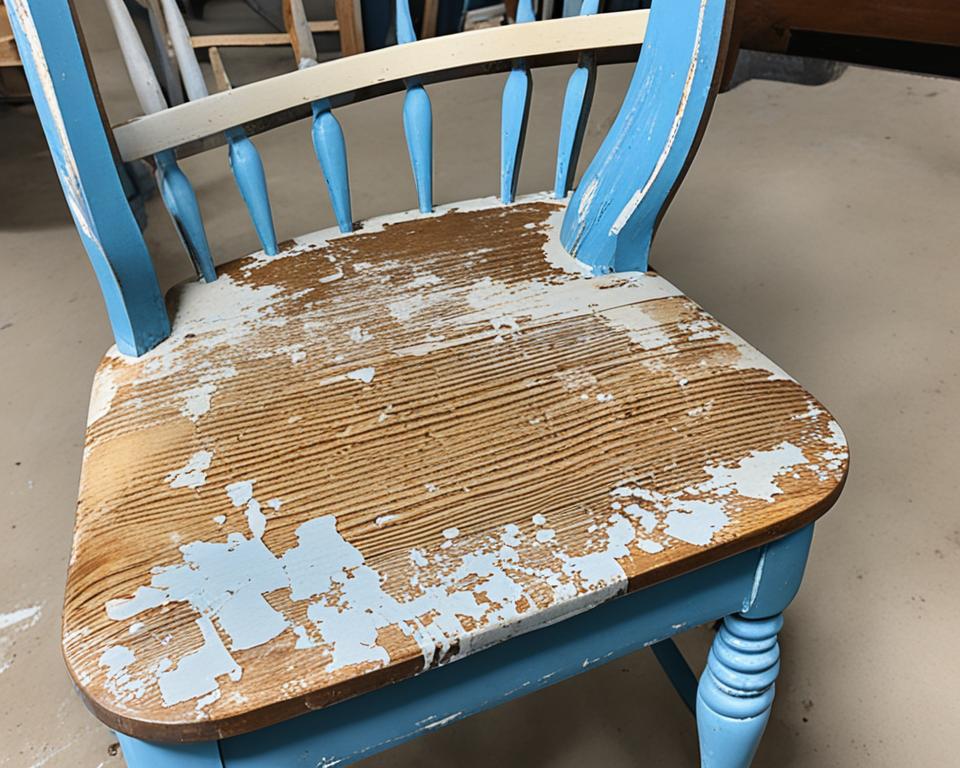
Beginner’s Guide to How to Restore Vintage Furniture

I’ve always had a fondness for vintage furniture. The craftsmanship, the timeless beauty, and the stories these pieces carry make them truly special. I believe that restoring vintage furniture is a wonderful way to honor its history and revive its charm.

If you’re new to the world of furniture restoration, fear not! In this beginner’s guide, I’ll walk you through the process of how to restore vintage furniture step by step. By the end, you’ll have the knowledge and confidence to bring new life to your beloved vintage pieces.

Whether you have inherited a family heirloom or stumbled upon a hidden gem at a flea market, restoring vintage furniture can be a rewarding and creative endeavor. So let’s dive in and uncover the secrets of furniture restoration techniques together.

how to restore vintage furniture

Key Takeaways:

  • Restoring vintage furniture is a way to breathe new life into old pieces and honor their history.
  • Even beginners can successfully restore vintage furniture with the right supplies and step-by-step instructions.
  • Furniture restoration techniques involve stripping old paint, sanding, staining, and finishing.
  • Testing for lead paint is crucial, especially for furniture made before 1978.
  • Inspect for any broken parts and consider seeking professional help if needed.

Supplies Needed for Furniture Restoration

Before you embark on the journey of restoring vintage furniture, it’s essential to gather all the necessary supplies. Having the right tools and materials at hand will make the restoration process smoother and more efficient. Here are the key items you’ll need:

  1. Paint stripper: A reliable paint stripper, such as [Brand Name], is crucial for removing layers of old paint and varnish.
  2. Chemical-resistant gloves: Protect your hands and skin from harsh chemicals with a pair of chemical-resistant gloves.
  3. Chip brushes: These brushes are ideal for applying paint stripper and other solutions to the furniture’s surface.
  4. Plastic wrap: Cover the furniture with plastic wrap to prevent the paint stripper from drying out too quickly.
  5. Plastic scraper: Use a plastic scraper to gently remove the softened paint and varnish.
  6. Mineral spirits: These solvents are effective for cleaning residue and preparing the surface for refinishing.
  7. Scotch-Brite scrubbing pads: These abrasive pads are ideal for scrubbing away stubborn debris and old finish.
  8. Sandpaper or a power sander: Depending on your preference, use sandpaper or a power sander to smooth the furniture’s surface.
  9. Tack cloths: Use tack cloths to remove any dust or debris after sanding.
  10. Shop vac: A shop vac will help you efficiently clean up dust and debris during the restoration process.
  11. Stain or paint: Choose a high-quality stain or paint that suits your desired finish.
  12. Polyurethane or varnish: Finish the restored furniture with a protective layer of polyurethane or varnish to enhance its durability and beauty.

With these essential supplies in hand, you’ll be well-equipped to begin your vintage furniture restoration project. Remember to exercise caution and patience throughout the process, and enjoy the rewarding experience of breathing new life into cherished pieces from the past.

Testing for Lead Paint

When working on vintage furniture restoration, it is crucial to prioritize safety. Testing for lead paint is especially important, particularly if the piece was manufactured before 1978. To ensure accurate results, I recommend using a lead test kit and following the manufacturer’s instructions.

Lead test kit in action:

Lead paint was commonly used in furniture before its health risks became widely known. Ingesting or inhaling lead particles can lead to serious health issues, especially for children and pregnant women. By conducting a lead paint test, you can protect both yourself and those around you.

The testing process is straightforward. Simply follow the instructions provided with the lead test kit. Start by preparing the test area and the testing materials as outlined in the instructions. Then, use the testing swabs or strips included in the kit to collect samples from different parts of the furniture. Wait for the chemical reaction to occur, which will indicate the presence or absence of lead paint.

If the test comes back positive for lead, take extra precautions when continuing with the restoration process. This may include wearing a respirator mask, working in a well-ventilated area, and using containment measures to prevent the spread of lead dust.

Why Testing for Lead Paint Matters

Testing for lead paint is essential for several reasons:

  • Health and Safety: Ensuring that the furniture does not contain lead paint is crucial for your health and the well-being of others.
  • Environmental Impact: Proper handling of lead-based paint is necessary to protect the environment from contamination.
  • Legal Requirements: In some areas, there are regulations and requirements for handling and disposing of lead-based paint.

By testing for lead paint, you can proceed with confidence in your restoration project, knowing that you are taking the necessary precautions for both yourself and the environment.

Paint Stripping

When it comes to restoring vintage furniture, paint stripping is an essential step in the process. By removing the old paint and stain, you can reveal the natural beauty of the wood and prepare it for refinishing. Here’s a step-by-step guide on how to effectively strip paint from your vintage furniture.

  • Paint stripper (such as Citristrip)
  • Chip brush
  • Plastic wrap
  • Plastic scraper

Now, let’s get started:

  1. Apply a thick layer of paint stripper to the furniture using a chip brush. Ensure that the entire surface is evenly covered.
  2. Cover the furniture with plastic wrap to prevent the stripper from drying out too quickly.
  3. Let the paint stripper sit for at least 30 minutes. This allows the chemicals to penetrate the layers of paint and loosen them.
  4. After the waiting period, test a small section of the furniture using a plastic scraper. Gently scrape away the paint to see if it easily comes off. If not, let the stripper sit for a bit longer.
  5. Once the old paint and stain start to lift, continue the stripping process. Apply more paint stripper as needed and repeat the waiting and testing process until all the old paint is removed.

Remember to wear gloves and work in a well-ventilated area while using paint stripper. It’s important to follow the manufacturer’s instructions and safety precautions for the specific product you’re using.

Once you’ve successfully stripped the furniture, you’re ready to move on to the next steps in the restoration process.

Removing Residue and Sanding

After stripping the paint, it’s crucial to remove any residue left behind on the vintage furniture. This step ensures a clean and smooth surface for refinishing. To remove the residue, I recommend using mineral spirits and scrubbing pads. These tools effectively eliminate stubborn remnants of paint and stripper.

When using mineral spirits, be sure to wear protective gloves and work in a well-ventilated area. Apply the mineral spirits to the furniture and use the scrubbing pads to gently scrub away the residue. Pay extra attention to small cracks and crevices where residue may accumulate.

Supplies needed:
Mineral spirits
Scrubbing pads

Sanding for a smooth finish

Once the residue has been removed, it’s time to sand the vintage furniture. Sanding helps to even out rough spots, imperfections, and any remaining old finish. Begin by using a coarse grit sandpaper to tackle the rough areas and gradually progress to a finer grit for a smooth finish.

When sanding, remember to work in the direction of the wood grain to achieve the best results. Take your time and be patient to avoid damaging the furniture. The goal is to create a surface that is smooth to the touch and ready for the next steps in the restoration process.

After sanding, use a tack cloth to remove any dust particles from the surface. This will ensure a clean and pristine base for the next stage of vintage furniture refinishing.

Now that we have cleaned off the residue and achieved a smooth surface, our vintage furniture is ready for the next phase: staining and finishing. This will help enhance its natural beauty and restore its original charm.

Staining and Finishing

When it comes to vintage furniture restoration, deciding whether to keep the natural wood look or apply a stain can greatly enhance the overall look and feel of the piece. Staining allows you to add color while still highlighting the beauty of the wood grain. Here are some tips for achieving the perfect stain and finish:

  1. Choose the Right Stain: Select a stain that complements the style and color palette of your space. Consider testing the stain on a small, inconspicuous area of the furniture to ensure it achieves your desired look.
  2. Apply the Stain: Use a clean rag to apply a light coat of stain to the furniture, working with the grain. Start in a less visible area to practice your technique and determine the desired depth of color. Allow the stain to penetrate the wood for the recommended time specified by the manufacturer.
  3. Remove Excess Stain: After the recommended time, wipe off any excess stain with a clean cloth. This step is crucial for achieving an even and consistent color. Be sure to wipe gently, following the direction of the grain, to avoid smudging or streaking.
  4. Allow for Proper Drying: Give the stain ample time to dry completely before moving on to the next step. This typically takes around 24 hours, but refer to the product instructions for accurate drying times.
  5. Protect with Polyurethane or Varnish: To provide durability and protection, apply a clear polyurethane or varnish as the finishing touch. This will help seal the wood and guard against wear and tear. Use a paint sprayer or brush to apply multiple thin coats, allowing sufficient drying time between each layer.

Remember, the key to achieving a flawless finish is patience and attention to detail. Take your time and ensure each step is executed carefully for a professional-looking result.

Top Stain and Finish Brands

Brand Product Features
Minwax Wood Finish Penetrating Stain – Wide range of colors
– Fast-drying formula
– Enhances natural wood grain
Varathane Fast Dry Wood Stain – One-coat coverage
– Fast drying time
– Ideal for interior projects
General Finishes Gel Stain – Easy to apply
– Non-drip formula
– Suitable for vertical surfaces
Briwax Original Wax – Traditional wax finish
– Available in various shades
– Adds a rich luster to wood

Repairing and Replacing Parts

When restoring antique furniture, it’s essential to carefully inspect the piece for any broken parts. Whether it’s a wobbly leg, a missing handle, or a cracked frame, addressing these issues will ensure the longevity and functionality of your restored treasure. While some repairs may require professional assistance, you can tackle minor fixes on your own with just a few simple techniques.

If you notice loose screws, simply tighten them with a screwdriver or a drill to restore stability. For small breaks or cracks, wood glue is an effective solution. Apply the glue to the affected area, join the broken pieces together, and secure them tightly until the glue dries. Once dry, use sandpaper to smooth out any excess glue for a seamless finish.

For cracks or gaps in the wood, stainable wood putty is an excellent choice. Fill in the damaged area with the putty, following the manufacturer’s instructions. After it dries, sand the area until it blends smoothly with the surrounding wood. This technique is particularly useful for hiding imperfections and maintaining the integrity of the furniture’s overall look.

If the damage is beyond repair or requires specialized knowledge, it’s advisable to seek professional assistance. Restoring antique furniture often requires delicate expertise to ensure the authenticity and value of the piece. A skilled professional can offer guidance and advice on preserving the historical significance and structural integrity of your beloved antique furniture.

furniture restoration techniques

Remember, restoring antique furniture is an art that requires patience and attention to detail. By effectively repairing and replacing parts, you can revive the functionality and beauty of your cherished piece, ensuring it remains a valuable addition to your home for generations to come.

Cleaning and Maintenance

Once the restoration is complete, it’s essential to maintain and care for your vintage furniture properly. By following these cleaning and maintenance tips, you can preserve its beauty and ensure its longevity.

Regular Dusting

Regular dusting is crucial to prevent the buildup of dust and dirt on your vintage furniture. Use a soft cloth or a duster to gently remove dust from all surfaces, including hard-to-reach areas and intricate details. Dusting regularly helps maintain the furniture’s appearance and prevents scratches caused by abrasive particles.

Avoid Harsh Chemicals

When cleaning vintage furniture, it’s important to avoid using harsh chemicals that can damage the finish. Opt for mild, non-abrasive cleaners specifically designed for wood furniture. Always test any new cleaning product on a small, inconspicuous area before applying it to the entire piece.

Protective Measures

To keep your vintage furniture looking its best, consider implementing protective measures. For wooden surfaces, applying furniture wax or polish can help moisturize the wood and provide a protective barrier against moisture and stains. Be sure to follow the manufacturer’s instructions for application.

Dealing with Spills

In the event of a spill, it’s crucial to act quickly to prevent damage to your vintage furniture. Blot the spill immediately with a clean, soft cloth to absorb excess liquid. Avoid rubbing or scrubbing, as this can push the liquid deeper into the wood or cause surface damage. If necessary, consult a professional furniture restorer for guidance on removing stubborn stains.

Environmental Considerations

Environmental factors can impact the condition of your vintage furniture. Avoid placing it in direct sunlight, as prolonged exposure can fade and damage the wood finish. Additionally, maintain proper humidity levels in your home to prevent wood from drying out or warping. Use a humidifier or dehumidifier if necessary.

Regular Inspections

Periodically inspect your vintage furniture for signs of wear and tear. Check for loose joints, cracks, or any other structural issues that may require attention. Timely repairs can prevent further damage and ensure the longevity of your beloved pieces.

By following these cleaning and maintenance tips, you can enjoy the beauty and charm of your restored vintage furniture for years to come.

Conclusion

Restoring vintage furniture is an incredibly rewarding experience that allows you to bring new life to beloved pieces. By following the proper furniture restoration techniques and having the right supplies, even beginners can successfully undertake this DIY project. With patience, dedication, and attention to detail, you can transform old, worn-out furniture into beautiful, functional pieces for your home.

Throughout this guide, we have provided step-by-step instructions on how to restore vintage furniture. From testing for lead paint to paint stripping, removing residue, sanding, staining, and finishing, each stage is crucial in achieving a professional-looking result. Taking the time to repair and replace broken parts, as well as implementing regular cleaning and maintenance, will ensure the longevity of your restored furniture.

As you embark on your furniture restoration journey, remember to approach each project with care and creativity. Every vintage piece has a story to tell, and by restoring it, you become part of that narrative. So gather your supplies, set aside some time, and let your passion for restoring vintage furniture shine through in each project you undertake. Happy restoring!

FAQ

What supplies do I need for furniture restoration?

To restore vintage furniture, you will need paint stripper, chemical-resistant gloves, chip brushes, plastic wrap, plastic scraper, mineral spirits, Scotch-Brite scrubbing pads, sandpaper or a power sander, tack cloths, shop vac, stain or paint of your choice, and polyurethane or varnish for finishing.

How do I test for lead paint on vintage furniture?

Before restoring vintage furniture, it’s important to test for lead paint, especially if the piece was made before 1978. Use a lead test kit and follow the manufacturer’s instructions for accurate results.

How do I strip paint from vintage furniture?

Apply a paint stripper, such as Citristrip, to the furniture. Use a chip brush to apply a thick layer of stripper and cover the furniture with plastic wrap to prevent drying. Let the stripper sit for at least 30 minutes before testing a small section with a plastic scraper. Repeat the stripping process until all the old paint and stain is removed.

How do I remove residue and sand vintage furniture?

After stripping the paint, clean off any residue using mineral spirits and scrubbing pads. Pay attention to small cracks and crevices. Once the residue is removed, sand the furniture to smooth out rough spots and imperfections. Start with a coarse grit sandpaper and gradually move to a finer grit for a smooth finish.

How do I stain and finish restored vintage furniture?

Decide if you want to keep the natural wood look or apply a stain. If staining, apply a light coat of stain using a rag and wipe off any excess. Let the stain dry completely before applying a clear polyurethane or varnish. Use a paint sprayer or brush to apply multiple coats of the finish, allowing drying time between each layer.

How do I repair and replace broken parts on vintage furniture?

Inspect the furniture for any broken parts. Consider seeking professional help for tough repairs or structural issues. For minor repairs, tighten screws, join small breaks with wood glue, and fill in cracks with stainable wood putty. If necessary, replace broken parts with custom-made pieces.

How do I clean and maintain restored vintage furniture?

Once the restoration is complete, clean the furniture regularly to preserve its beauty. Use a soft cloth or duster to remove dust and avoid using harsh chemicals that can damage the finish. Apply furniture wax or polish to keep the wood moisturized and protected.

Posted on

Revive Your Pieces: Furniture Restoration Techniques

Furniture Restoration Techniques

Furniture restoration techniques are essential for bringing new life to your cherished pieces. Whether you have wood furniture, antiques, or want to tackle a DIY project, expert tips and methods can help you transform worn-out furniture into stunning pieces. In this article, we will explore various restoration techniques, step-by-step processes, and the tools you need to revive your furniture.

Key Takeaways:

  • Learn how to assess the condition of your furniture before starting the restoration process.
  • Researching the historical context is crucial for preserving the authenticity of your furniture.
  • Cleaning and stripping are important initial steps in furniture restoration.
  • Repair and restore your furniture using traditional woodworking techniques and appropriate tools.
  • Refinishing and staining can transform the appearance of your furniture.

Assess the Condition of Your Furniture

Before you embark on the restoration process, it is crucial to thoroughly assess the condition of your furniture. By inspecting each piece carefully, you can identify any required repairs and determine the extent of damage. This assessment will guide you in planning and executing the restoration process effectively, ensuring that your furniture receives the care it needs.

Inspecting Your Furniture

When examining your furniture, pay close attention to various aspects to understand its overall condition. Look for signs of wear and tear, such as scratches, dents, or worn-out finishes. Check for loose joints, missing hardware, or damaged components that may require repairs or replacements. Additionally, pay attention to any deep gouges, burns, or water damage that may impact the structure or aesthetic appeal of the piece. By inspecting your furniture thoroughly, you can develop a comprehensive understanding of the repairs needed and the level of restoration required.

“A thorough assessment of your furniture’s condition allows you to plan and prioritize repairs effectively, ensuring a successful restoration process.”

Identifying Repairs and Determining Damage

During the assessment, make a detailed note of any repairs or replacements needed. This could include fixing loose joints, reinforcing weak areas, or replacing missing hardware. Identifying the required repairs ensures that you have a clear roadmap for the restoration process and helps you gather the necessary tools and materials. It is also essential to determine the extent of damage, as this can impact the level of restoration required. Understanding the scope of damage will allow you to allocate appropriate time, resources, and techniques to bring your furniture back to its former glory.

Determining the Furniture Condition

Based on your assessment, determine the overall condition of your furniture. Categorize each piece into different levels of damage, such as minor repairs, moderate restoration, or extensive refurbishment. This classification will help you prioritize your restoration projects and allocate resources accordingly. Additionally, it will guide your decision-making process, enabling you to choose the most suitable restoration techniques and approaches for each piece.

By assessing the condition of your furniture, you lay a solid foundation for the restoration process. Understanding the repairs needed, determining the extent of damage, and categorizing the furniture’s condition will enable you to proceed with confidence and effectively plan the subsequent restoration steps.

Research the Historical Context

To maintain the authenticity of your furniture during restoration, it is essential to conduct thorough historical research. By gaining insights into the furniture era, design style, and era-specific techniques prevalent during the time period, you can make informed decisions throughout the restoration process. Preserving the original characteristics of the furniture will ensure its historical integrity and enhance its value.

Understanding the Furniture Era

Before starting your research, it is crucial to identify the specific furniture era your piece belongs to. Whether it’s Georgian, Victorian, Art Deco, or Mid-Century Modern, each era has its distinct features and design elements. Explore books, online resources, and museum exhibits dedicated to furniture history to deepen your understanding of the era and the unique characteristics associated with it.

By familiarizing yourself with the furniture era, you’ll be able to make well-informed decisions about the techniques, materials, and finishes that were commonly used during that time. This knowledge will guide you in achieving an authentic restoration while preserving the original charm of the furniture.

Examining Design Style and Construction Techniques

To truly understand the historical context of your furniture piece, delve into the prevalent design style and construction techniques of its era. Analyze the furniture’s structure, joinery, and ornamentation to identify key elements that contribute to its overall style and authenticity.

Look for clues such as specific carving techniques, decorative motifs, or innovative manufacturing methods that were characteristic of the era. By identifying these design elements and techniques, you’ll have a better understanding of the craftsmanship involved and how to replicate them accurately during the restoration process.

Research Tips
Visit local historical societies or museums specializing in furniture of the era.
Examine furniture catalogs, advertisements, and trade publications from the relevant time period.
Consult with antique furniture experts or restoration professionals who specialize in the era.

By immersing yourself in the design style and construction techniques of the furniture era, you can ensure that your restoration efforts align with the original craftsmanship and authenticity of the piece.

Preserving Authenticity in the Restoration Process

Preserving the authenticity of the furniture is paramount in the restoration process, as it adds value and historical significance to the piece. Use the knowledge gained from your historical research to guide your decisions throughout the restoration.

When choosing materials, opt for ones that were commonly used during the era. For example, if your piece comes from the Victorian era, select upholstery fabrics that reflect the period’s popular patterns and colors. Similarly, choose finishes and stains that match the era’s prevailing trends to achieve an authentic look.

Remember to prioritize techniques that were used during the furniture era. For instance, if the piece features hand-carved details, consider investing time and effort in replicating those details using traditional hand carving methods.

By preserving the historical authenticity of your furniture, you can appreciate and showcase the history, craftsmanship, and design style of your cherished piece.

In the next section, we will explore essential steps for cleaning and stripping your furniture, preparing it for the restoration process.

Cleaning and Stripping

One of the initial steps in furniture restoration is thorough cleaning and stripping. Removing dirt, grime, old finishes, or paint layers is essential to reveal the true condition of the furniture and prepare it for refurbishment.

When it comes to furniture cleaning, different materials require specific cleaning methods. For wood furniture, use gentle soaps and water to remove surface dirt and stains. Avoid harsh chemicals that can damage the wood. Make sure to dry the furniture thoroughly after cleaning to prevent any moisture-related issues.

For furniture with stubborn finishes or paint layers, stripping is an effective technique. Stripping agents or paint removers can be applied to the surface, allowing them to break down the old finishes. Depending on the type of finish and the thickness of the layers, scraping or sanding may be necessary to remove the residue completely.

“Cleaning and stripping the furniture surface is a crucial step in the restoration process. It helps reveal the true potential of the piece and allows you to assess any underlying damage or imperfections,” says Emma Carter, an experienced furniture restorer.

Wood furniture requires special care during cleaning and stripping. It is essential to use products specifically formulated for wood surfaces and follow the manufacturer’s instructions carefully. Avoid abrasive cleaners that can scratch or damage the wood. Always test any cleaning or stripping products on a small inconspicuous area before applying them to the entire piece.

Once the furniture is cleaned and stripped, make sure to remove any residue left from the cleaning or stripping agents. Wipe the surface with a clean, damp cloth and let it dry completely before proceeding with the next steps of the restoration process.

A clean and stripped furniture piece, ready for the next steps of restoration.

Repairing and Restoring

Once you have thoroughly cleaned your furniture, it’s time to address any structural issues and restore its original charm. Whether you are dealing with loose joints, damaged veneers, or missing hardware, the goal is to breathe new life into your treasured piece.

Utilizing traditional woodworking techniques and the appropriate tools, you can ensure seamless repairs that preserve the integrity of the furniture’s design and functionality. A careful approach to repairing and restoring will enhance both its aesthetic appeal and durability.

For upholstered furniture, consider reupholstering or replacing worn-out fabric or cushions. This not only refreshes the appearance but also ensures a comfortable seating experience.

Remember, the aim is to restore without compromising the original character of the piece. By paying attention to detail and using your skills, you can transform worn-out furniture into cherished heirlooms.

furniture repair

Essential Tools for Furniture Repair and Restoration

Having the right tools at your disposal is key to a successful repair and restoration process. Here are some essential tools you’ll need:

  • A set of screwdrivers for removing and replacing screws
  • Clamps to hold pieces together during glue drying
  • A rubber mallet for gentle adjustments
  • Wood glue for securing loose joints
  • A chisel for precise woodworking
  • A sanding block or sandpaper for smoothing surfaces
  • Replacement hardware, such as hinges, knobs, or drawer pulls
  • Upholstery tools, including fabric scissors, a staple gun, and upholstery nails

With these essential tools, you’ll be equipped to tackle various repairs and resto

Refinishing and Staining

Refinishing and staining are essential techniques in furniture restoration, allowing you to transform the appearance of your beloved pieces. By applying these finishing touches, you can achieve the desired look that aligns with the authenticity and natural beauty of the furniture.

To begin the refinishing process, start by sanding down the surface of the furniture. This step helps remove imperfections such as scratches, dents, or old finishes, creating a smooth and even canvas for refinishing. Use fine-grit sandpaper and work in the direction of the wood grain for optimal results.

Once the surface is prepared, it’s time to choose the right stain or finish. Consider the desired color, tone, and level of opacity you want to achieve. Whether you prefer a rich, dark stain or a lighter, natural finish, there are various options available to suit your preferences.

When applying the stain, follow the manufacturer’s instructions carefully. Use a brush, cloth, or sponge to ensure an even and consistent application. Pay special attention to the corners, edges, and intricate details of the furniture.

Choosing the Right Finish

After staining the furniture, allow the stain to dry completely. This process generally takes several hours, but it’s best to refer to the manufacturer’s instructions for accurate drying times. Once dry, evaluate the appearance of the stain and determine if an additional coat is needed to achieve the desired level of color and depth.

To protect the beauty of the stained wood and enhance its durability, it’s essential to finish the furniture with a protective coating. Consider using wax or oil-based finishes that preserve the natural beauty of the wood while offering adequate protection against daily wear and tear.

Finishing Technique Description
Wax Finish A traditional and popular choice, wax finishes provide a warm and natural appearance. They are easy to apply and can be buffed to a subtle sheen, enhancing the wood’s grain and adding a protective layer.
Oil Finish Oil finishes penetrate deep into the wood, enhancing its natural color while offering excellent moisture resistance. They provide a slightly matte or satin appearance and are more suitable for high-contact areas.
Polyurethane Finish Polyurethane finishes are durable and water-resistant, making them ideal for heavily used furniture. They provide a glossy or satin sheen, protecting the wood and adding a layer of visual appeal.

When applying the finish, follow the manufacturer’s instructions and ensure an even and thin coat to avoid any streaks or bubbles. Allow the finish to dry completely between coats, and lightly sand the surface with fine-grit sandpaper before applying subsequent layers.

Pro Tip: Before staining and finishing the entire furniture piece, test the stain and finish on a small inconspicuous area. This allows you to preview the color and ensure it complements the piece’s overall aesthetic.

By refinishing and staining your furniture, you can achieve a desired finish that highlights its natural beauty and preserves its authenticity. The careful selection of stains and finishes, along with proper application techniques, will help you transform worn-out furniture into timeless pieces that can be cherished for years to come.

Choosing the Right Tools and Materials

When it comes to furniture restoration, having the right tools and materials is essential for achieving successful results. The selection of the appropriate equipment and quality materials can significantly impact the efficiency, safety, and overall outcome of your restoration project.

Here are some essential furniture restoration tools and materials you should consider:

1. Sanders:

Recommended brands: Bosch, Makita, Festool

A reliable sander is indispensable for smoothing surfaces, removing paint or finishes, and achieving a clean and polished look. Electric sanders, such as orbital or palm sanders, are popular choices for their effectiveness in removing imperfections.

2. Chisels:

Recommended brands: Stanley, Narex, Two Cherries

Chisels are essential for precise carving, shaping, and removing excess material during intricate repairs or detailing work. Sharp chisels with different sizes and shapes allow you to work with accuracy and achieve professional-grade results.

3. Clamps:

Recommended brands: Bessey, Jorgensen, Irwin

Clamps play a crucial role in securing furniture joints and allowing adhesives to bond properly. They help maintain stability, promote even pressure distribution, and prevent movement during glue drying. Various clamp types, such as bar clamps or pipe clamps, offer versatility for different restoration needs.

4. Paintbrushes:

Recommended brands: Purdy, Wooster, Harris

Paintbrushes are vital for applying paint or finishes to furniture surfaces smoothly and evenly. High-quality brushes with synthetic or natural bristles provide excellent control, minimize streaks, and ensure a flawless finish.

5. Protective Gear:

Wear proper protective gear, including safety goggles, dust masks, gloves, and ear protection, to safeguard yourself from potential hazards during the restoration process.

Materials for Restoration:

  • Stains: Choose stains that complement the type of wood and enhance its natural beauty. Popular brands include Minwax, Varathane, and General Finishes.
  • Finishes: Opt for finishes that provide durability, protection, and the desired sheen level. Common types include polyurethane, lacquer, and shellac.
  • Adhesives: Use high-quality wood glues, such as Titebond or Gorilla Glue, to ensure strong bonding between different parts and repairs.
  • Upholstery Fabrics: Select upholstery fabrics that match the style and era of your furniture. Consider durability, colorfastness, and texture when choosing fabric for reupholstering tasks.

By investing in reliable tools and using appropriate materials, you can be better equipped to tackle furniture restoration projects with confidence. Remember to research and choose brands and products that suit your specific restoration needs.

furniture restoration tools

Professional Restoration Services

While do-it-yourself (DIY) restoration projects can be fulfilling, there are certain situations where hiring professional restoration experts is essential. This is especially true for furniture repairs that require specialized knowledge and skills. By consulting with professionals in the field of furniture restoration, you can ensure that your valuable pieces receive the proper assessment, recommendations, and execution of restoration techniques.

When it comes to complex repairs or highly valuable furniture, professional restoration services are the ideal choice. These experts have extensive experience and expertise in handling intricate or delicate pieces. Whether it’s a cherished heirloom with sentimental value or a valuable antique, restoration professionals understand the importance of preserving its historical significance and authenticity.

One of the key advantages of hiring professionals is their in-depth knowledge of restoration methods. They have access to specialized tools and equipment that are specifically designed for furniture restoration. This allows them to tackle even the most challenging projects with precision and efficiency. By entrusting complex repairs to the hands of experts, you can have peace of mind knowing that your furniture will be restored to its former glory.

Professional restoration services also offer a range of specialized restoration techniques. From intricate wood carving repairs to upholstery restoration, these experts have the necessary skills to handle every aspect of the restoration process. Their attention to detail and commitment to achieving exceptional results are what set them apart. By hiring professionals, you can be confident that your furniture will receive the highest level of care and expertise.

Furthermore, professional restoration services can provide valuable insights and recommendations based on their years of experience. They can guide you through the restoration process, offering advice on the best course of action for your specific furniture piece. Their expertise ensures that the restoration work is done in a way that not only addresses the current issues but also prevents future damage.

When it comes to restoring valuable furniture or addressing complex repairs, hiring professionals is the smart choice. Their specialized knowledge, skills, and tools make them the ideal choice for ensuring the successful restoration of your cherished pieces. Whether it’s a family heirloom or an antique find, entrust your furniture to the hands of restoration experts who will bring it back to its former glory.

Sustainable Furniture Restoration

Furniture restoration aligns with sustainable living principles by minimizing waste and reducing the need for new furniture. Instead of throwing away worn-out pieces, consider upcycling and refurbishing them to create a more eco-friendly and conscious lifestyle.

By embracing furniture restoration techniques, you can give new life to old furniture and reduce your environmental impact. Rather than contributing to landfills, you have the opportunity to revitalize and reuse existing pieces, preserving their historical value and unique character.

Consider donating unwanted furniture to charities or repurposing them for other uses. By doing so, you contribute to sustainable living and minimize waste by promoting the longevity and versatility of furniture.

“The greatest threat to our planet is the belief that someone else will save it.” – Robert Swan

Conclusion

Furniture restoration is a rewarding process that allows you to revive cherished pieces and preserve their historical value. By assessing the condition of your furniture, researching the era it belongs to, and utilizing appropriate restoration techniques, you can bring new life to worn-out furniture.

Whether you choose to embark on a DIY project or seek professional help, the restoration process requires careful attention to detail, patience, and the right tools. Taking the time to assess and plan the restoration ensures that you address any structural issues and preserve the original design and functionality of the piece.

Embrace furniture restoration as a sustainable practice and enjoy the satisfaction of transforming furniture into stunning pieces that can be cherished for years to come. The art of restoration allows you to not only breathe new life into old furniture but also contribute to a more eco-friendly and conscious lifestyle by minimizing waste and promoting sustainability.

In conclusion, furniture restoration is a comprehensive process that involves assessing the condition, researching the era, cleaning, repairing, refinishing, and selecting the right tools and materials. Whether you are a DIY enthusiast or prefer the expertise of professionals, restoration techniques can help you restore the beauty, functionality, and historical significance of your furniture.

FAQ

What is furniture restoration?

Furniture restoration refers to the process of repairing, cleaning, and refinishing furniture to bring it back to its original condition or enhance its appearance and functionality.

What types of furniture can be restored?

Almost any type of furniture can be restored, including wood furniture, antiques, vintage pieces, and upholstered furniture.

How can I assess the condition of my furniture?

Thoroughly inspect your furniture for any signs of damage, wear and tear, loose joints, missing parts, and deep scratches or water damage.

Why is historical research important for furniture restoration?

Researching the historical context of your furniture helps you understand the era, design style, and construction techniques, allowing you to make informed decisions during the restoration process and preserve its authenticity.

What is involved in the cleaning and stripping process?

Cleaning and stripping involves removing dirt, grime, old finishes, and paint layers from the furniture to reveal its true condition and prepare it for the restoration process.

How do I repair and restore my furniture?

Repairing and restoring furniture may involve fixing loose joints, replacing damaged veneers, reupholstering or replacing fabric, and preserving the original design and functionality of the piece.

How do I refinish and stain my furniture?

Refinishing and staining involves sanding the surface to remove imperfections, choosing a suitable stain or finish, applying it evenly, and finishing with a protective coating to enhance durability.

What tools and materials do I need for furniture restoration?

Essential tools include sanders, chisels, clamps, paintbrushes, and protective gear. High-quality materials like stains, finishes, adhesives, and upholstery fabrics are also necessary for the restoration process.

When should I consider seeking professional restoration services?

If you have valuable or intricate furniture, or if the repairs are complex, it is advisable to consult with experienced furniture restorers who have the expertise, tools, and knowledge to handle such pieces effectively.

How does furniture restoration contribute to sustainable living?

Furniture restoration reduces waste and promotes sustainable practices by upcycling and refurbishing old pieces instead of buying new ones, thereby minimizing the environmental impact.

Posted on

Antique Highboy Dresser: Vintage Elegance Unveiled

Antique Highboy Dresser

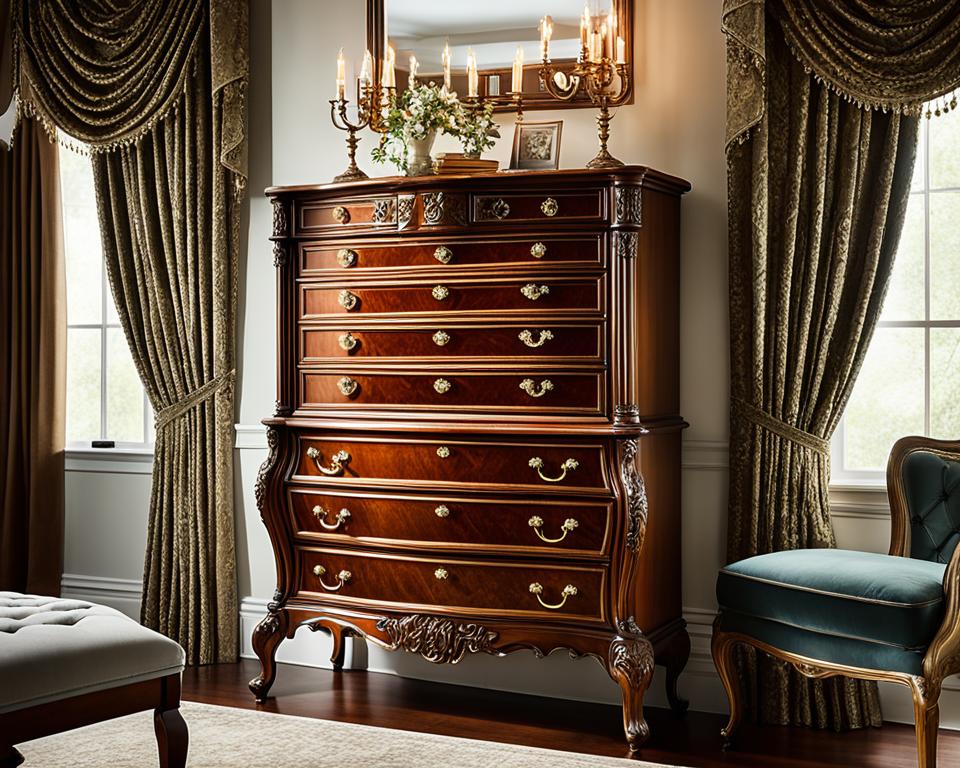
Antique highboy dressers are a perfect addition to any vintage home decor. These timeless pieces of antique furniture exude elegance and charm. With their tall and slender design, they provide ample storage space in the form of multiple drawers, making them ideal for organizing clothes, linens, and other belongings. Antique highboy dressers are often crafted from high-quality wood such as oak or mahogany, ensuring their durability and long-lasting beauty. Restoring and refinishing antique highboy dressers can bring them back to their original glory and enhance their vintage appeal. These stunning pieces of antique bedroom furniture are sought after by collectors and enthusiasts alike, and they can add a touch of vintage sophistication to any home.

Key Takeaways:

  • Antique highboy dressers are elegant and functional storage solutions for vintage home decor.
  • They are crafted from high-quality wood and can be restored to their original beauty.
  • Antique highboy dressers are sought after by collectors and enthusiasts.
  • They add a touch of vintage sophistication to any room.
  • Proper care and maintenance are essential for preserving their beauty and longevity.

The Beauty of Antique Highboy Dressers

Antique highboy dressers are prized for their classic and timeless beauty. The craftsmanship of these antique furniture pieces is evident in their intricate details, including carved accents, ornate handles, and elegant curves. They often feature unique wood grain patterns that add to their visual appeal. Antique highboy dressers are not only functional but also serve as statement pieces in any room. Their elegant design and vintage charm make them highly desirable among antique furniture enthusiasts and collectors. Whether used as bedroom furniture or as a decorative accent in other areas of the home, antique highboy dressers bring sophistication and character to any space.

The History of Antique Highboy Dressers

Antique highboy dressers have a rich history dating back to the 18th century. These tall and narrow dressers first gained popularity during the Baroque and Rococo periods. They were often used in bedrooms, providing much-needed storage space for clothing and personal items.

Antique highboy dressers were typically made from high-quality wood, such as oak, walnut, or mahogany, and were meticulously handcrafted by skilled artisans. Their intricate details and elegant design reflected the opulence and grandeur of the time.

Today, antique highboy dressers continue to be valued for their historic significance and timeless beauty.

“Antique highboy dressers are a window into the past, showcasing the craftsmanship and elegance of bygone eras. Their tall and narrow silhouette exudes sophistication, while the fine details and use of high-quality wood highlight their craftsmanship. These beautiful pieces have truly stood the test of time.” – Furniture Expert

Throughout history, antique highboy dressers have remained a symbol of luxury and craftsmanship. Their unique design and use of premium materials make them treasured pieces of antique furniture. Whether displayed in a bedroom or integrated into the decor of other living spaces, antique highboy dressers add a touch of history and elegance to any setting.

In the next section, we will explore tips for restoring antique highboy dressers, ensuring their continued beauty and longevity.

Tips for Restoring Antique Highboy Dressers

Restoring antique highboy dressers requires attention to detail and care. Before beginning the restoration process, it’s important to assess the condition of the dresser, including any structural issues or damage.

Start by cleaning the surface of the dresser using gentle, non-abrasive cleaners to remove dirt and grime. Ensure that you use products that are specifically formulated for wood furniture to avoid any damage. Take your time and carefully work on each surface, ensuring that every nook and cranny is free from dirt and debris.

If the dresser has any scratches or dents, consider using wood filler to repair and even out the surface. Gently apply the wood filler using a putty knife, following the instructions provided by the manufacturer. Once the filler has dried, use fine-grit sandpaper to smooth out the surface, taking care to blend it seamlessly with the surrounding wood.

Pro tip: For deeper scratches or damaged areas, sanding and refinishing may be necessary. Use a medium-grit sandpaper to remove the damaged layer of wood, working in the direction of the grain. Gradually switch to finer-grit sandpaper until the surface is smooth. Be gentle and avoid sanding too much as this can affect the overall integrity of the dresser.

When refinishing the dresser, choose a stain or paint that complements the dresser’s original aesthetic and finish. Consider the type of wood used and the overall look you want to achieve. Apply the stain or paint evenly, following the recommended application techniques. Allow the dresser to dry completely before adding any additional layers or finishes.

Pro tip: If you’re unsure about the best stain or paint color to use, consider consulting a professional or conducting research to find examples of similar antique highboy dressers that have been successfully restored. This can provide inspiration and guidance for your own restoration project.

Finally, consider replacing any missing or broken hardware with period-appropriate pieces to complete the restoration. Look for hardware that matches the style and era of the dresser, ensuring that it enhances the overall vintage appeal. Replacing hardware can breathe new life into an antique highboy dresser and make it look and function as it did in its prime.

Restoring an antique highboy dresser can be a rewarding and fulfilling project. It allows you to bring out the dresser’s inherent beauty and showcase its vintage charm. By following these tips and taking the time to care for each detail, you can ensure that your restored antique highboy dresser becomes a cherished piece of furniture that will be enjoyed for years to come.

Buying Antique Highboy Dressers

When it comes to purchasing an antique highboy dresser, there are several important factors to consider. Ensuring that you make an informed decision will not only result in a valuable acquisition but also add a touch of history and elegance to your home. Here are some key points to keep in mind:

  1. Evaluate the Condition: Carefully examine the dresser’s condition, paying close attention to the wood quality, structural integrity, and any signs of damage or repairs. A well-preserved dresser will retain its charm and value over time.
  2. Authentic Features: Look for original features and hardware, as they add to the dresser’s authenticity and value. Antique highboy dressers with intact original components are highly sought after by collectors.
  3. Size and Proportions: Consider the dresser’s size and proportions in relation to the space where it will be placed. Ensure that it fits harmoniously within the room without overpowering the other furniture or leaving inadequate space.
  4. Research History and Provenance: If possible, delve into the dresser’s history and provenance. Understanding its origin and any previous owners can enhance its value and bring an interesting story to your home.
  5. Budget and Sources: Establish a budget for your antique highboy dresser purchase. Explore a variety of sources, such as reputable antique stores, online marketplaces, or auctions, to find the best selection and prices that align with your budget.

By taking these factors into consideration, you can make an informed decision when buying an antique highboy dresser that reflects your style, tastes, and appreciation for timeless craftsmanship.

Antique Highboy Dresser Buying Checklist:

Considerations Tips
Condition Inspect wood quality, structural integrity, and signs of damage or repairs
Authenticity Look for original features and hardware
Size Ensure it fits harmoniously within the space
History Research its origin and provenance, if available
Budget Establish a budget and explore different sources

Styling Antique Highboy Dressers in Vintage Home Decor

Antique highboy dressers can add a versatile touch to vintage home decor. In bedrooms, they not only serve as functional storage solutions but also bring an elegant and vintage charm. To enhance the dresser’s vintage appeal, consider styling it with antique accessories such as mirrors, lamps, or decorative items. In living rooms or entryways, antique highboy dressers can become statement pieces, showcasing collectibles, books, or family heirlooms.

When styling antique highboy dressers, it’s essential to create a cohesive vintage aesthetic by pairing them with other vintage-inspired furniture and decor items. This helps maintain a consistent and nostalgic ambiance throughout the space. Consider incorporating soft textiles like lace or silk and floral patterns to further enhance the vintage vibe.

“Antique highboy dressers can be focal points in vintage home decor, creating a sense of nostalgia and adding character to the space.”

To provide a visual representation of how antique highboy dressers can be styled in vintage home decor, here’s a curated table showcasing some key elements:

Bedroom Styling Living Room / Entryway Styling
  • Antique mirrors
  • Vintage lamps
  • Delicate lace doilies
  • Floral-patterned curtains
  • Antique jewelry boxes
  • Vintage-style display cabinets
  • Antique books
  • Framed vintage family photos
  • Decorative porcelain vases
  • Antique candleholders

By incorporating these elements, antique highboy dressers become focal points in vintage home decor, creating a sense of nostalgia and adding character to the space. Let your creativity shine as you embrace the beauty of antique highboy dressers and infuse vintage charm into your home.

Caring for Antique Highboy Dressers

Proper care and maintenance are essential for preserving the beauty and longevity of antique highboy dressers. Follow these tips to ensure your valuable piece of antique furniture remains in excellent condition:

  1. Avoid placing the dresser in direct sunlight or near sources of heat or moisture to prevent damage to the wood.
  2. Dust the dresser regularly with a soft cloth or feather duster to remove any debris or dirt.
  3. Use a mild wood cleaner or wax to clean and nourish the wood, following the manufacturer’s instructions.
  4. Be careful when moving or handling the dresser to avoid any accidents or damage.
  5. If necessary, consult a professional antique furniture restorer for more extensive repairs or restoration work.

By taking proper care of your antique highboy dresser, you can ensure that it remains a cherished piece of vintage furniture for years to come.

Caring for Antique Highboy Dressers

Care Tips for Antique Highboy Dressers: Benefits:
Place away from direct sunlight and moisture sources Prevents wood damage and discoloration
Dust regularly with a soft cloth or feather duster Removes debris and dirt
Clean with a mild wood cleaner or wax Nourishes and protects the wood
Handle with care when moving or handling Avoid accidents or damage
Consult a professional for extensive repairs or restoration Preserves the dresser’s authenticity and value

The Timelessness of Vintage Highboy Dressers

Vintage highboy dressers possess a timeless quality that defies the constraints of passing trends and changing styles. Their classic design and impeccable craftsmanship establish them as enduring pieces of vintage furniture, capable of being admired and cherished in any era. With their tall and slender structure, vintage highboy dressers exemplify both practicality and grace, making them versatile additions to any vintage home decor.

The allure of vintage highboy dressers lies in their remarkable history and exceptional craftsmanship. Each piece carries with it a unique character and charm, reflecting the expert hands that brought it to life. Whether displayed as the focal point in a bedroom or utilized as storage in a living space, vintage highboy dressers bestow upon any room a touch of vintage sophistication that is unmatched.

“Vintage highboy dressers possess a timeless quality that defies the constraints of passing trends and changing styles.”

By incorporating a vintage highboy dresser into your home decor, you invite a tangible connection to the past – a piece of furniture that has stood the test of time and witnessed generations come and go. Its presence illuminates the room with a sense of nostalgia, sparking conversation and providing a glimpse into the elegance of days gone by.

Whether you choose to display prized possessions atop its carefully crafted surface or utilize its capacious drawers for storage, a vintage highboy dresser adds an unmistakable touch of vintage sophistication to your living space. Its delicate silhouette and exceptional craftsmanship exemplify the grace and beauty of an era long past, reminding us that true style and elegance are, indeed, timeless.

Adding Vintage Charm with Antique Chests of Drawers

Antique chests of drawers are more than just functional storage pieces; they are timeless treasures that add a touch of vintage charm to any home decor. These compact and versatile furniture pieces are ideal for organizing personal belongings and adding storage to any room. Crafted with meticulous attention to detail, antique chests of drawers often feature intricate woodwork, delicate carvings, and decorative handles, showcasing the craftsmanship of the era they were created in.

Whether placed in bedrooms, living rooms, or even entryways, antique chests of drawers bring an elegant and nostalgic element to the overall aesthetic. By pairing them with other vintage furniture and accessories, you can create a cohesive and inviting ambiance that exudes vintage style. Embrace the beauty of antique chests of drawers and let them elevate your vintage home decor.

Unleashing Vintage Style

The beauty of antique chests of drawers lies in their ability to enhance the vintage charm of any space. Their timeless appeal and unique design make them versatile pieces that can be incorporated into various rooms.

“Antique chests of drawers are like hidden gems, waiting to add a touch of elegance to your home decor.” – Interior Design Magazine

In bedrooms, antique chests of drawers serve as functional storage solutions for clothing, accessories, and personal items. Their compact size is particularly beneficial for smaller rooms or those with limited floor space. Pair an antique chest of drawers with vintage-inspired decor, such as lace curtains, floral bedding, or an ornate mirror, to create a charming vintage bedroom retreat.

In living rooms, antique chests of drawers can be used as statement pieces or focal points. Display family heirlooms, collectibles, or your favorite books on top of the chest to create an eye-catching arrangement. The drawers can also be utilized to store blankets, board games, or remote controls, ensuring both style and practicality in your living space.

Caring for Antique Chests of Drawers

To preserve the beauty and integrity of your antique chest of drawers, it’s important to provide proper care and maintenance.

  1. Dust the surface regularly using a soft cloth or feather duster to remove any accumulated dirt or debris.
  2. Avoid placing the chest in direct sunlight or near sources of heat or moisture, as these can cause damage to the wood.
  3. Use a mild wood cleaner or wax specifically designed for antique furniture to clean and nourish the wood. Follow the manufacturer’s instructions for best results.
  4. Handle the chest with care to prevent accidental damage or scratches. When moving it, enlist the help of others or use furniture sliders to avoid strain or accidents.

By following these care tips, you can ensure that your antique chest of drawers remains a cherished piece of vintage furniture for years to come.

antique chest of drawers

Antique Highboy Dressers: A Blend of Beauty and Functionality

Antique highboy dressers are not just beautiful pieces of furniture, but also practical storage solutions. Their tall and slender design maximizes vertical space, making them ideal for small bedrooms or rooms with limited floor space. The multiple drawers provide ample storage for clothes, linens, and personal belongings, helping to keep the room organized and clutter-free.

These antique highboy dressers add a touch of elegance and vintage charm to any bedroom, serving as statement pieces while also fulfilling their functional purpose. Whether you’re looking to add character to a vintage-inspired bedroom or enhance the charm of a contemporary space, antique highboy dressers offer a blend of beauty and functionality that can elevate any room.

The Versatility of Antique Highboy Dressers

Antique highboy dressers are highly versatile pieces of furniture that can enhance any home decor style. Their timeless design and craftsmanship make them perfect additions to both traditional and modern interiors.

  1. Vintage-inspired bedrooms: Antique highboy dressers can be the focal point of a vintage-inspired bedroom. Pair them with lace curtains, vintage floral bedding, and antique accessories to create a romantic and nostalgic ambiance.
  2. Modern interiors: Contrasting antique highboy dressers with sleek and minimalist decor can create a captivating juxtaposition. The blend of old and new adds an element of intrigue and personality to the space.
  3. Entryways or living rooms: Antique highboy dressers can also be used in entryways or living rooms as statement pieces. Display vintage collectibles, family heirlooms, or decorative items on top of the dresser to showcase your unique style.

No matter where you place them, antique highboy dressers bring a sense of sophistication and history to any room.

Pros Cons
  • Adds elegance and vintage charm
  • Provides ample storage space
  • Maximizes vertical space
  • Makes a statement in any room
  • May be expensive compared to modern alternatives
  • Requires careful maintenance and care
  • May have limited availability in certain styles or designs

Antique highboy dressers offer a blend of beauty and functionality, making them a worthwhile investment for anyone seeking to enhance their interior space with a touch of vintage elegance.

By incorporating an antique highboy dresser into your home, you not only gain a practical storage solution but also a stunning piece of history that will undoubtedly become a cherished heirloom for years to come.

Conclusion

Antique highboy dressers are cherished pieces of antique furniture that effortlessly bring vintage elegance and sophistication to any home decor. With their tall and slender design, intricate details, and durable craftsmanship, these timeless pieces serve both functional and aesthetic purposes. They provide ample storage space while making a striking statement in any room.

Restoring antique highboy dressers not only revitalizes their inherent beauty and charm but also adds value to these treasured heirlooms. Every scratch or imperfection tells a story of their rich history and legacy. Investing in an antique highboy dresser is not just an acquisition of furniture; it is preserving history and adding character to your space.

Whether used in bedrooms, living rooms, or entryways, antique highboy dressers exude vintage sophistication. They seamlessly blend with various decor styles, from traditional to eclectic, and elevate the overall ambiance. By caring for these antique treasures and incorporating them into your vintage home decor, you create a space that exudes elegance, nostalgia, and timeless style.

Embrace the allure of Antique Highboy Dressers and let their vintage charm take center stage in your home. They are not just pieces of furniture; they are beautiful relics symbolizing craftsmanship, history, and the art of living.

FAQ

What is an antique highboy dresser?

An antique highboy dresser is a tall and slender piece of vintage furniture that provides ample storage space through multiple drawers. It exudes elegance and charm, making it a perfect addition to any vintage home decor.

What materials are antique highboy dressers made from?

Antique highboy dressers are often crafted from high-quality wood such as oak or mahogany, ensuring their durability and long-lasting beauty.

Why are antique highboy dressers desirable?

Antique highboy dressers are sought after by collectors and enthusiasts for their classic and timeless beauty, intricate details, and vintage charm. They serve as statement pieces in any room, adding sophistication and character to the space.

What is the history of antique highboy dressers?

Antique highboy dressers have a rich history dating back to the 18th century. They gained popularity during the Baroque and Rococo periods and were often used in bedrooms for their storage capabilities and beautiful craftsmanship.

How can I restore an antique highboy dresser?

Restoring antique highboy dressers requires attention to detail and care. Start by assessing the dresser’s condition, cleaning the surface, repairing any scratches or dents, refinishing the wood, and replacing any missing or broken hardware to enhance its vintage appeal.

What should I consider when buying an antique highboy dresser?

When buying an antique highboy dresser, consider factors such as its condition, wood quality, original features, size, history, and budget. Research different sources, such as antique stores or online marketplaces, to find the best selection and prices.

How can I style an antique highboy dresser in vintage home decor?

In vintage home decor, antique highboy dressers can be used as functional storage solutions and statement pieces. Style them with vintage accessories, incorporate soft textiles and floral patterns, and pair them with other vintage-inspired furniture for a cohesive and nostalgic ambiance.

How do I care for an antique highboy dresser?

To preserve the beauty of an antique highboy dresser, avoid direct sunlight or exposure to heat or moisture. Dust it regularly, use a mild wood cleaner or wax, and handle it with care. Consult a professional restorer for extensive repairs or restoration work, if needed.

What is a vintage highboy dresser?

A vintage highboy dresser is a tall and slender piece of vintage furniture that adds a timeless quality to any home decor. Its classic design and craftsmanship make it an enduring piece of vintage furniture that can be appreciated in any era.

What is an antique chest of drawers?

An antique chest of drawers is a timeless piece of furniture that can add vintage charm to any home decor. It offers compact size and functionality, making it ideal for organizing personal belongings and adding storage to a room.

Why are antique highboy dressers a blend of beauty and functionality?

Antique highboy dressers not only provide functional storage space but also serve as elegant statement pieces in any room. Their timeless beauty and durable craftsmanship make them versatile additions to vintage home decor, showcasing both style and practicality.