Dining Chair Covers
There are lots of reasons you may want to make dining chair covers. For one, you may NOT wish to fully reupholster your chairs. While fairly simple to do, reupholstering drop-in seats permanently changes the look of your chairs.
On the other hand, making removable dining room slipcovers allows you to have a washable alternative. Additionally, it means you could change the look of the chairs for the season or for a period if you intend to change your decor down the road.
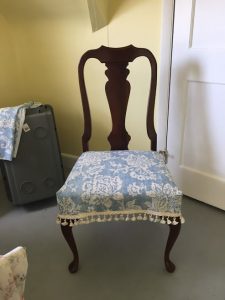
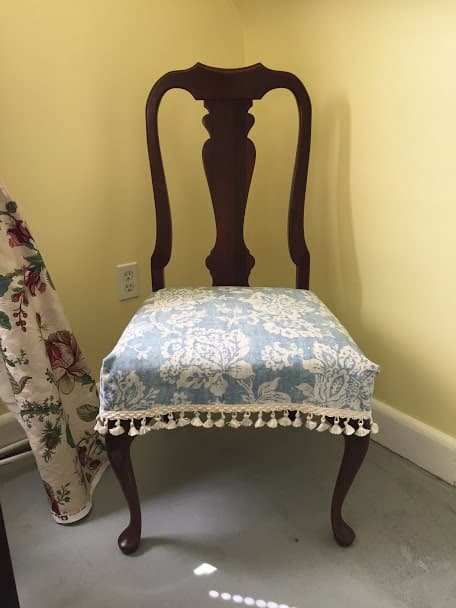
Finally, Dining Chair Covers allow you to add extra touches like special trims, or piping. You could add a nice patterned ribbon trim for a chic and tailored look. Or, add a feminine touch with tassel trim! These special trims can add so much personality to your room. (I chose tassel trim for this case since it is a Victorian Dining Room and can handle lots of frills.)
In my case, I decided to make removable chair covers for my mom’s dining room for another very specific practical reason:

Yes, pets, and especially cats, tend to cause problems for soft furnishings. In this case, shedding and the occasional accidents means all of the upholstery in my mom’s home needs to be removable and washable.
Queen Anne Dining Chairs
Queen Anne Dining Chairs are a classic, elegant and traditional style. However, they do require a little bit more careful cutting and pattern making because of the center back-splat.
This Tutorial will work for any chair with a back-splat, including Queen Anne Chairs and Chippendale Chairs. It involves making a two piece slip covers that attach with the back with Velcro. There are no ties, snaps or buttons.
Dining Room Chair Cover Tutorial
This Dining Room Chair Cover Tutorial took some Trial and Error. I am by no means an expert seamstress. In fact, my sewing skills are very basic. Here’s my step-by-step tutorial on how to make dining room chair covers for Queen Anne style Chairs!
With a little time and patience, you can make beautiful removable dining room chair covers, too!
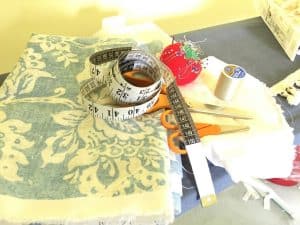
Materials You Will Need (Six Dining Chairs):
- 6-8 yards 54” Wide Home Decorators Fabric (Durable Cotton Duck, Twill, Upholstery Grade Fabrics all work great. Stay away from stretch fabrics or very lightweight fabrics). If your fabric is not 54” wide you may need a few more yards.
- 6-8 yards of Muslin Lining in Coordinating color (usually white or beige)
- 4-6 yards of ⅝” Sew-in Velcro
- All-Purpose or Heavy Duty Thread
- Sewing Machine
- Iron, Sharp Fabric Scissors, Pins etc
- 13-15 Yards of Tassel Trim or Ribbon Trim(Optional)
- Paper and Pen to Make Notes of all your Measurements!
Planning and Measuring
Step 1: Measure your chair seats on the very top of the chair at the widest points, width and depth. Add 10.5 inches to each measurement.
Step 2: Cut the main panel using the two measurements (width + 10.5” by depth + 10.5”) of both the fabric and lining. Pin and iron with “Right Sides” together.
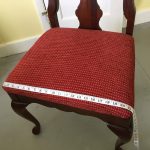
Step 3: In the front two corners of the fabric and lining of the larger square, cut a 5” by 5” square. These will form the front corners of the chair cover.
Step 4: Lay the piece of fabric on the chair so that the corners fall down over the seat and check the fit. Remember, a ¼” seam allowance will make the fit a bit tighter than it appears.
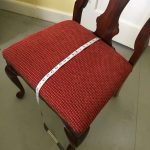
Step 5: Fold back the back flap of the fabric 5 inches on the back side of the chair.
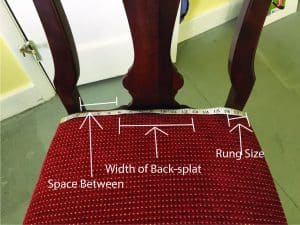
Back-splat Measuring
Step 6: Measure the width of the back splat in about the area where the seat meets the back. Write down this measurement.
Step 7: Measure the width of the two vertical wooden pieces that make up the sides of the chairs and write down this measurement.
Step 8: Measure the distance between the back-splat and the vertical rungs and write down this measurement.
Photo:
Cutting out For the Back-splat and Vertical Rungs
Using your measurements, you will need to cut out rectangles to allow for the back-splat and vertical rungs.
Step 9: Remove the fabric from the chair and fold in half vertically so you can mark the central point along the five inch back-flap.
Step 10: Using your central point, Mark and Cut a Rectangle that is the width of your back-splat by 5 inches from edge.
Step 11: Measure the distance from the edge of this rectangle on either side to cut out strips for the rungs, using the width and 5” in length.
Step 12: Lay the fabric back on the chair and check for fit.
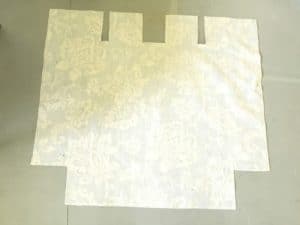
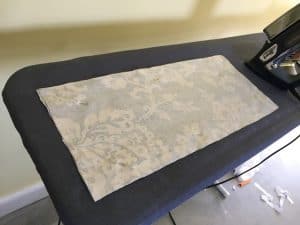
Your panel should look something like this:
Sewing Time
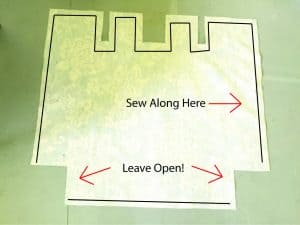
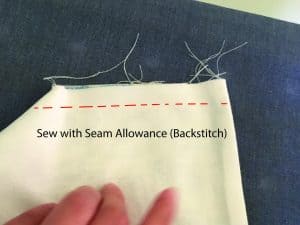
Step 13: Now it is time to sew the lining and chair fabric together using a ¼” seam allowance. Of course, you will simply use a straight stitch and sew all the way around, pivoting around the rectangle slits you cut out.
However, do not sew the two front corners where you cut the corner squares for turning. Make sure you back-stitch at the beginning and end! SEE BELOW
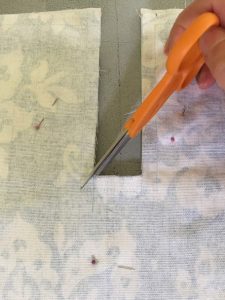
Step 14: Next, carefully cut small slits into the inner-corners (taking precautions not to cut your stitching). Carefully cut off triangles near the outer-corners. Press and Turn. You may need a chopstick to push out the edges. Press well.
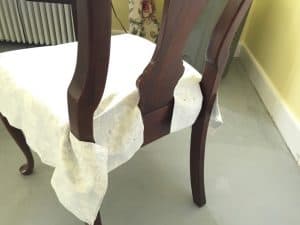
Step 15: Check for fit by laying on the chair.
Step 16: Place the two Front Corners together (right sides together) and sew to make the front edges. Press and Turn.
Step 17: Now to make the back Panel. Cut a rectangle of the main fabric and lining that is the width of the chair + 1 inch and the length you would like it to be + 1 inch (mine was 9 x 18 inches). Sew together with right sides together, leaving room for turning. Press and turn. You can choose to top stitch your open area now or do this later if you intend to add tassel trim.
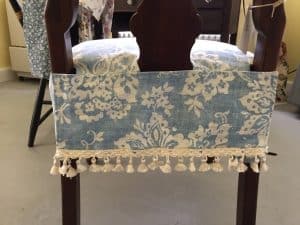
Attaching the Velcro
Step 18: Add the Velcro to the back panel and main panel. I used long strips (about 5 inches) of Velcro on either side of the panel that wraps around the back leg and two strips on the small areas on either side of the back-splat for a nice even and secure fit. Pin and check for fit.
*** This is a little tricky to do since your Velcro will stick to itself as you try to check for fit. I recommend using two pins for each strip of Velcro and taking your time. Since the back panel will be seen the most as you enter the room, you want it to lay nice and flat on the chair and look professional.
Step 18: Sew the Velcro on by sewing around the edge of each piece on the back panel and main panel. (I moved my needle position over to the right and used the sewing foot as my guide for a nice stitch along the edge.)
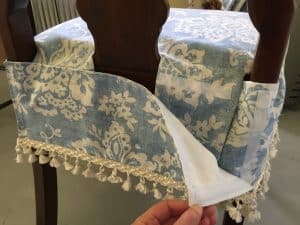
Step 19: Finally, top Stitch along the finished bottom edge of the slip cover, OR pin and sew your tassel trim, tucking the ends behind for a nice finish.
Step 20: Final Pressing.

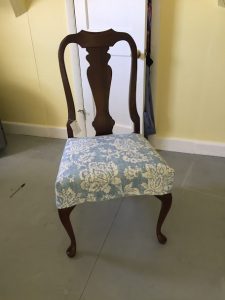
Enjoy Your Chair Covers!